

Introduction
In our previous blogs, we showed you how to perform load tests using the Ddosify Engine. Now, we are presenting an interesting version of it - the Ddosify Cloud. You can implement your tests easily using our intuitive user interface. Today, we will show how to simulate user authentication flow at a given concurrency level. By generating accounts, and making those accounts login, we will finally use their tokens to get personal information. We can also easily scale the account count. As a result, you will learn how to identify the upper limit of your backend API.
Test Scenario
The user scenario consists of 3 sequential actions
- The user registers with the system using their email
- The user logs into the system with their username
- The user sends a GET request to fetch its private account information
The first two actions are a common flow for all apps in the world. We added the third action to demonstrate authenticated user behavior. In our use case, the user fetches their account information once they've logged in.
The Environment
We will use the Ddosify test API as a backend service. It has all the endpoints that we need.
POST https://testserverk8s.ddosify.com/account/register/endpoint waits for email, username, and password before it returns HTTP 201 Created.POST https://testserverk8s.ddosify.com/account/login/endpoint accepts username and password. It checks if a user with these credentials exists, then sends HTTP 200 OK along with a JWT.GET https://testserverk8s.ddosify.com/account/user/endpoint anticipates an Authorization header key in bearer type with a valid access token value to respond with the private account information of the user.
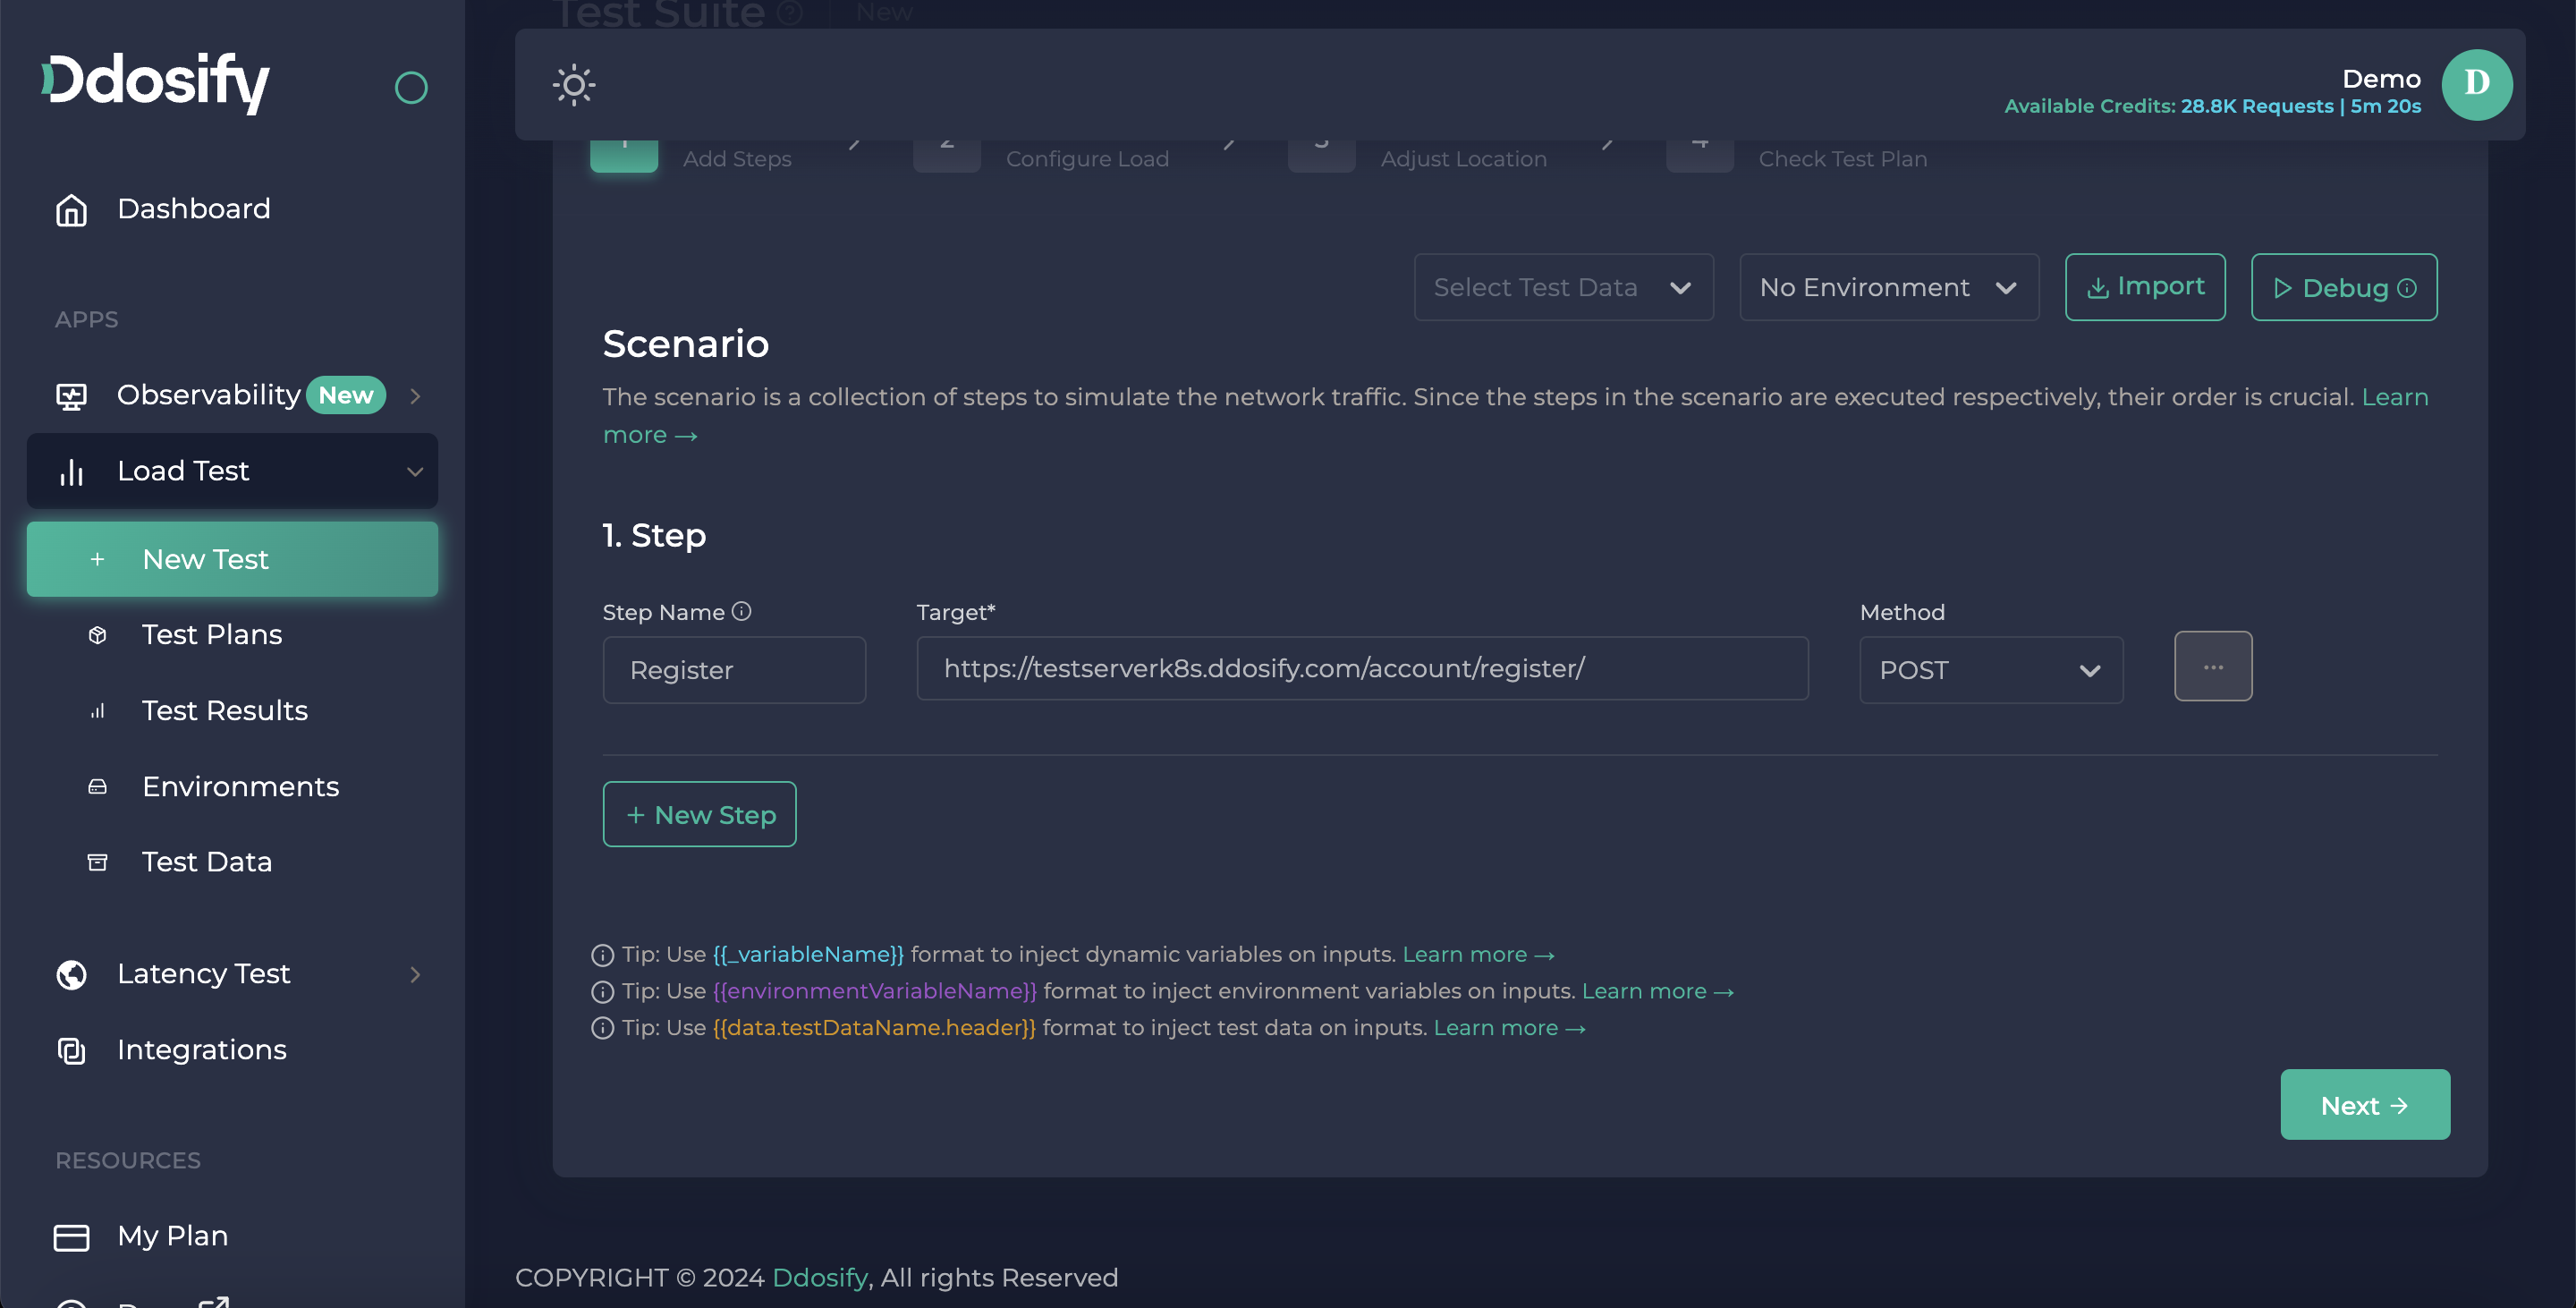
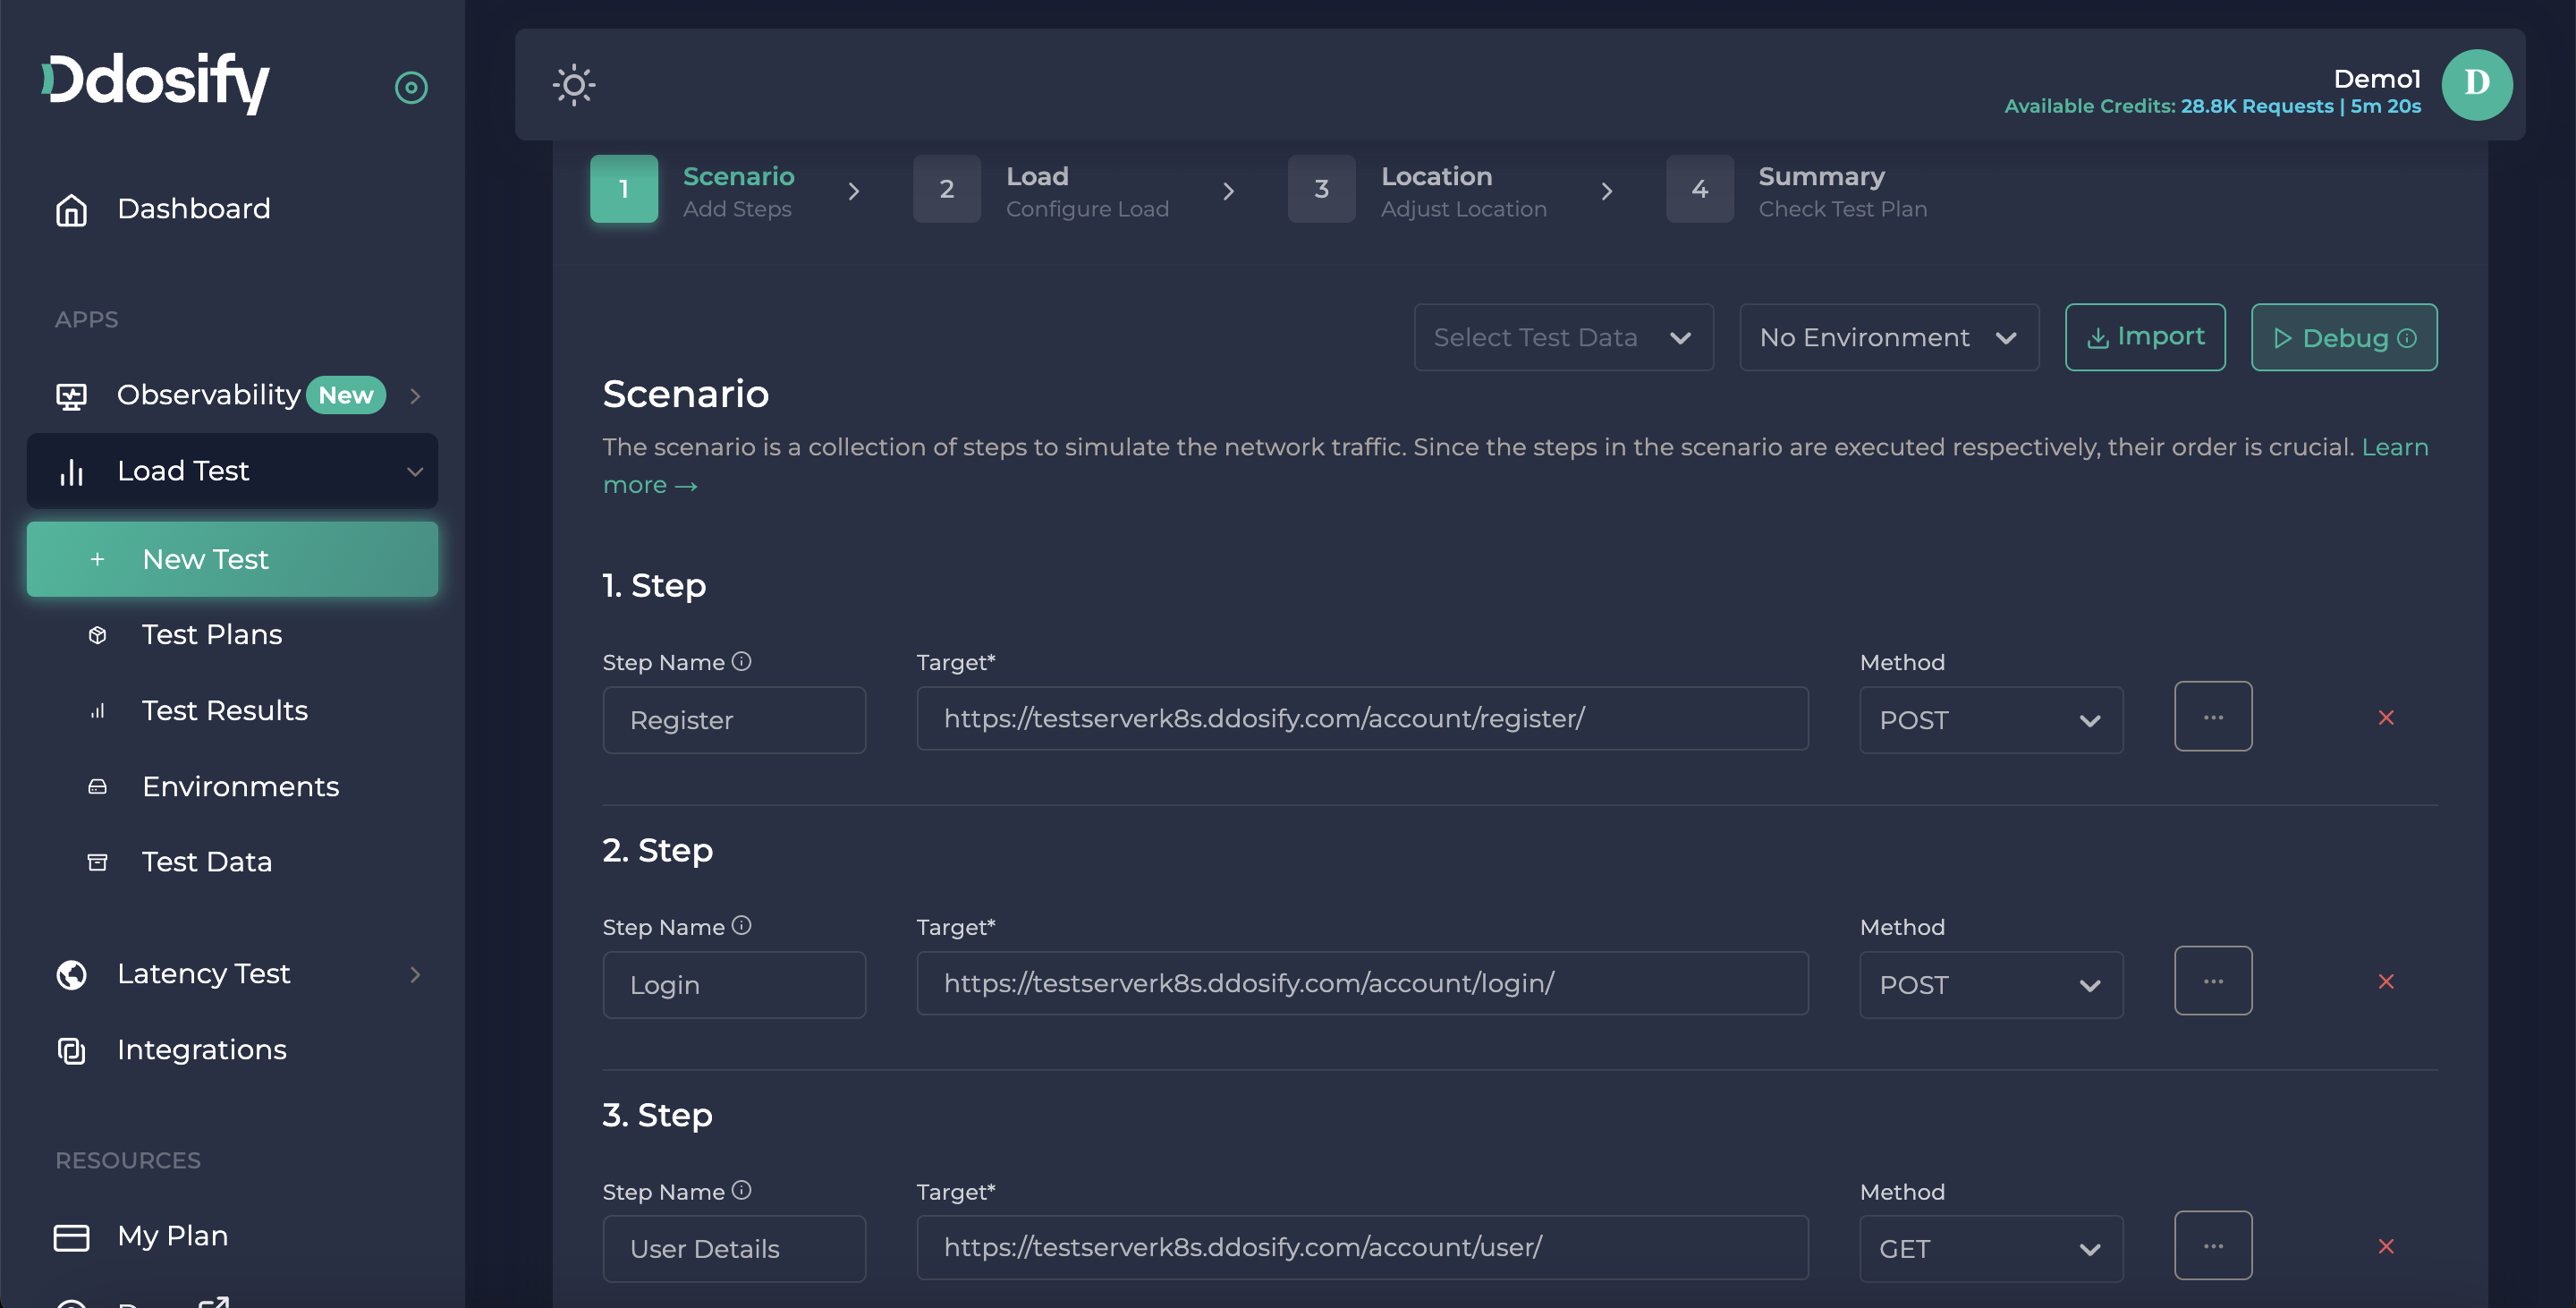
We will use Ddosify Cloud to create and run this test scenario at high IPS (Iteration Per Second). To do that we need to create an account, after registration Ddosify Cloud gives you 10.000 free requests. After signing in you can see the "+ New Test" button under the "Load Test" tab on the left menu.
Implementing Register Endpoint
First of all, we need to write our register URL and choose the request method which is POST.
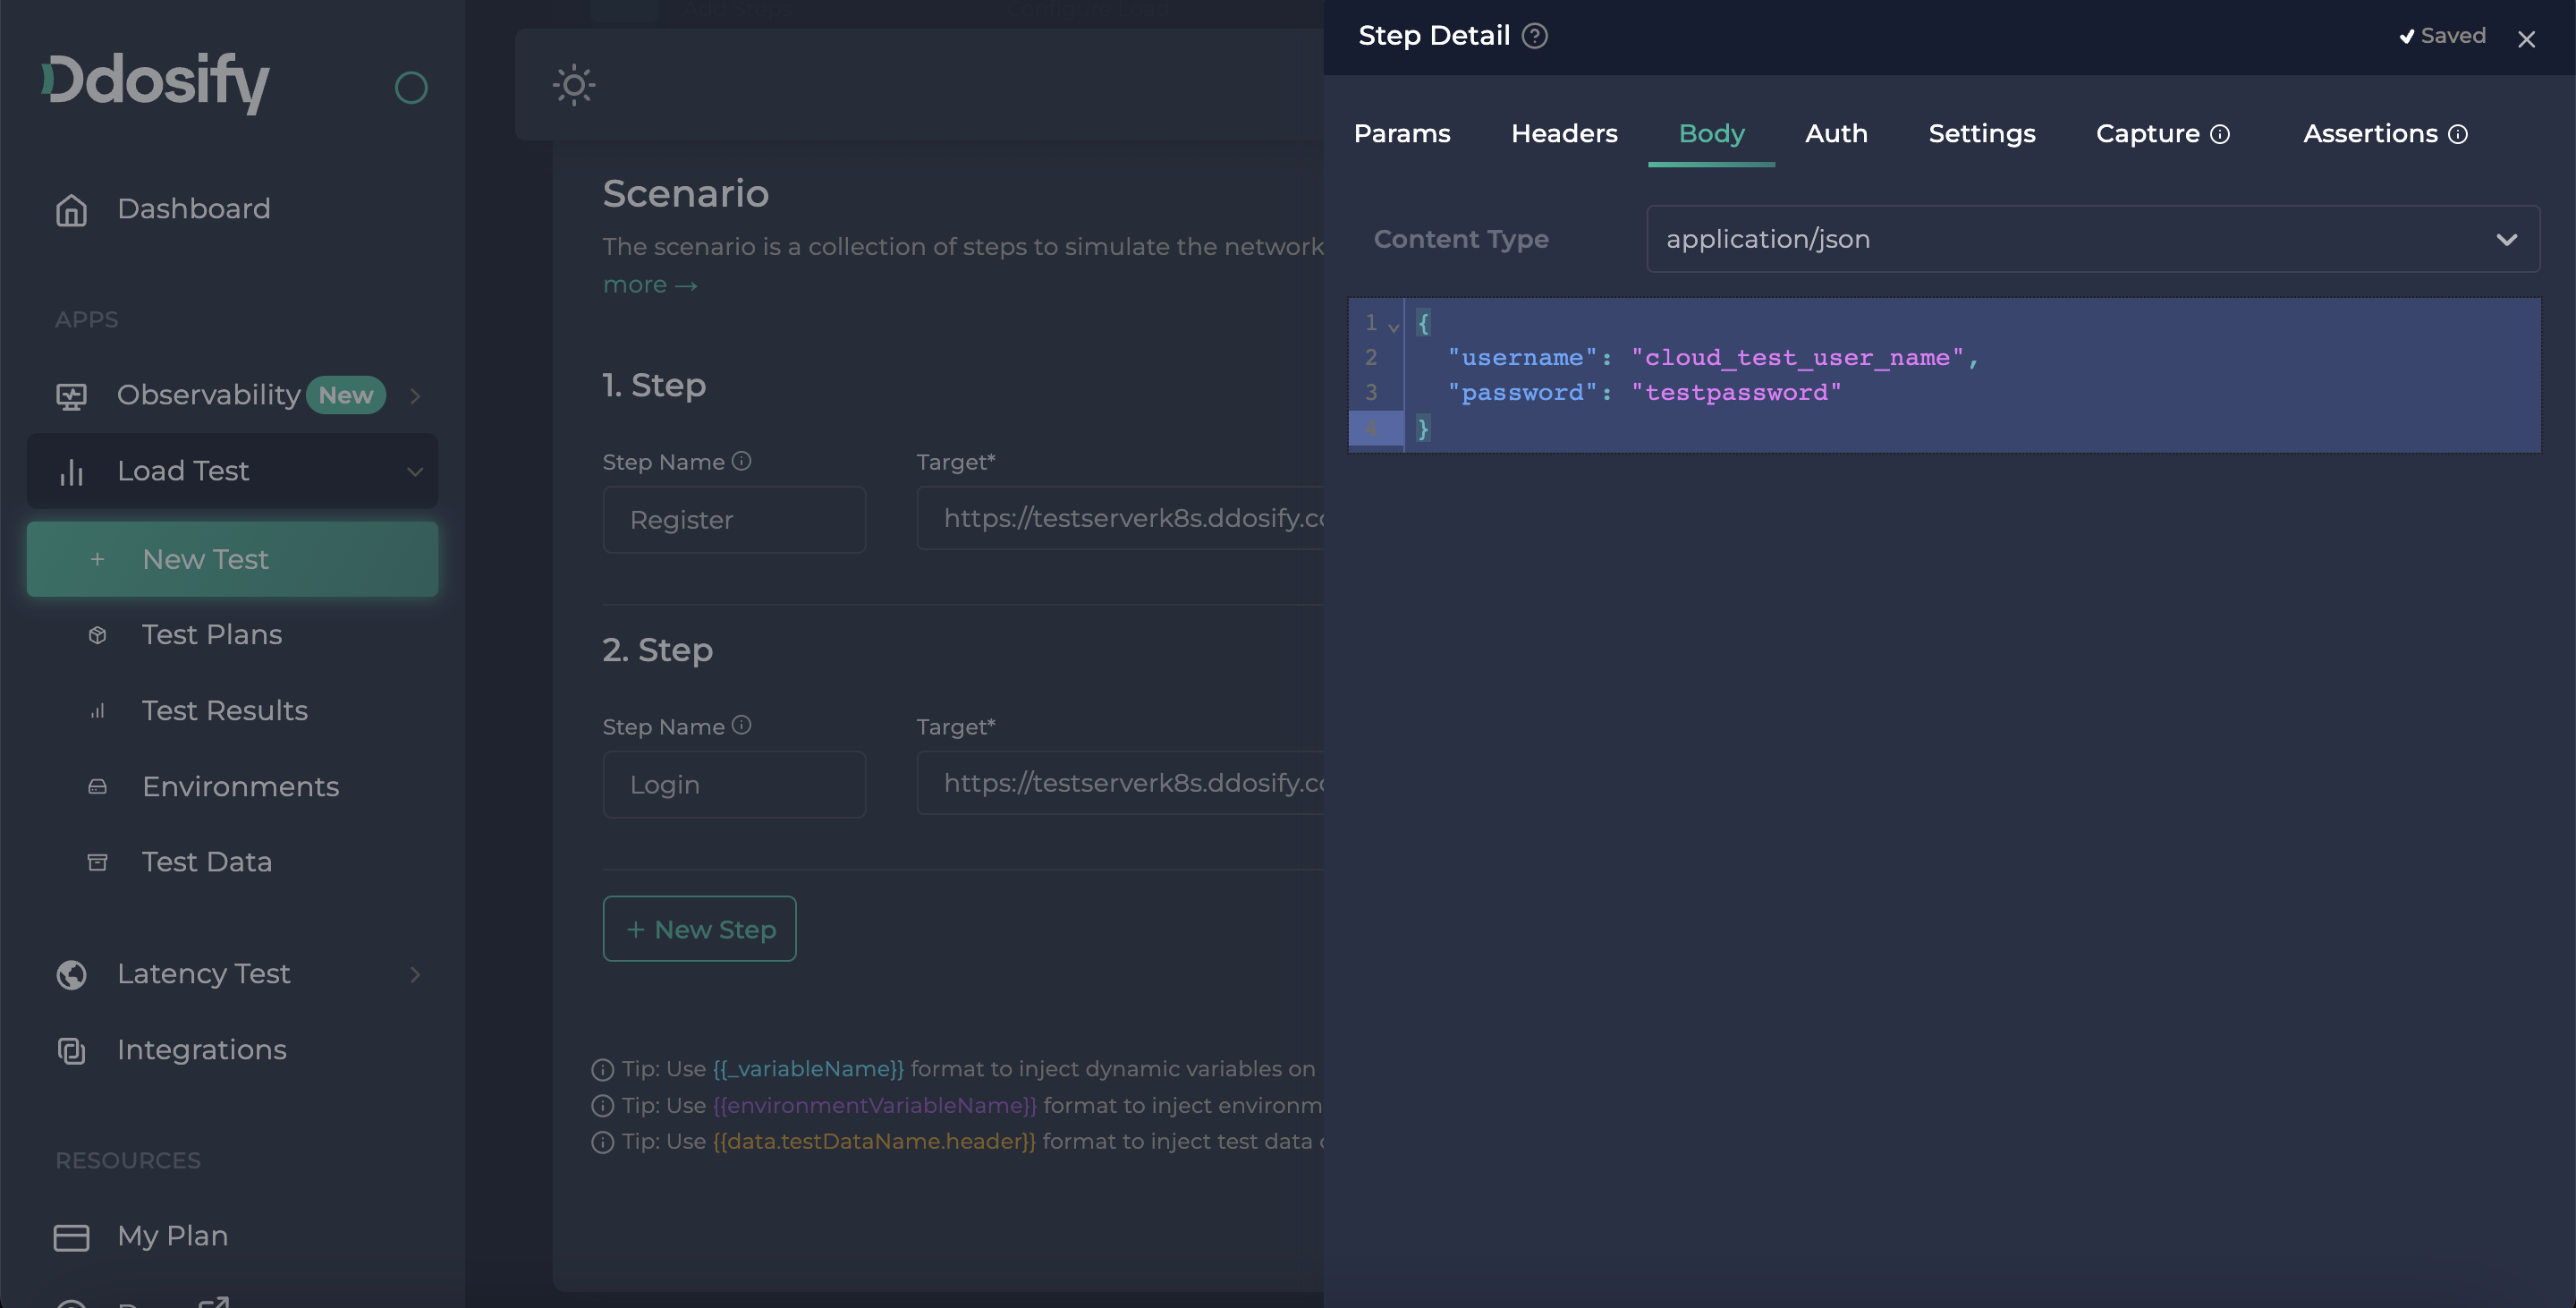
 After that we need to add a body for sending our new account details. To add a body, we click the ... (three dots) button which is positioned next to methods.
Then, click the body part because we need to send it in the body. You can see different body shapes, for this example, our endpoint expects application/json type. Finally, we can write our body. For now, we will write that constant body, later I will show you how you can generate a random dynamic body for this operation.
After that we need to add a body for sending our new account details. To add a body, we click the ... (three dots) button which is positioned next to methods.
Then, click the body part because we need to send it in the body. You can see different body shapes, for this example, our endpoint expects application/json type. Finally, we can write our body. For now, we will write that constant body, later I will show you how you can generate a random dynamic body for this operation.

{
  "username": "cloud_test_user_name",
  "email": "[email protected]",
  "password": "testpassword"
}
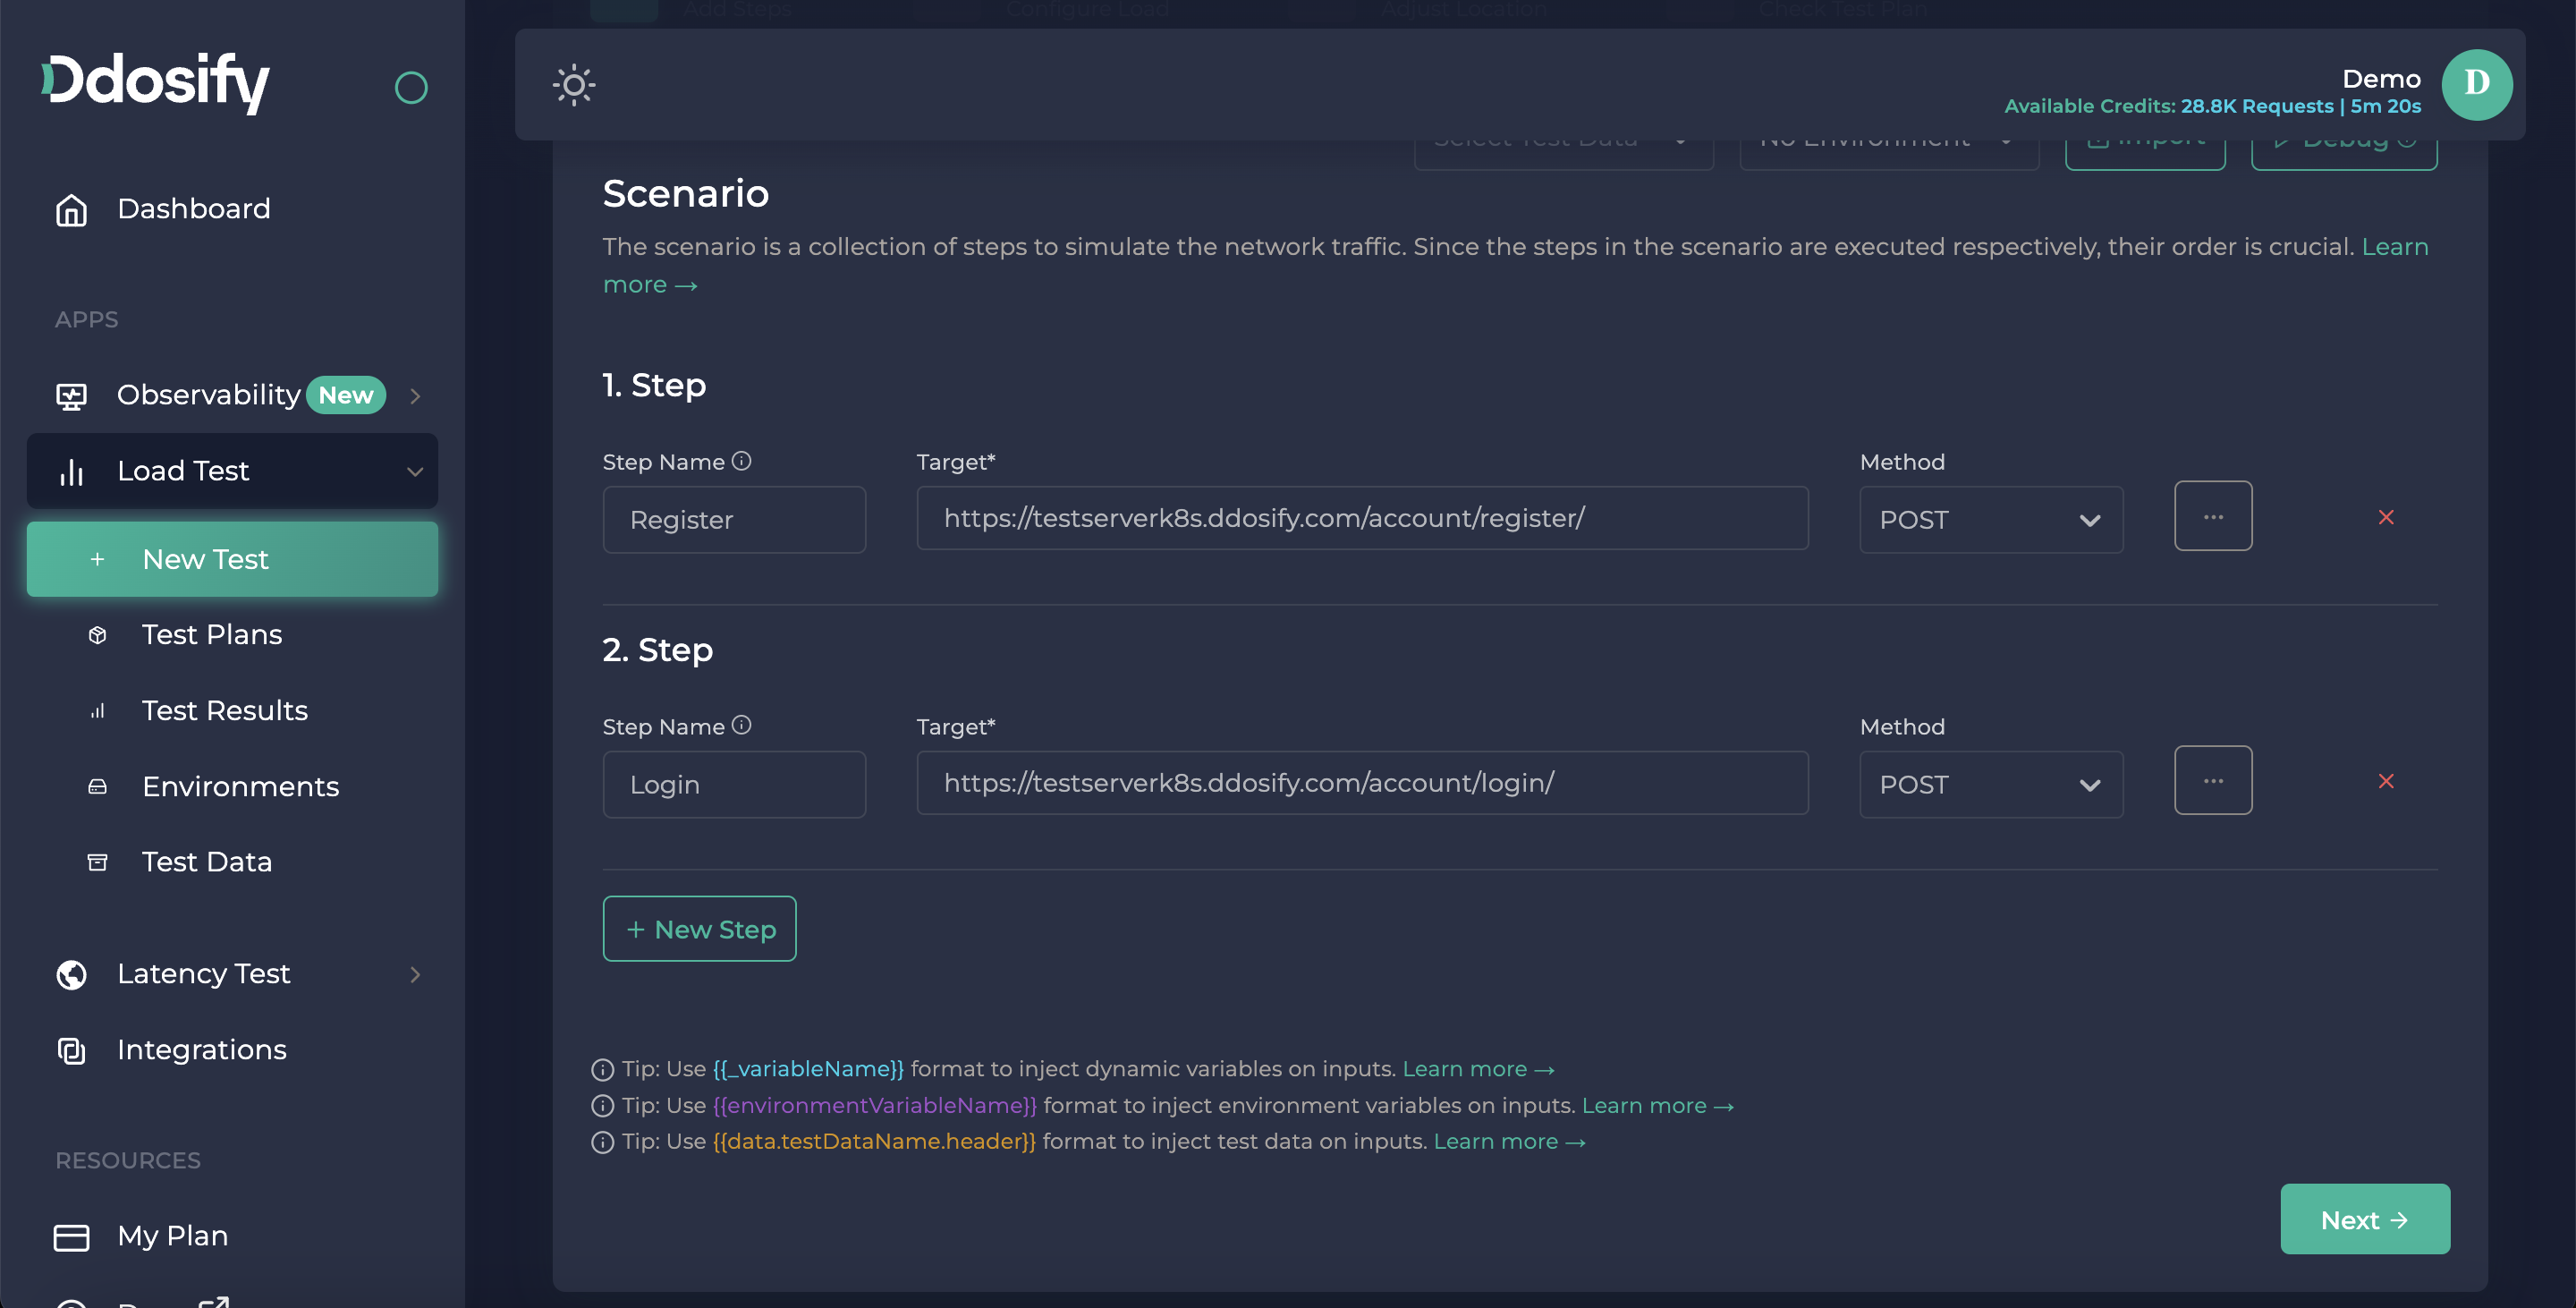
Implementing Login Endpoint
Again, we need to write our login URL and choose the request method which is POST. This endpoint will get our access and refresh tokens.
Then we will add our login credentials to the body by pressing the dots button on the right side of step 2. Under body part, we can add our body, in application/json format.
{
  "username": "cloud_test_user_name",
  "password": "testpassword"
}
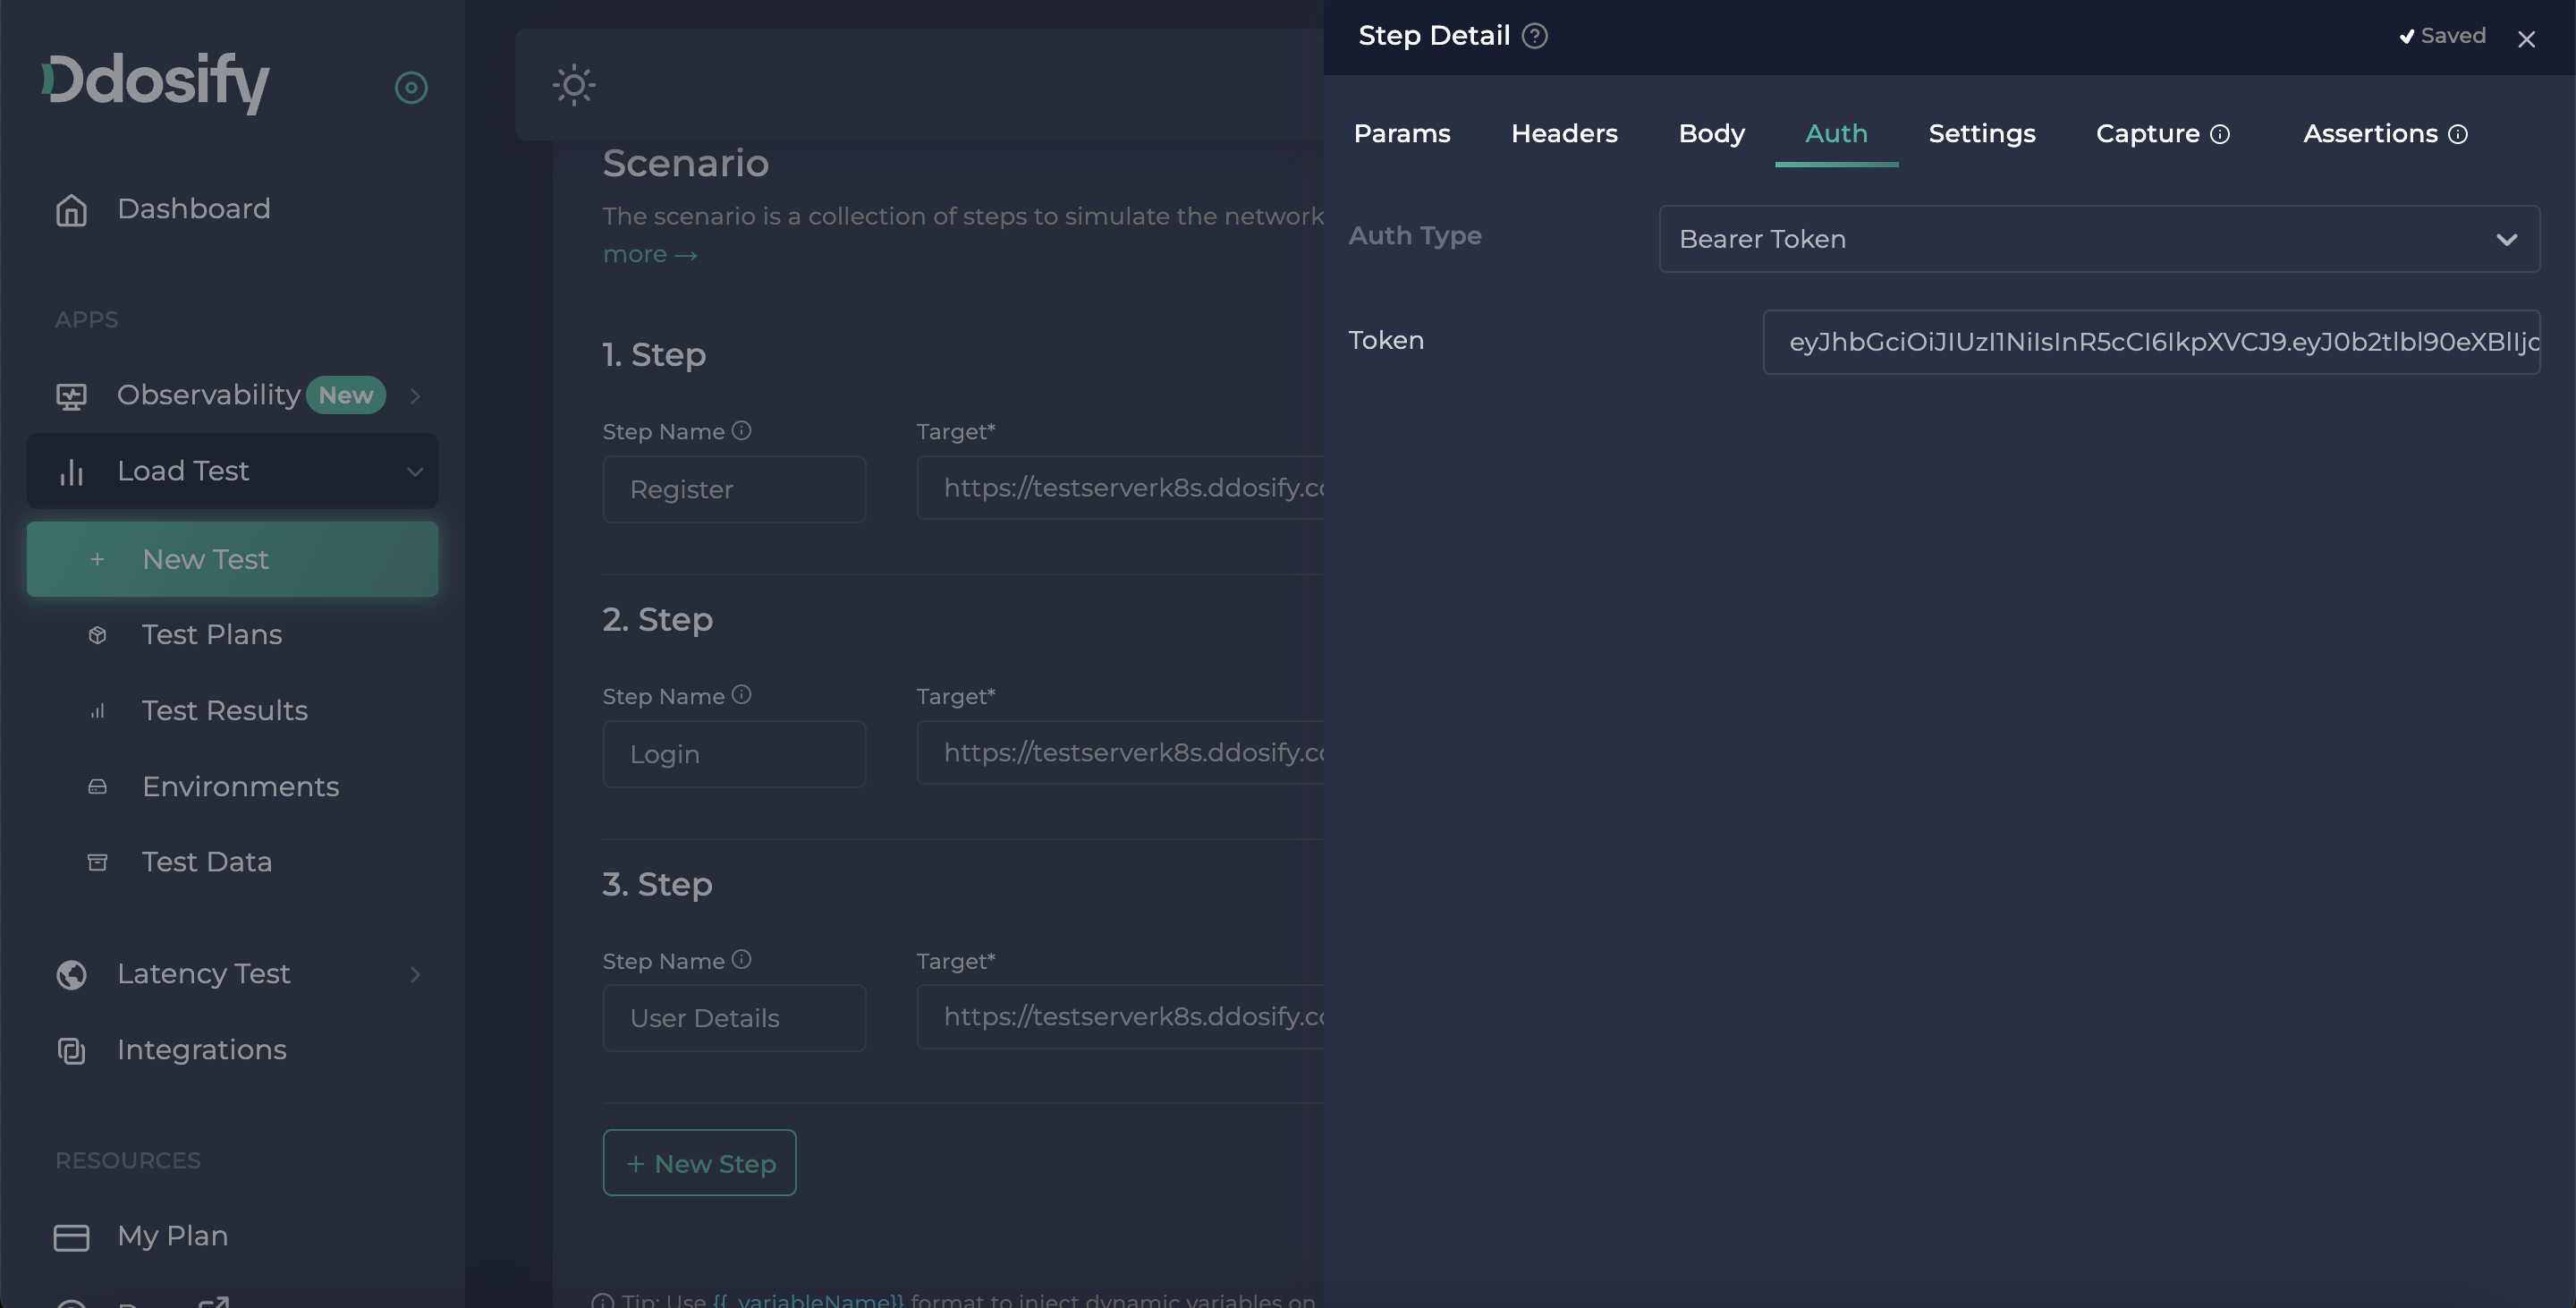
Implementing User Detail Endpoint
For this endpoint, again we need to write our URL and choose the request method which is GET. This will return us the user details, we created. User Url

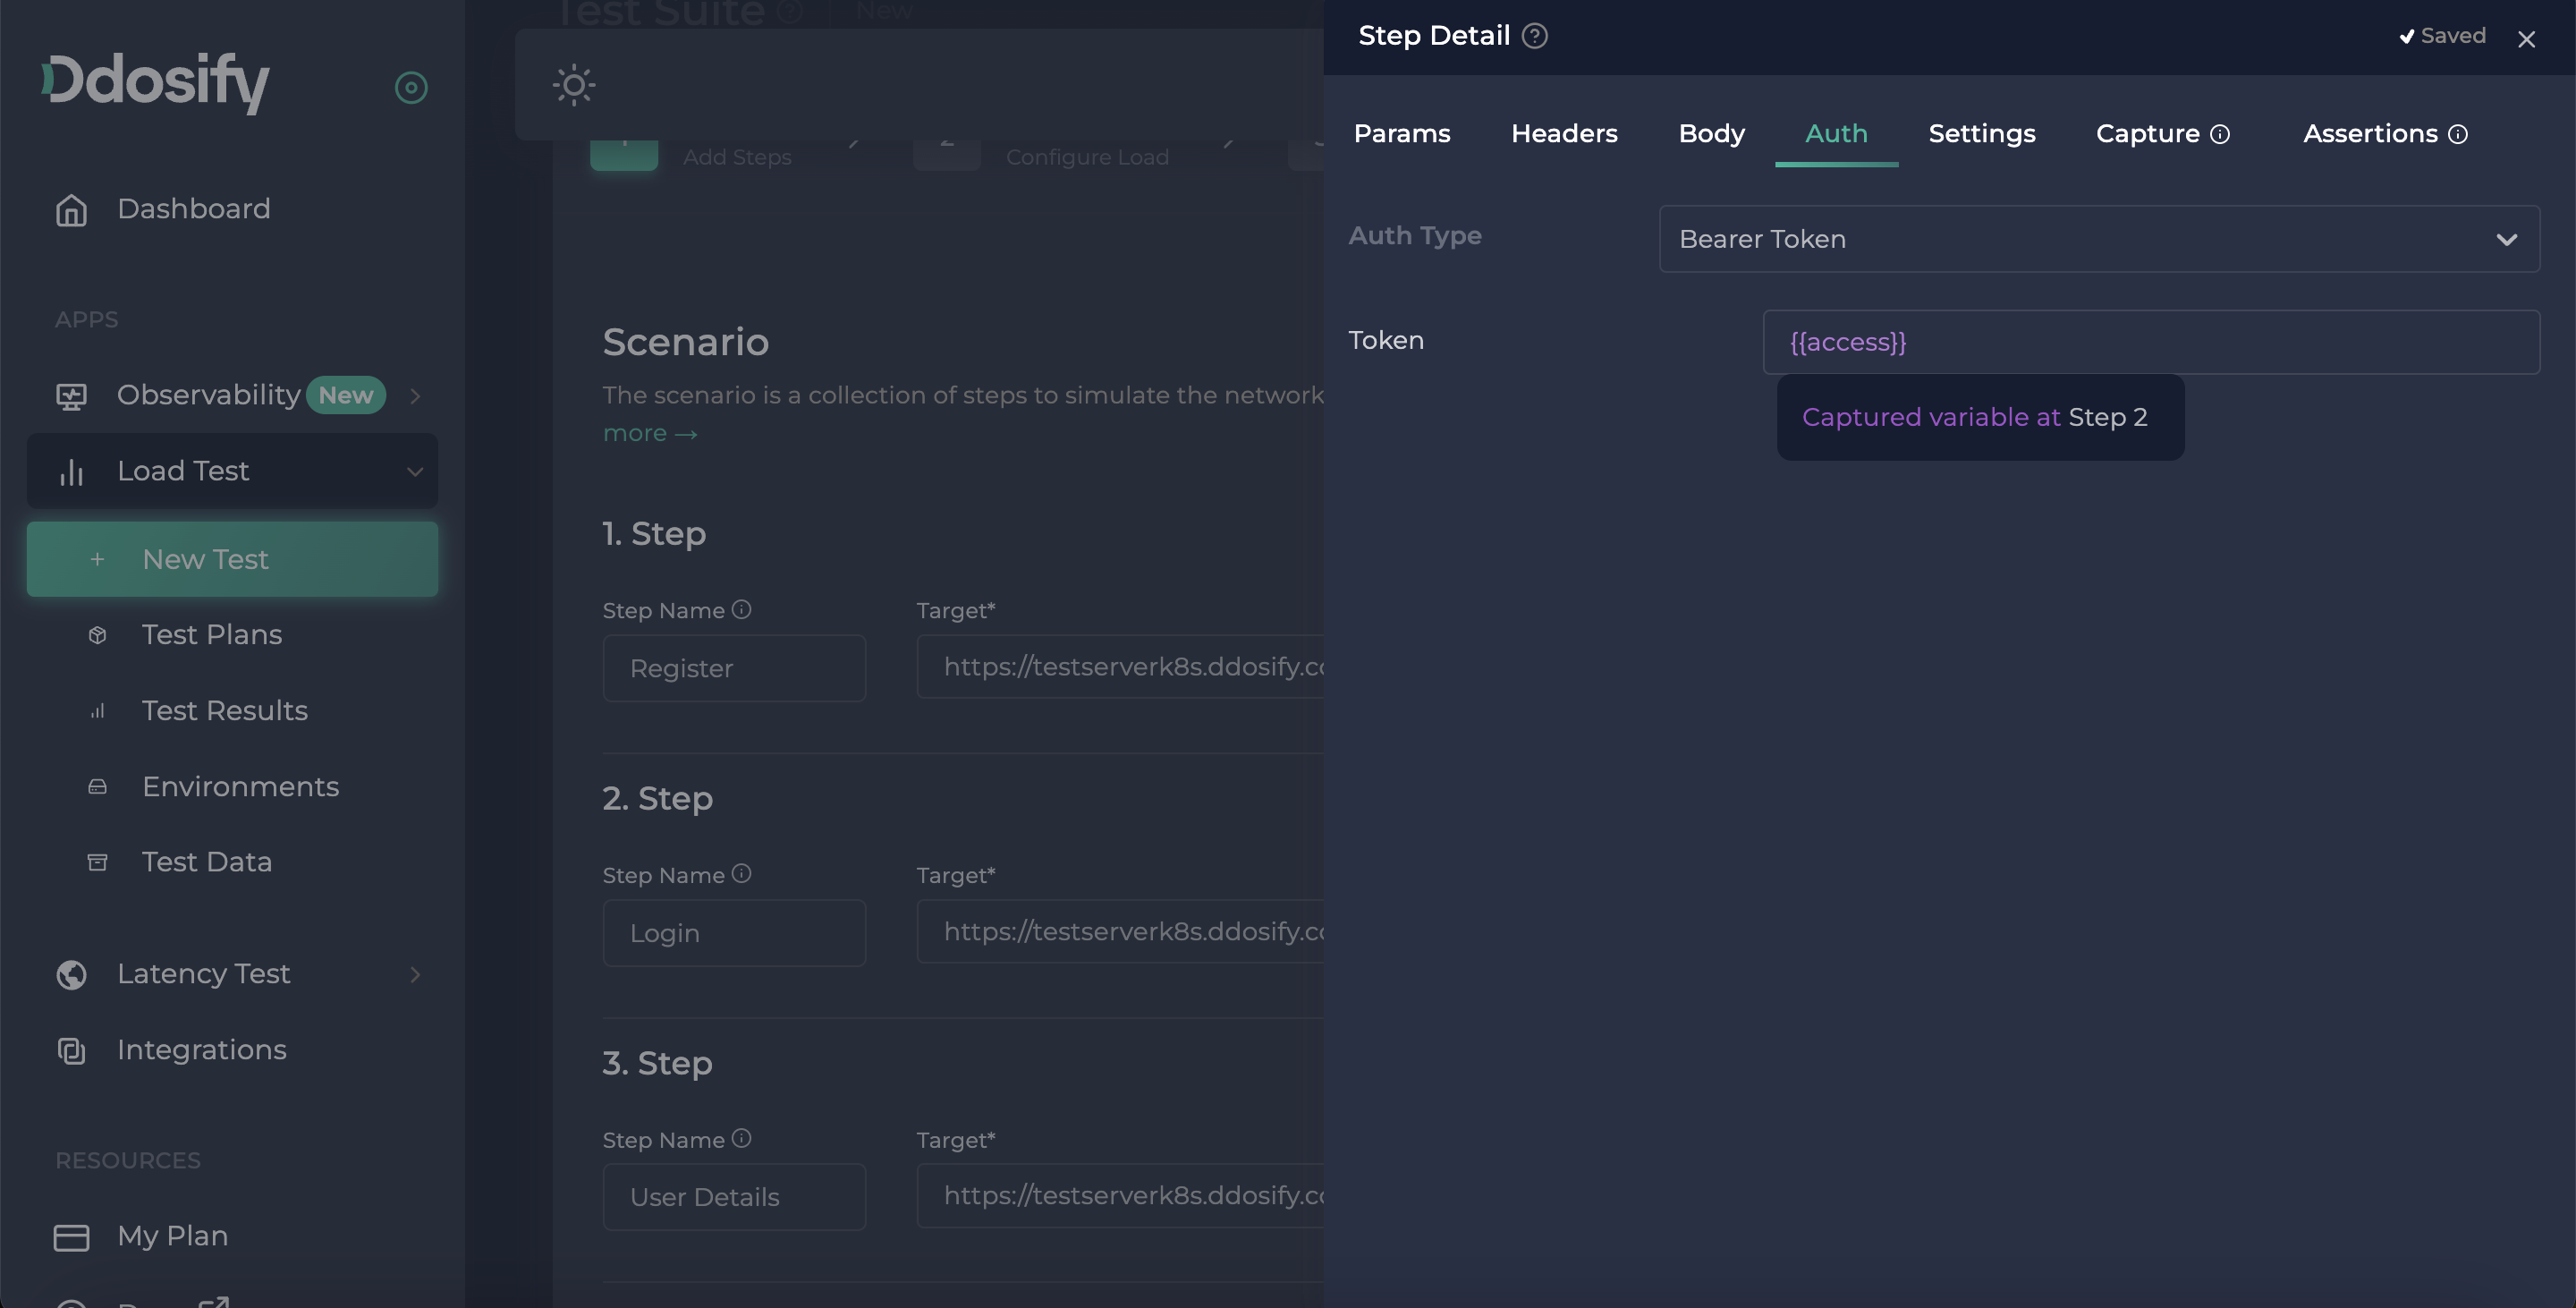
This Endpoint is waiting for a bearer auth token, To add it we need to go details window by pressing the three dots button and clicking the auth tab. You can see we have different auth types, for this endpoint, we need Bearer Token type. Now we can use a pre-defined constant access token. Next steps, I will show you how to use the token that we get from our login endpoint in Step 2.
eyJhbGciOiJIUzI1NiIsInR5cCI6IkpXVCJ9.eyJ0b2tlbl90eXBlIjoiYWNjZXNzIiwiZXhwIjoxNjczNTgzMDg2LCJpYXQiOjE2NzMzODIzODYsImp0aSI6IjFmYWFlMzM5YTYyMjQ2ZGRhNTk1MTZlN2NkYzMyMWU4IiwidXNlcl9pZCI6ImI5ZjI0MjNhLWYyYTgtNGMwZC1iZjZmLWY0ODFlMGUyYmJlZSJ9.X_x63UOFSbz7s8jiR44YUZjPVXRAcpKSLfO8skLCmG0
Debugging current flow
Ddosify has a debugging mode, it iterates your flow from step 1 to step n only once and allows you to test your flow easily. You can find detailed information about the debugging mode here.
By pressing the "Debug" button at the top of the page, you can start debugging,
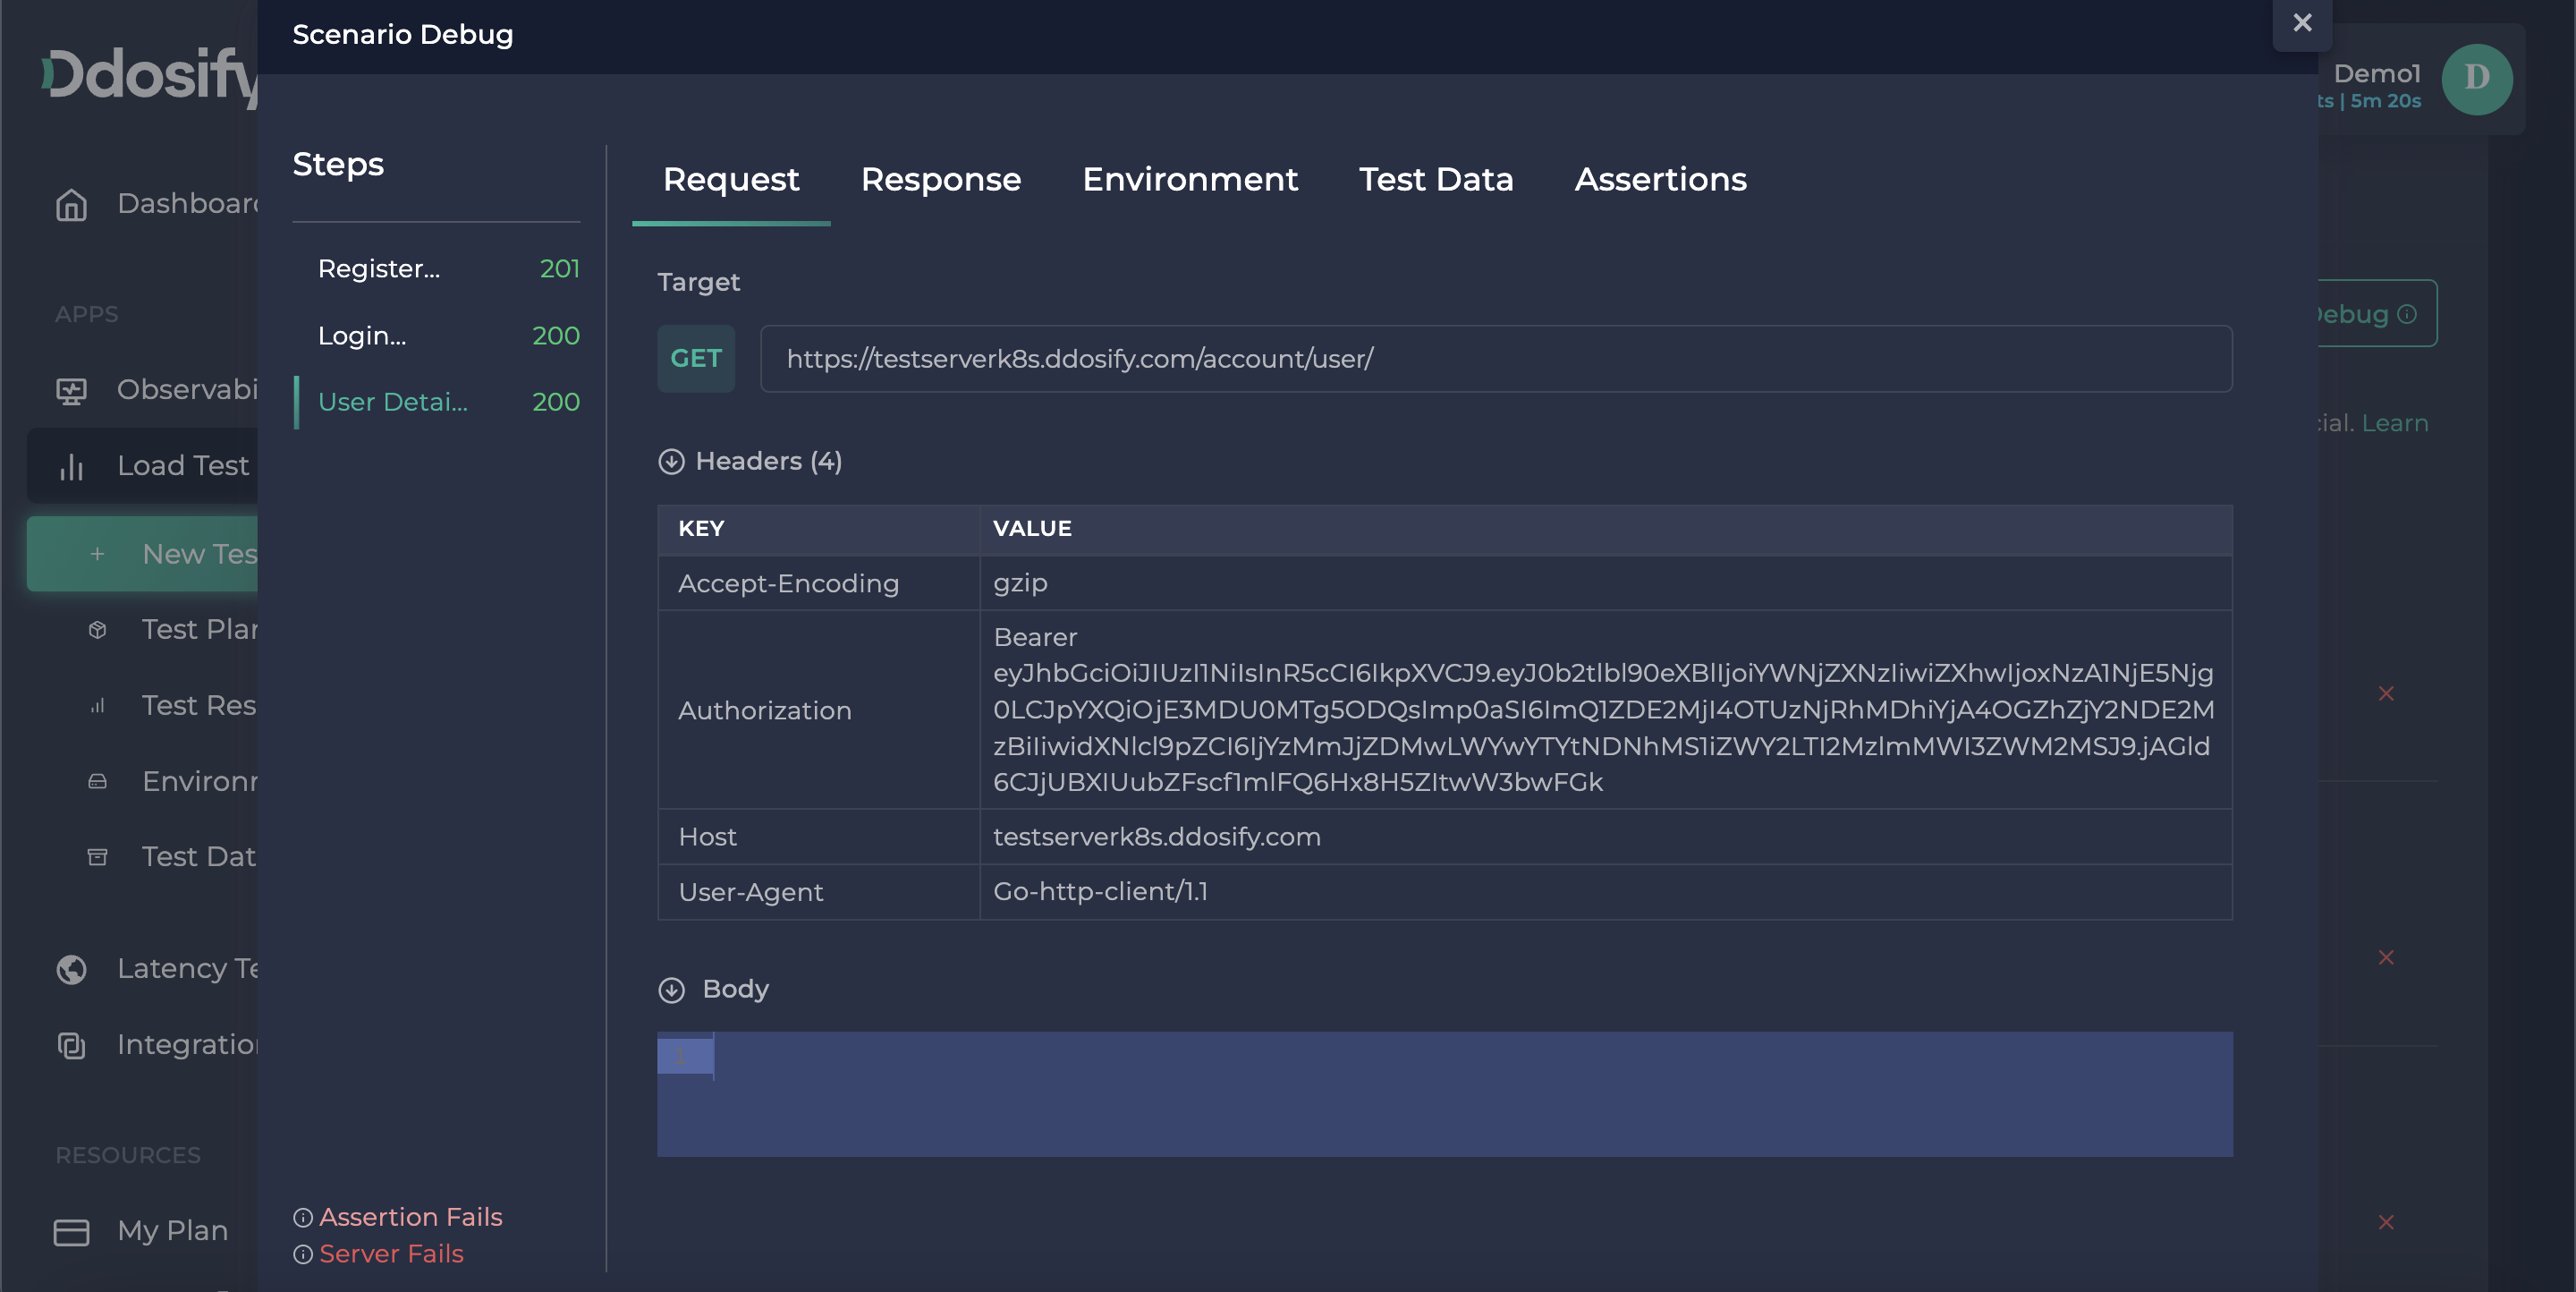
As you see in that debugging details window, we successfully made register and login operations but the user details endpoint returned a 401 HTTP error, To inspect the error we need to choose that step from the left bar.
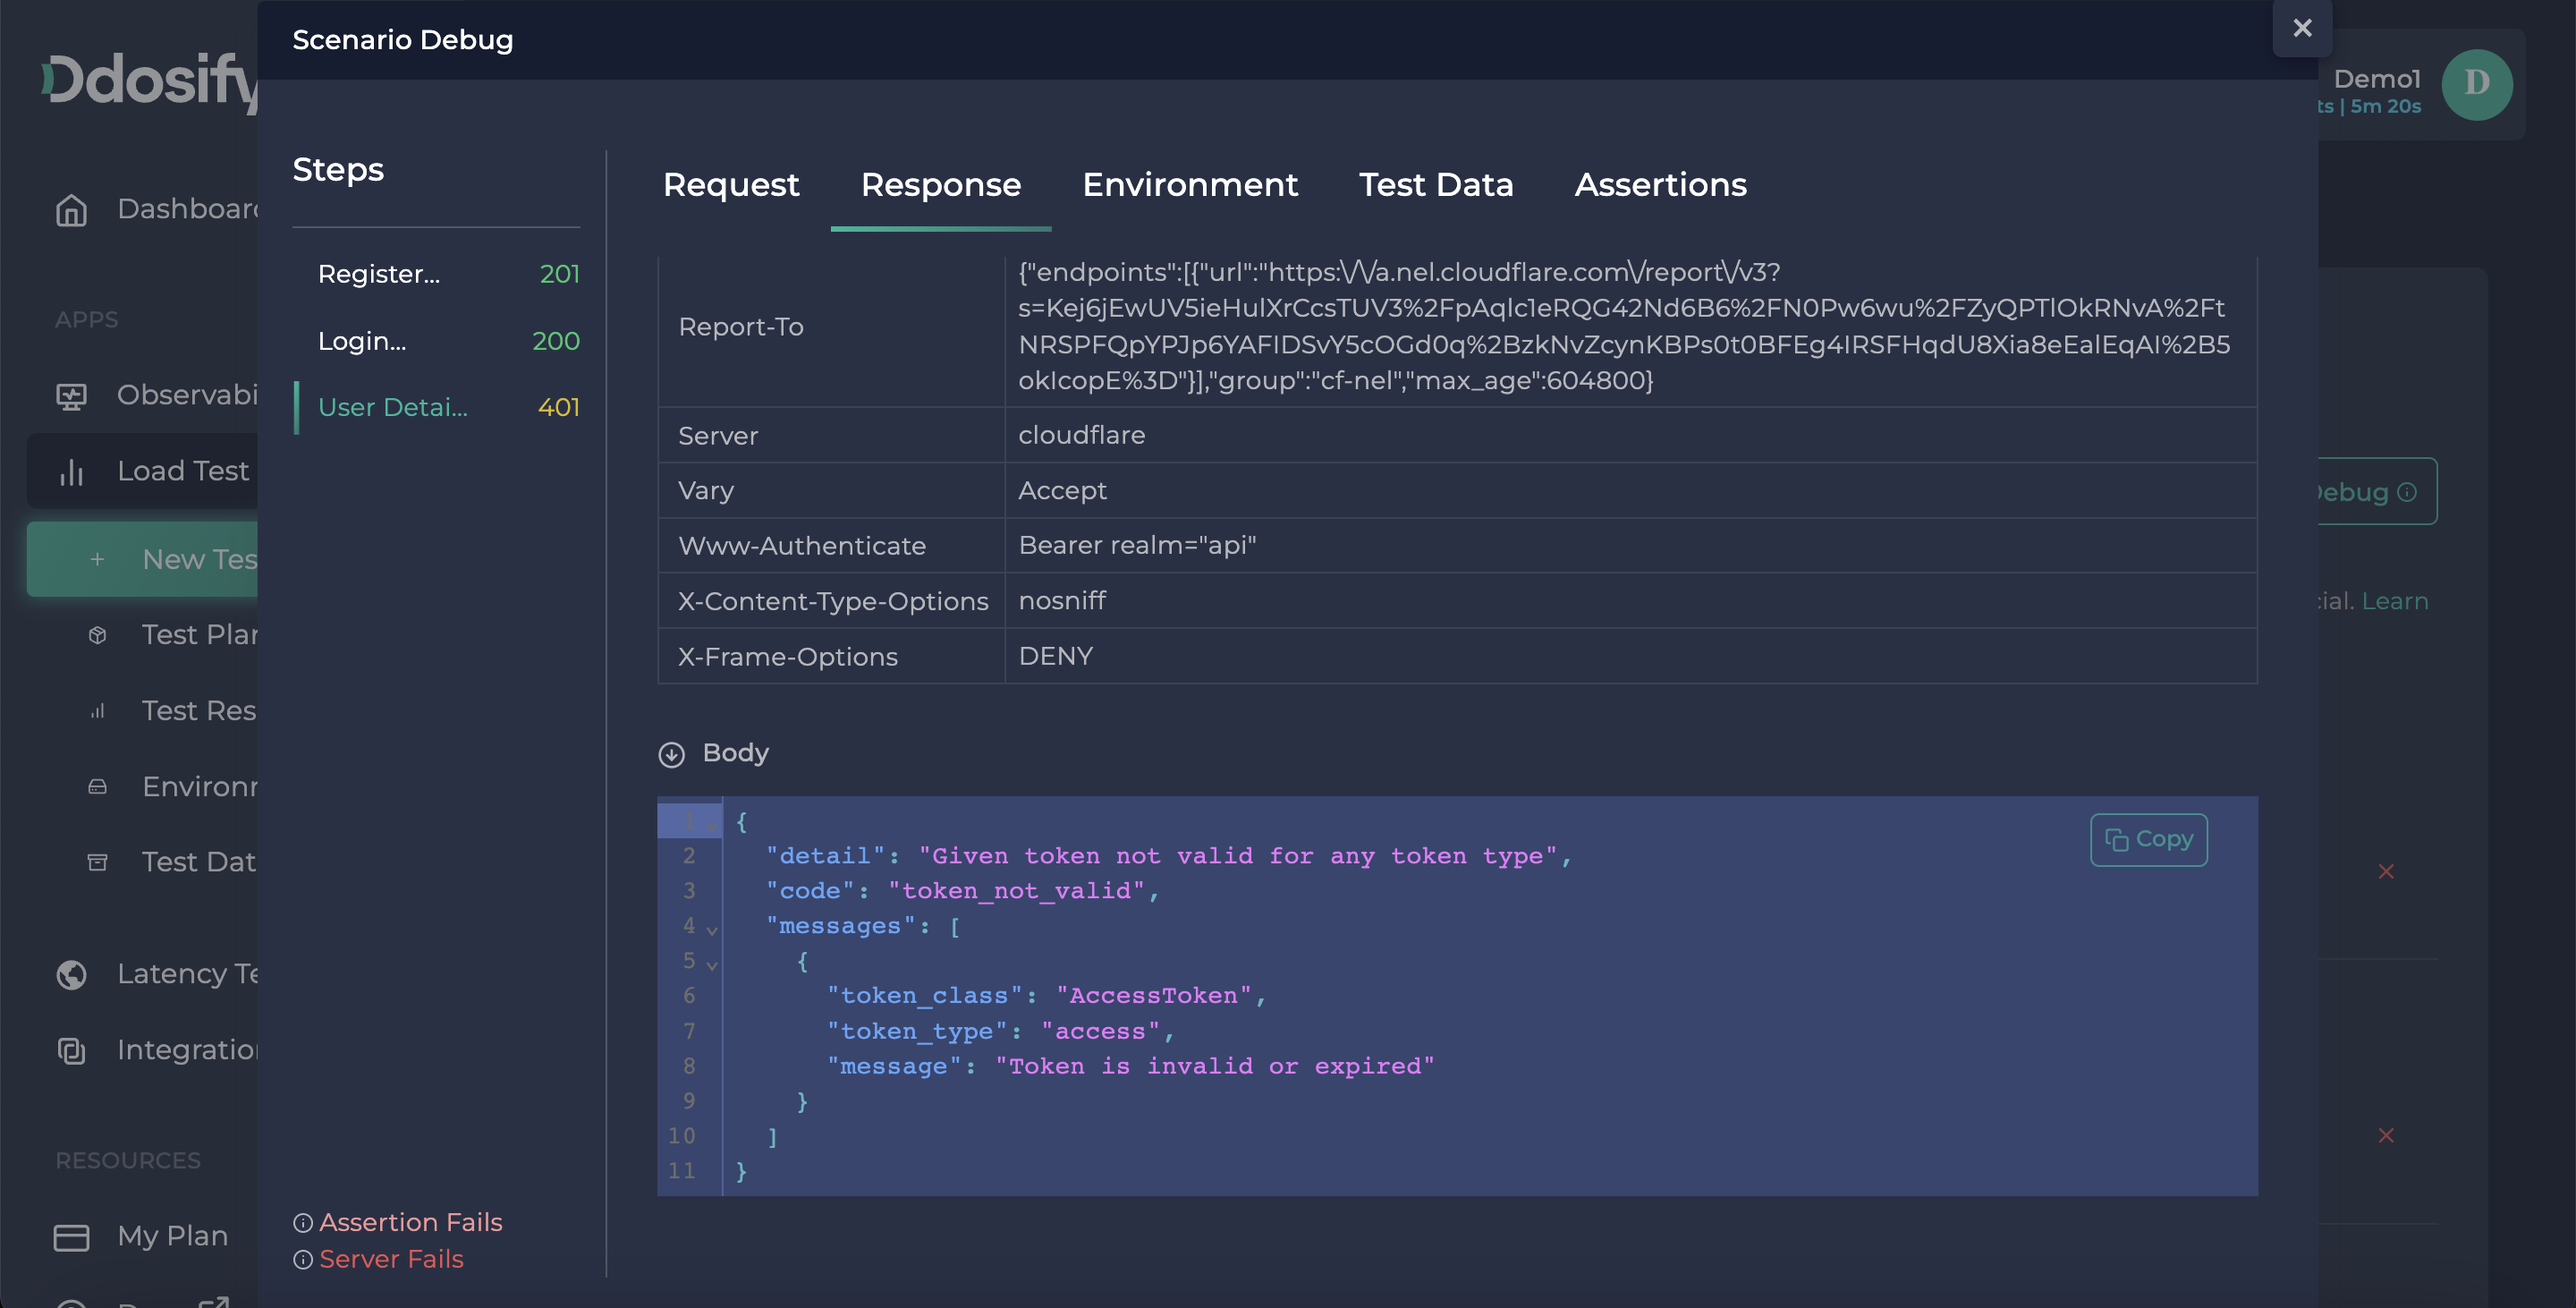
As it seems, our token validation is expired because it is an old token. To fix it we need to use the response values of the login endpoint as this auth token.
Creating Authentication Scenario With Dynamic Variables
In the previous sections, we successfully hit the endpoints with a flow. Now we will create a realistic user flow. To achieve this we should consider below requirements:
- On every iteration (new user) we have to pass different email, username, and password
- The user's email, username, and password should be the same on all steps in an iteration.
- We should capture the authentication token returned on the Login request. Then we need to use this token on the next request which is user data fetching.
- There should be a wait time between requests to simulate real user behavior.
For the first requirement, we can use dynamic variables to create random data. To use the same randomly generated data on all the steps, we can assign them to environment variables. As the environment variables are created at the beginning of the iteration, random variables will be generated for each iteration at once and can be accessed by scenario steps.
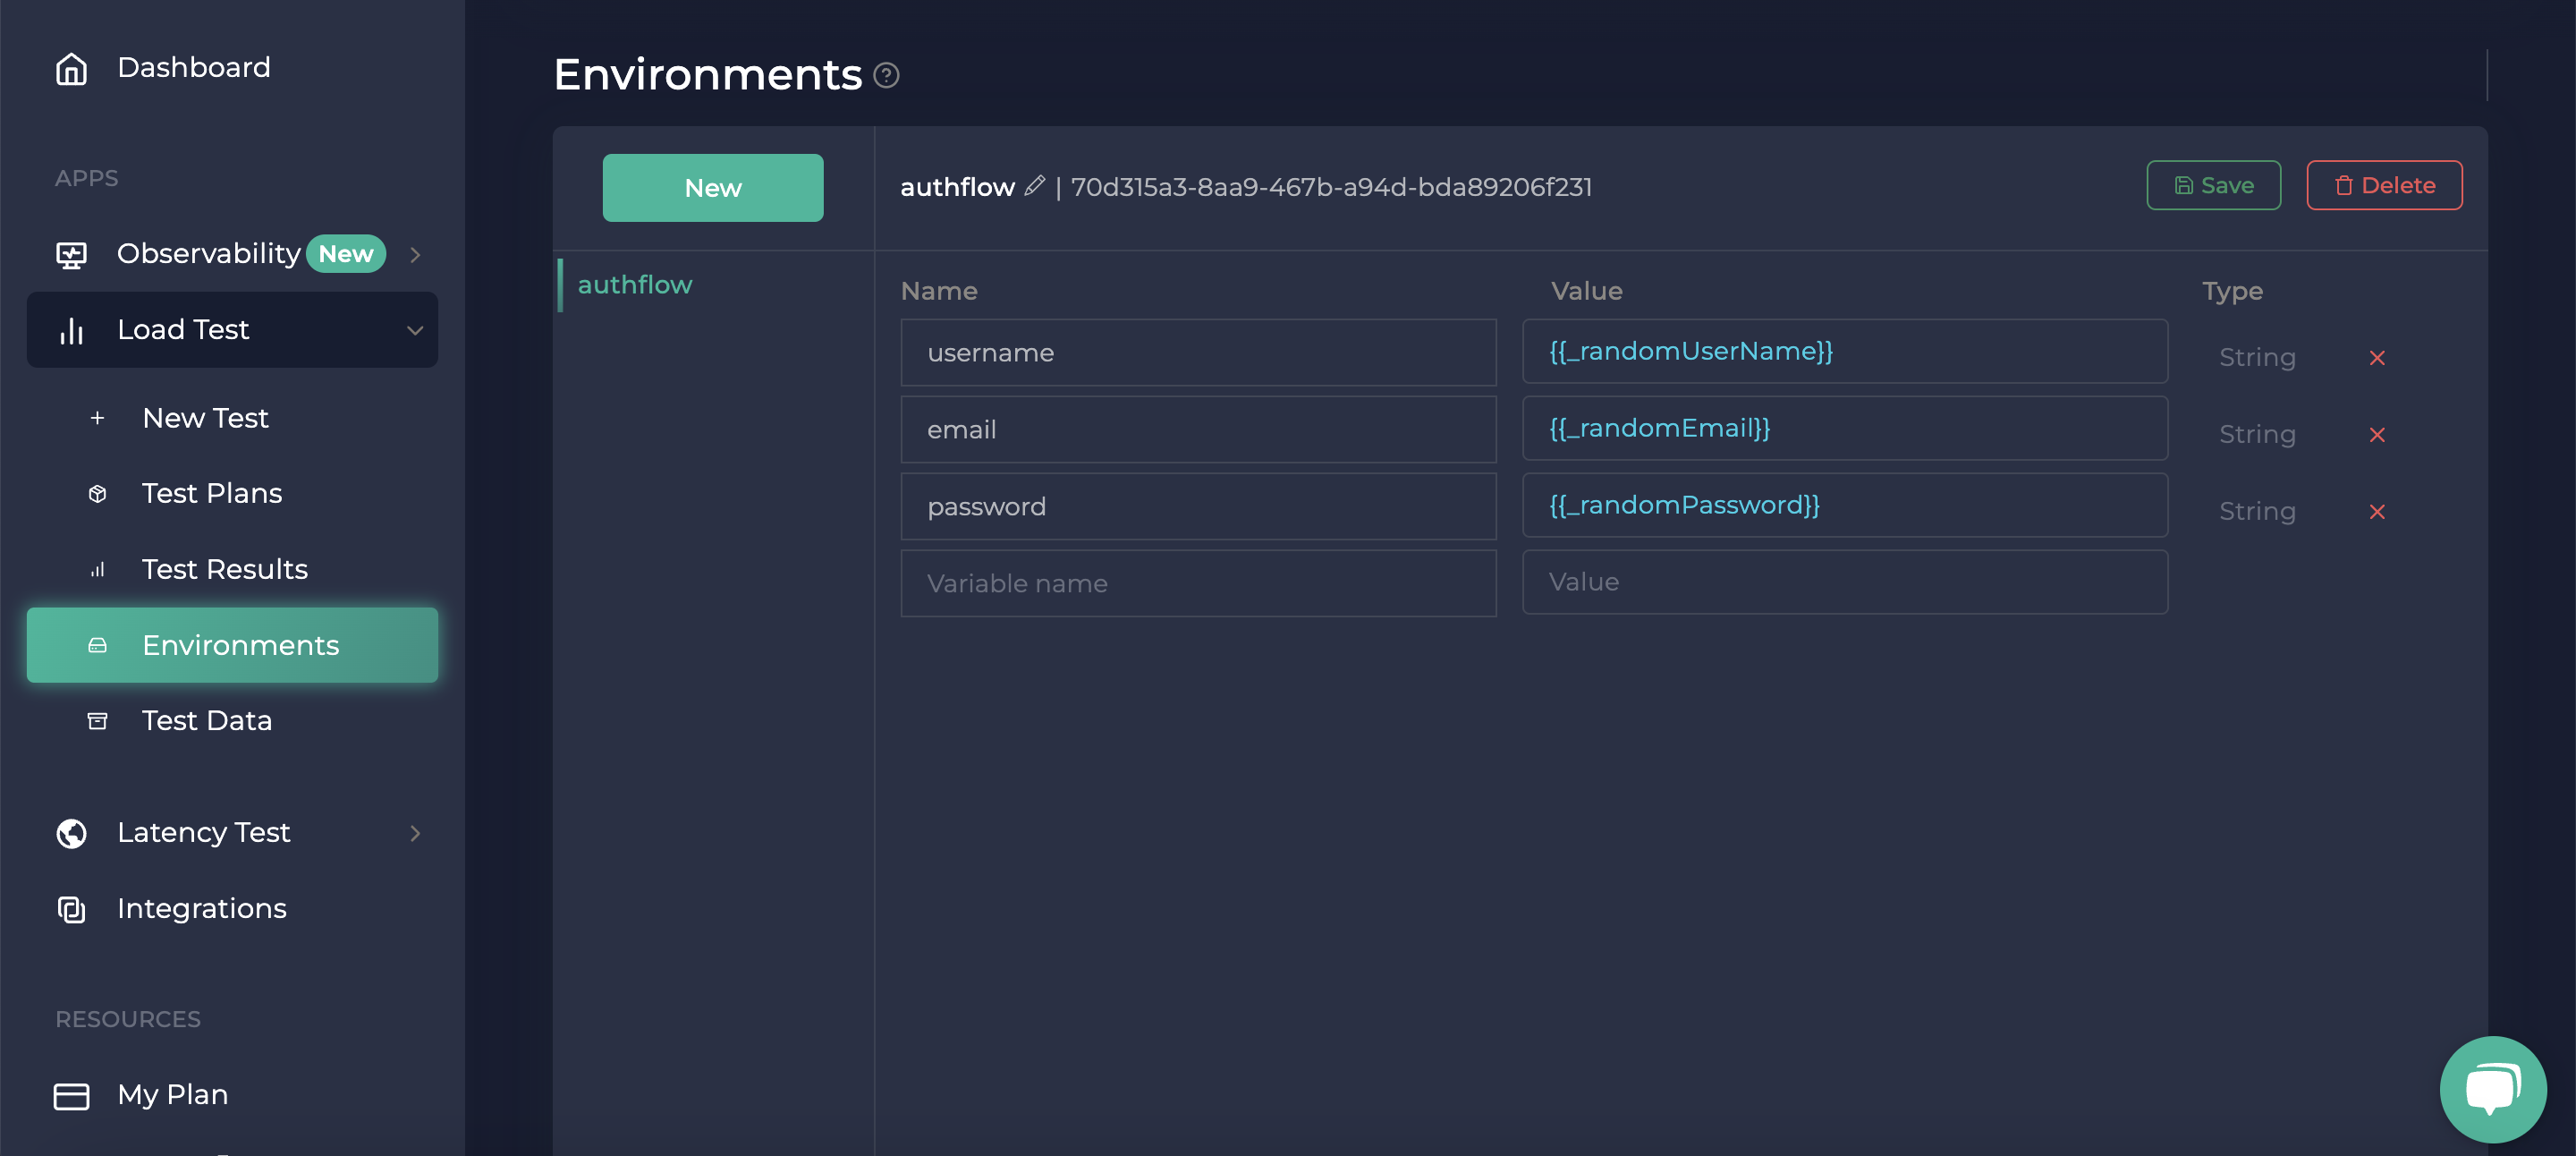
Create New Environment
We need email, username, and password environments. For adding a new environment you need to go to your environments page. On that page, you can press the new button or the Create first environment button to add a new environment, After that you can add new environment key values. Don't forget to save it.
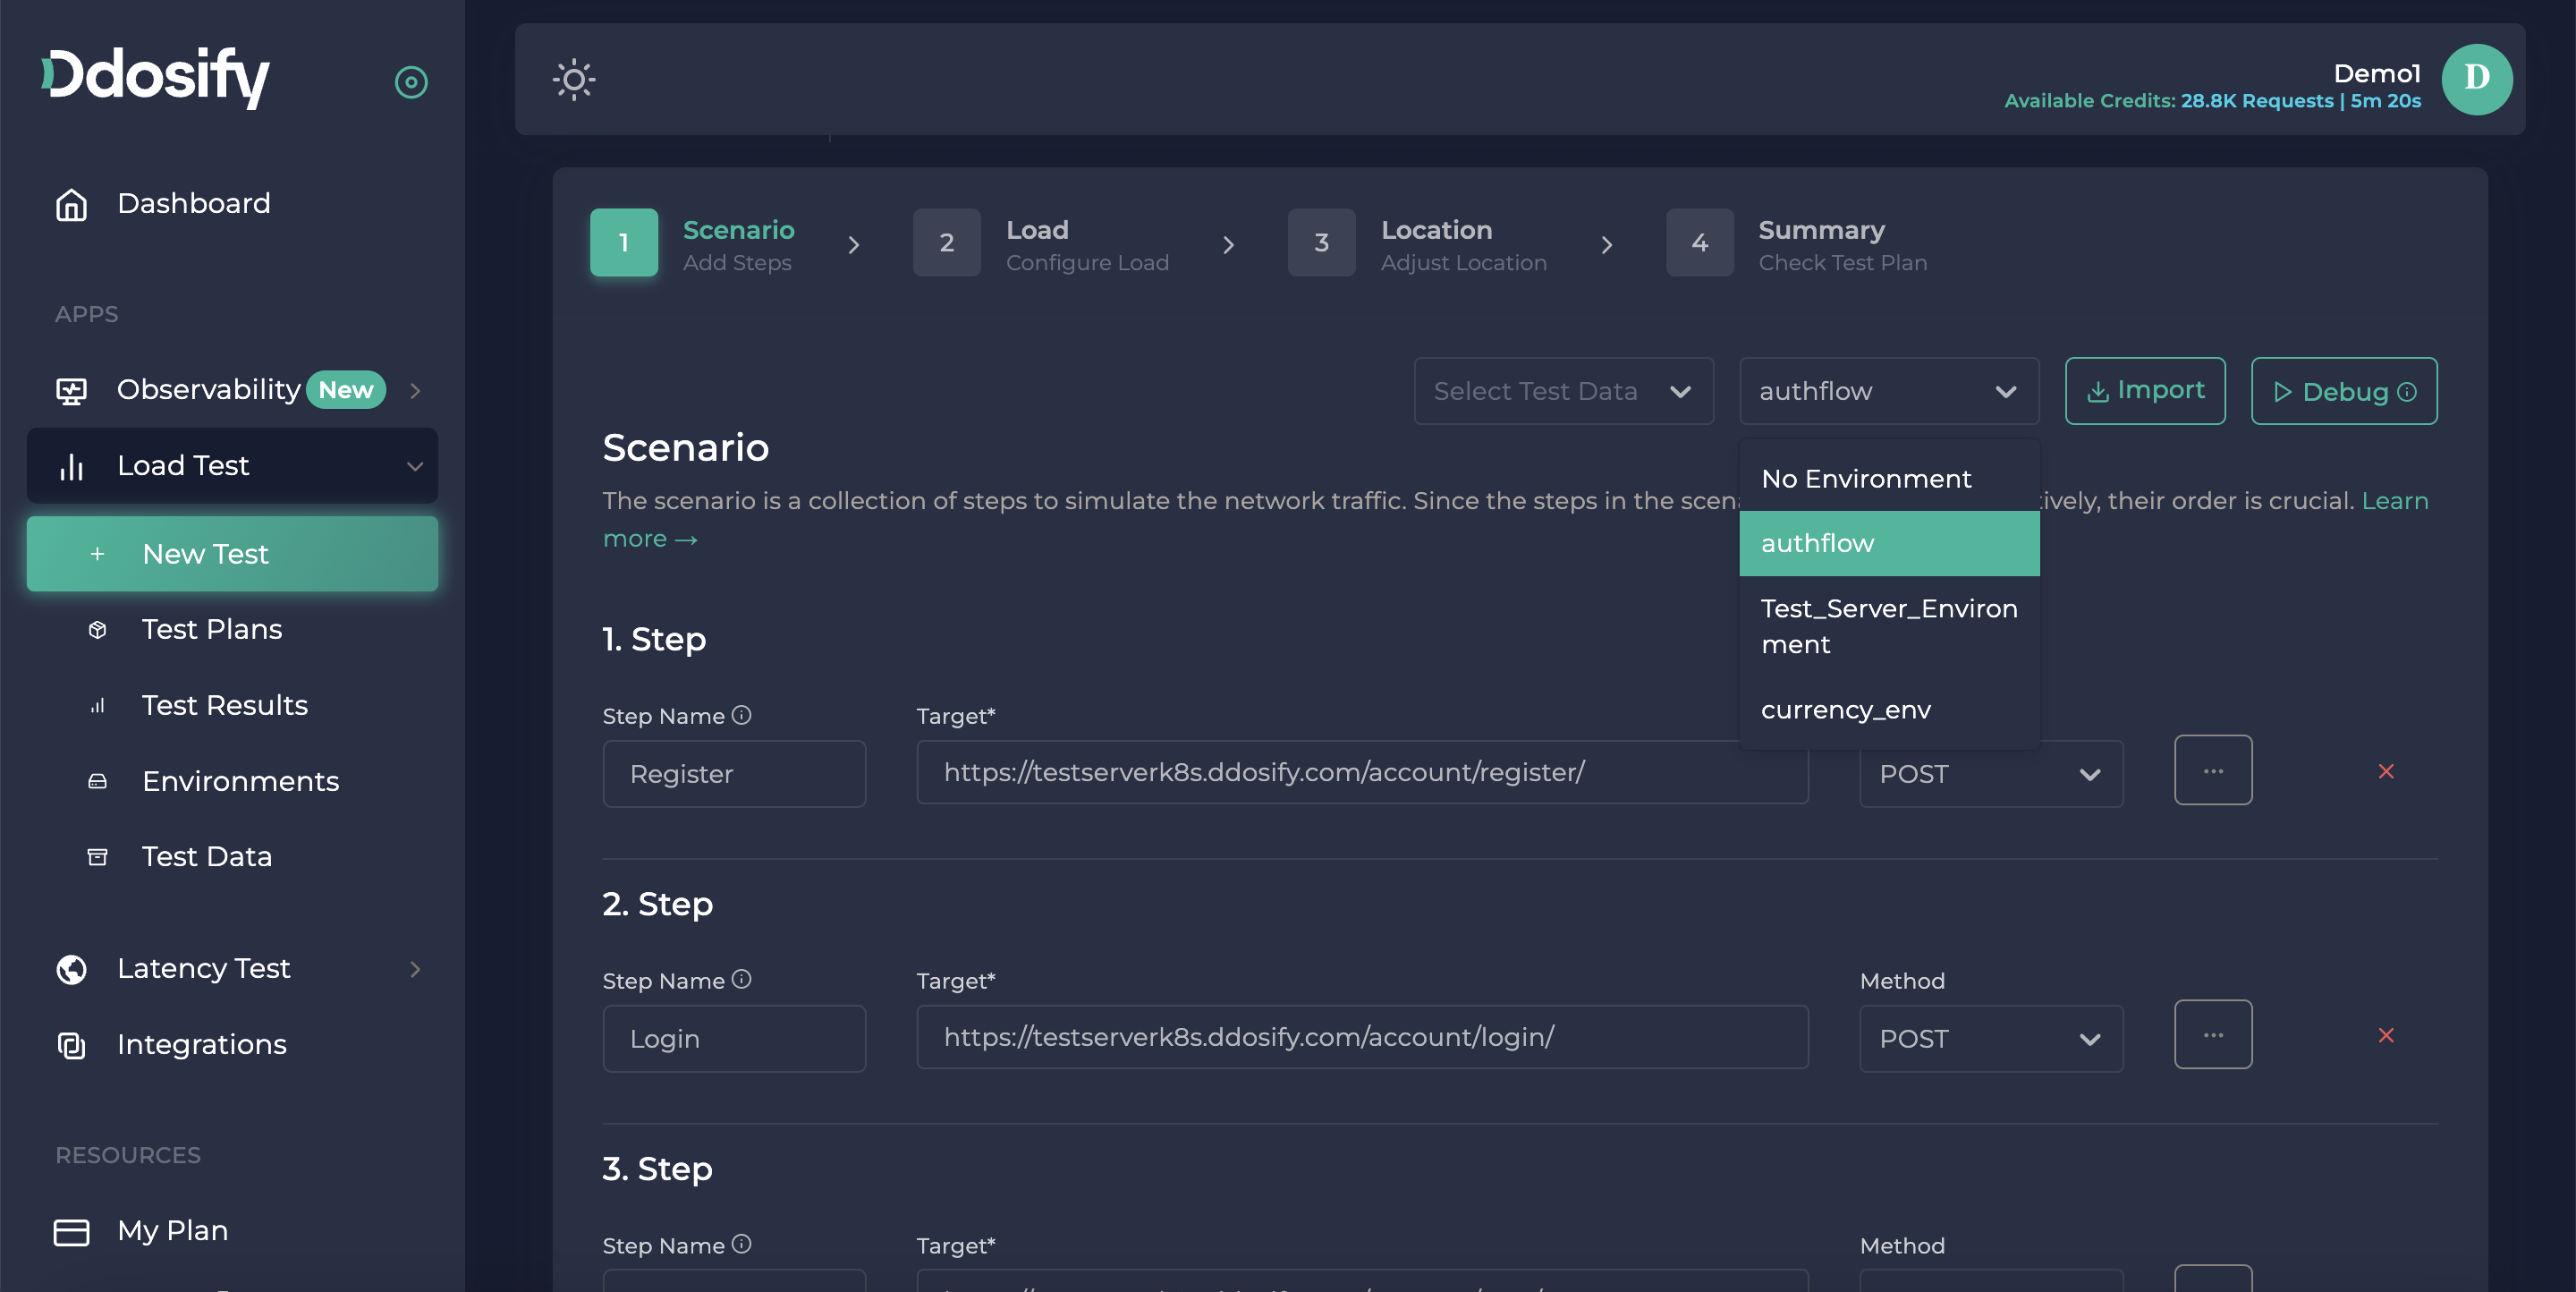
Then, we need to choose our environment from the top part.
Lastly, we need to change, register, and login endpoint bodies with our new environments, by clicking their step details button (three dots button).
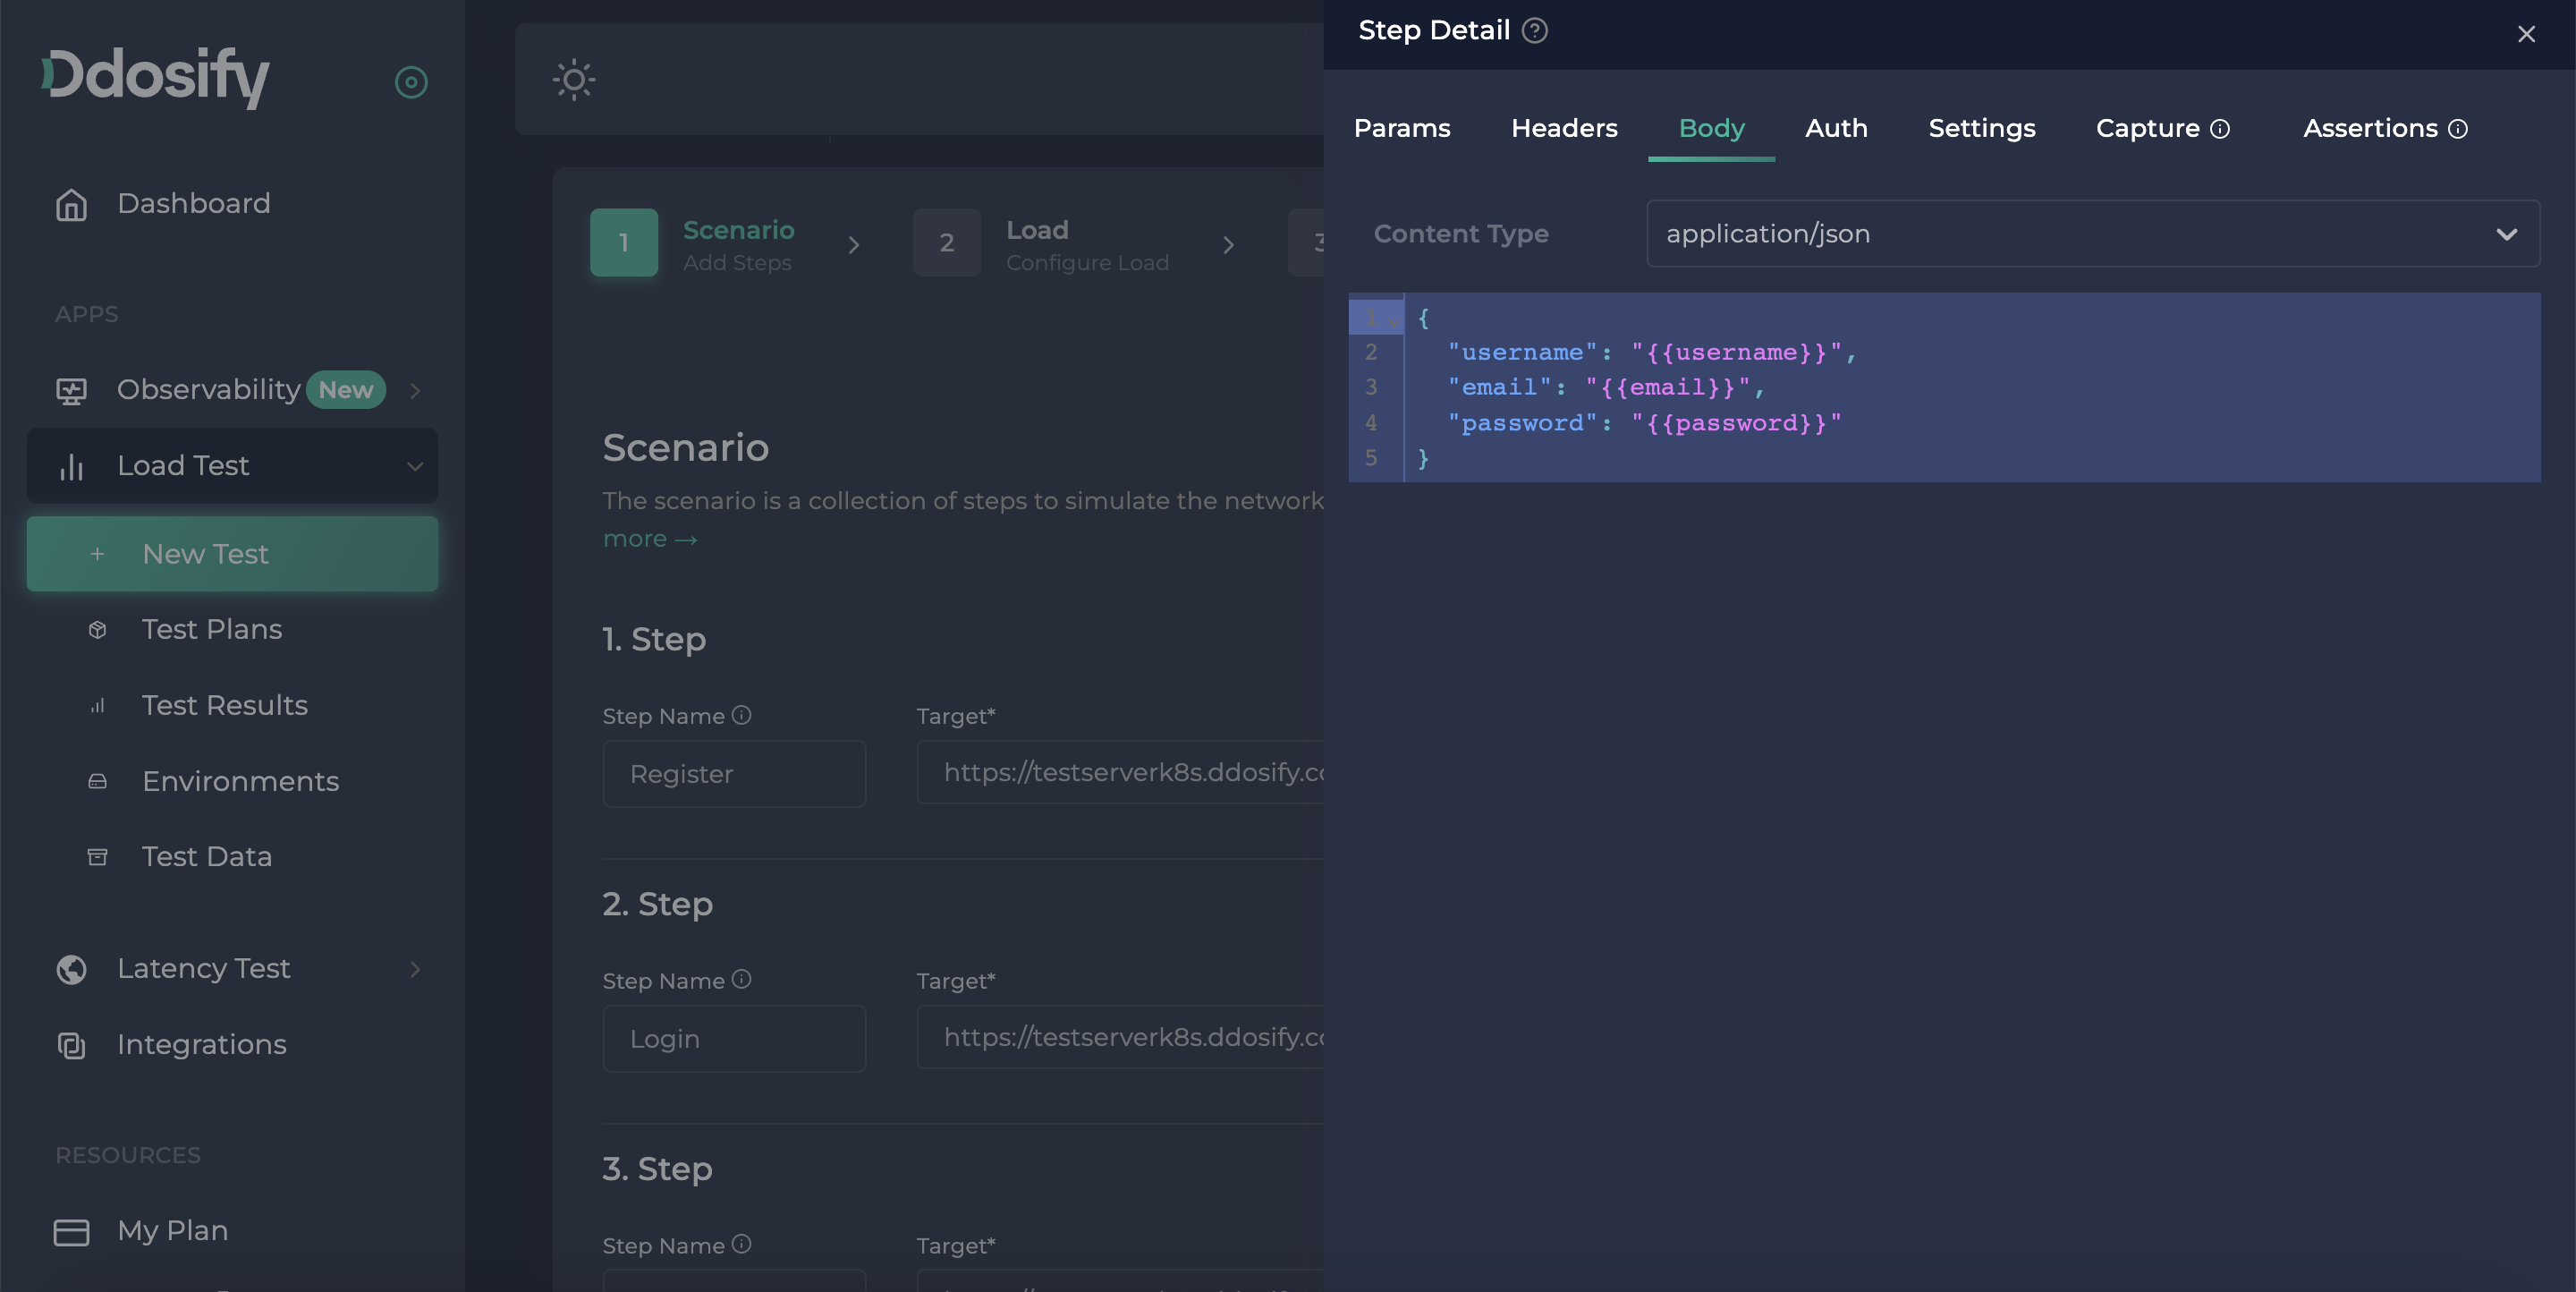
{
  "username": "{{username}}",
  "email": "{{email}}",
  "password": "{{password}}"
}
{
  "username": "{{username}}",
  "password": "{{password}}"
}
Capture Variable From Login

To capture the access token on the Login action we can use the correlation feature of Ddosify. This feature allows us to extract values from the response body or response header. We can assign the extracted value to a new variable and then we can use this variable as an environment variable in the following steps. In our scenario, the response of the Login endpoint is in JSON format. So we can use the json_path to extract the access token from the response body. As you can see in the top photo, our intended access token is coming in a tokens object so, The true path of the access token is tokens.access
Now we need to open the capture part of the login endpoint from the details window by pressing the three dots button. Then we need to give a name to our captured variable to use it in the next steps. In this example we will use the body and JSON path of the extraction method, Also our JSON path will be tokens.access as we stated.

After capturing, the last thing we need to do is use that variable in the user details endpoint's authorization part. We can simply change the previously added token to {{access}} to use the captured variable.
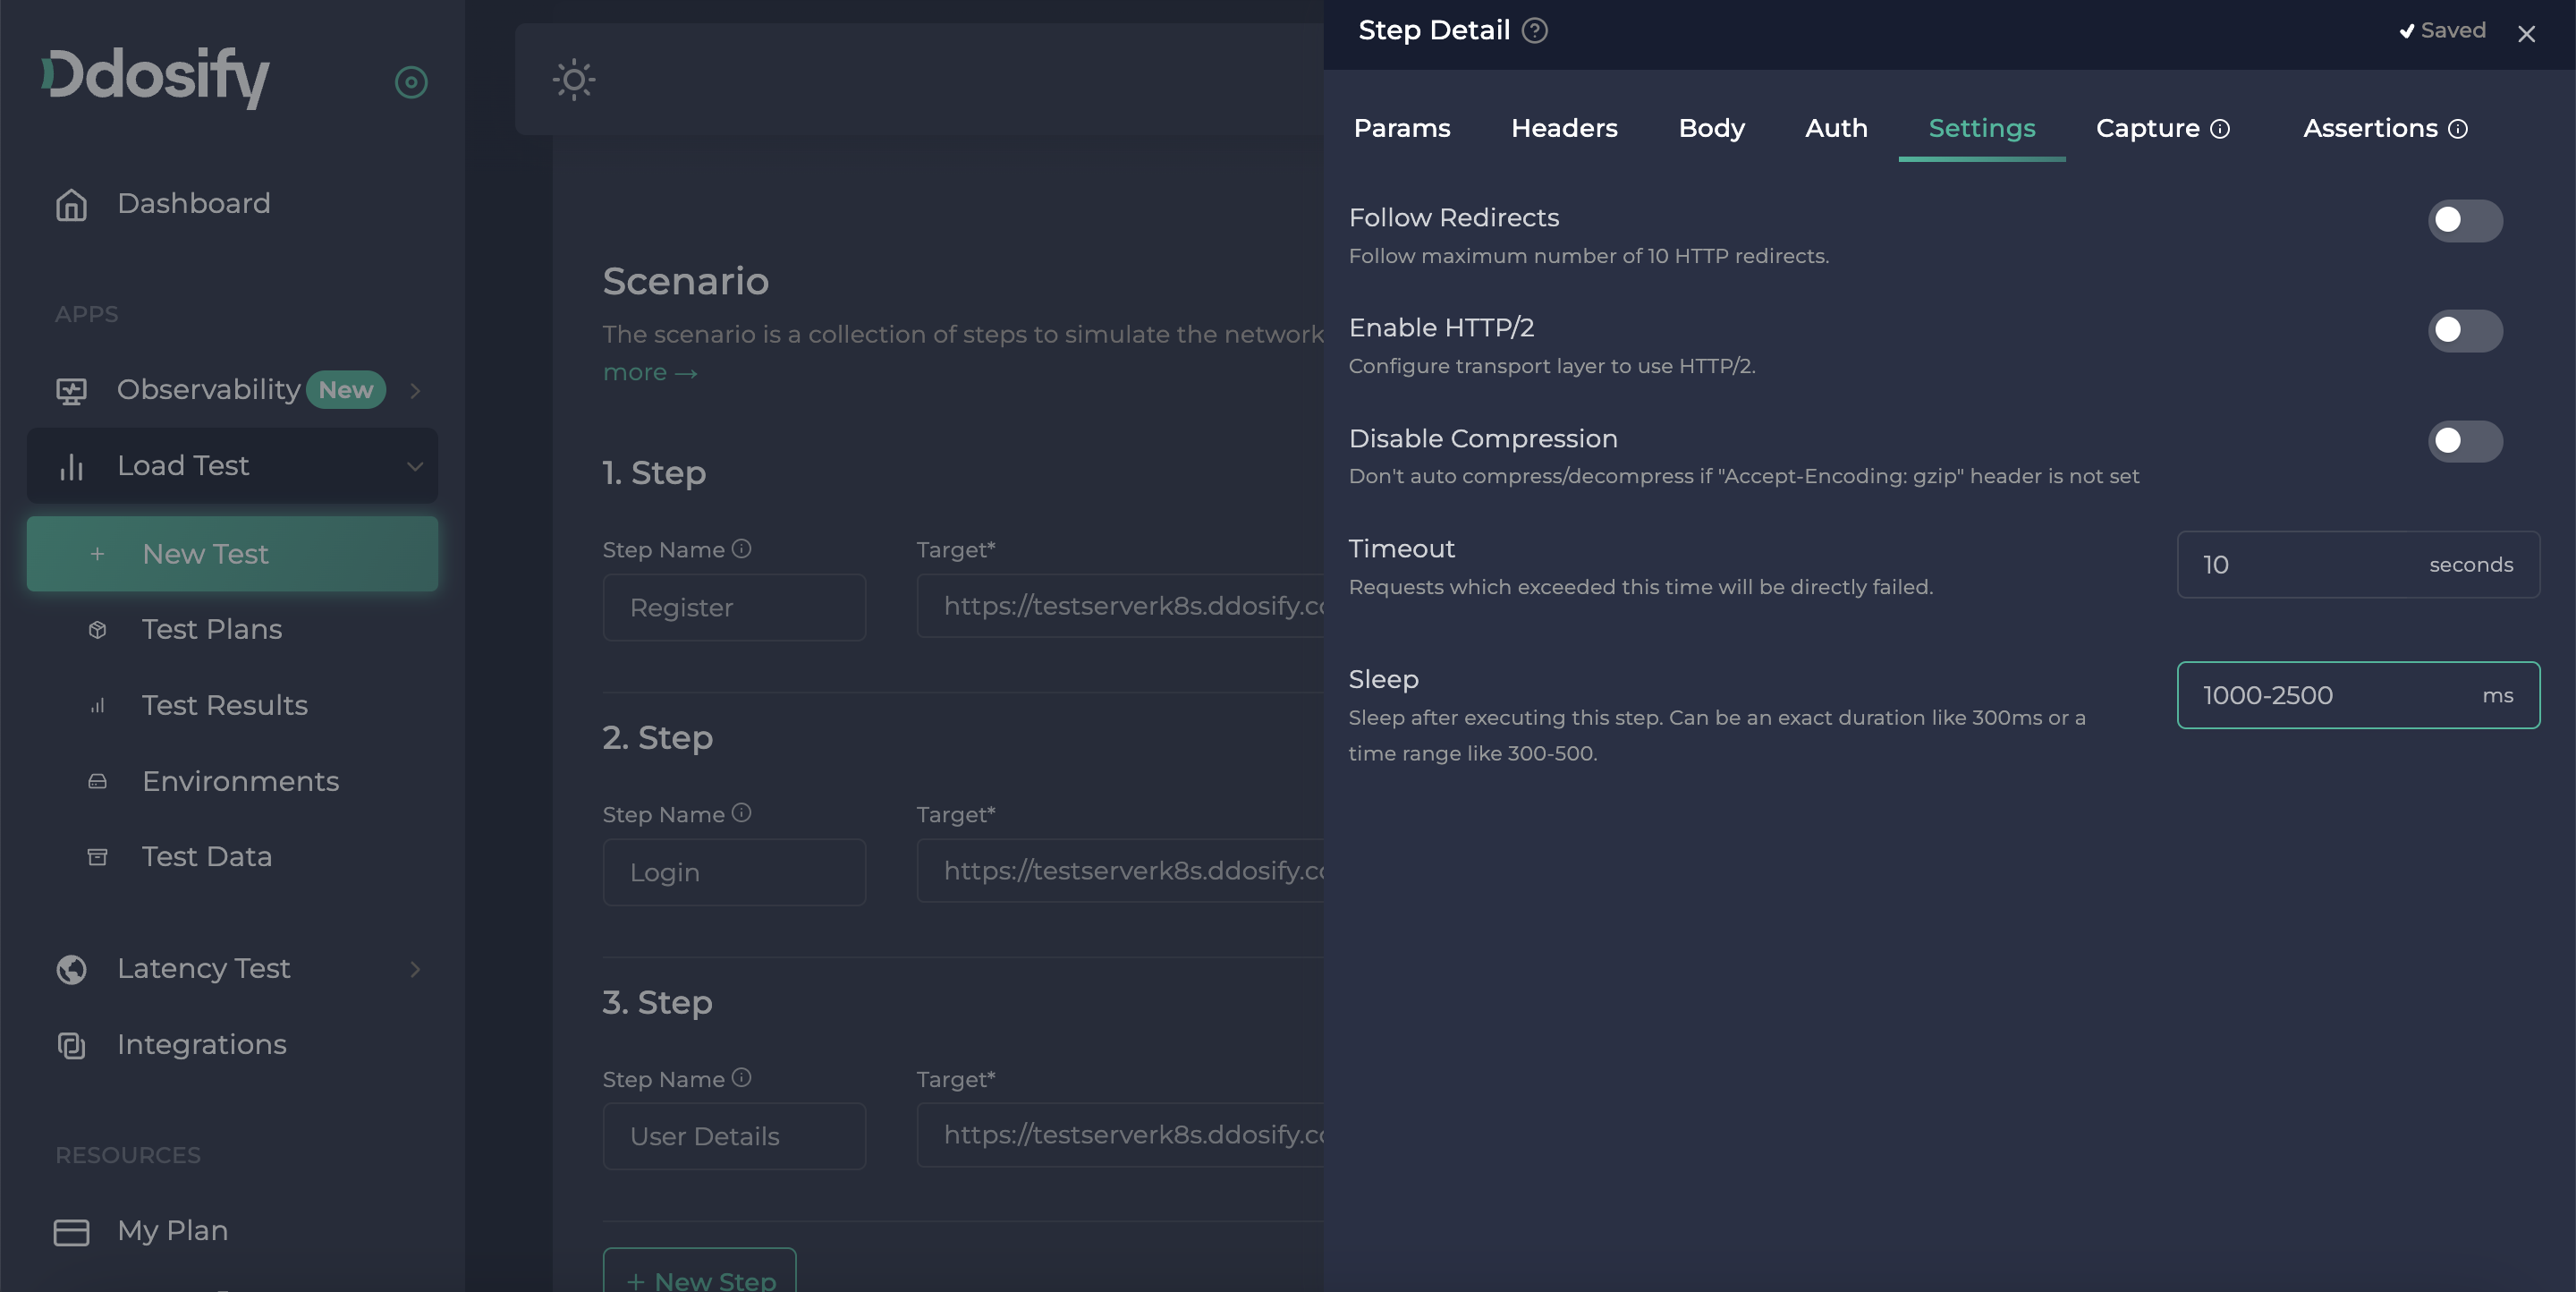
The only requirement we have to handle is the think time between the requests to simulate real user behavior. This is the easiest one since we can just add the sleep property for the first two steps to add think time after finishing that step. Sleep property can be an exact digit in milliseconds or it can also be a range to add a random wait between the given range. In our example, we would like to add think time between 1 second to 2.5 seconds.
If we use debug again, as shown in the Debug result, the user detail sections are filled with the data generated by random dynamic variables like username and email.

Also, in the request tab auth is visible, which is captured in the Login step. We simulated the user authentication flow.
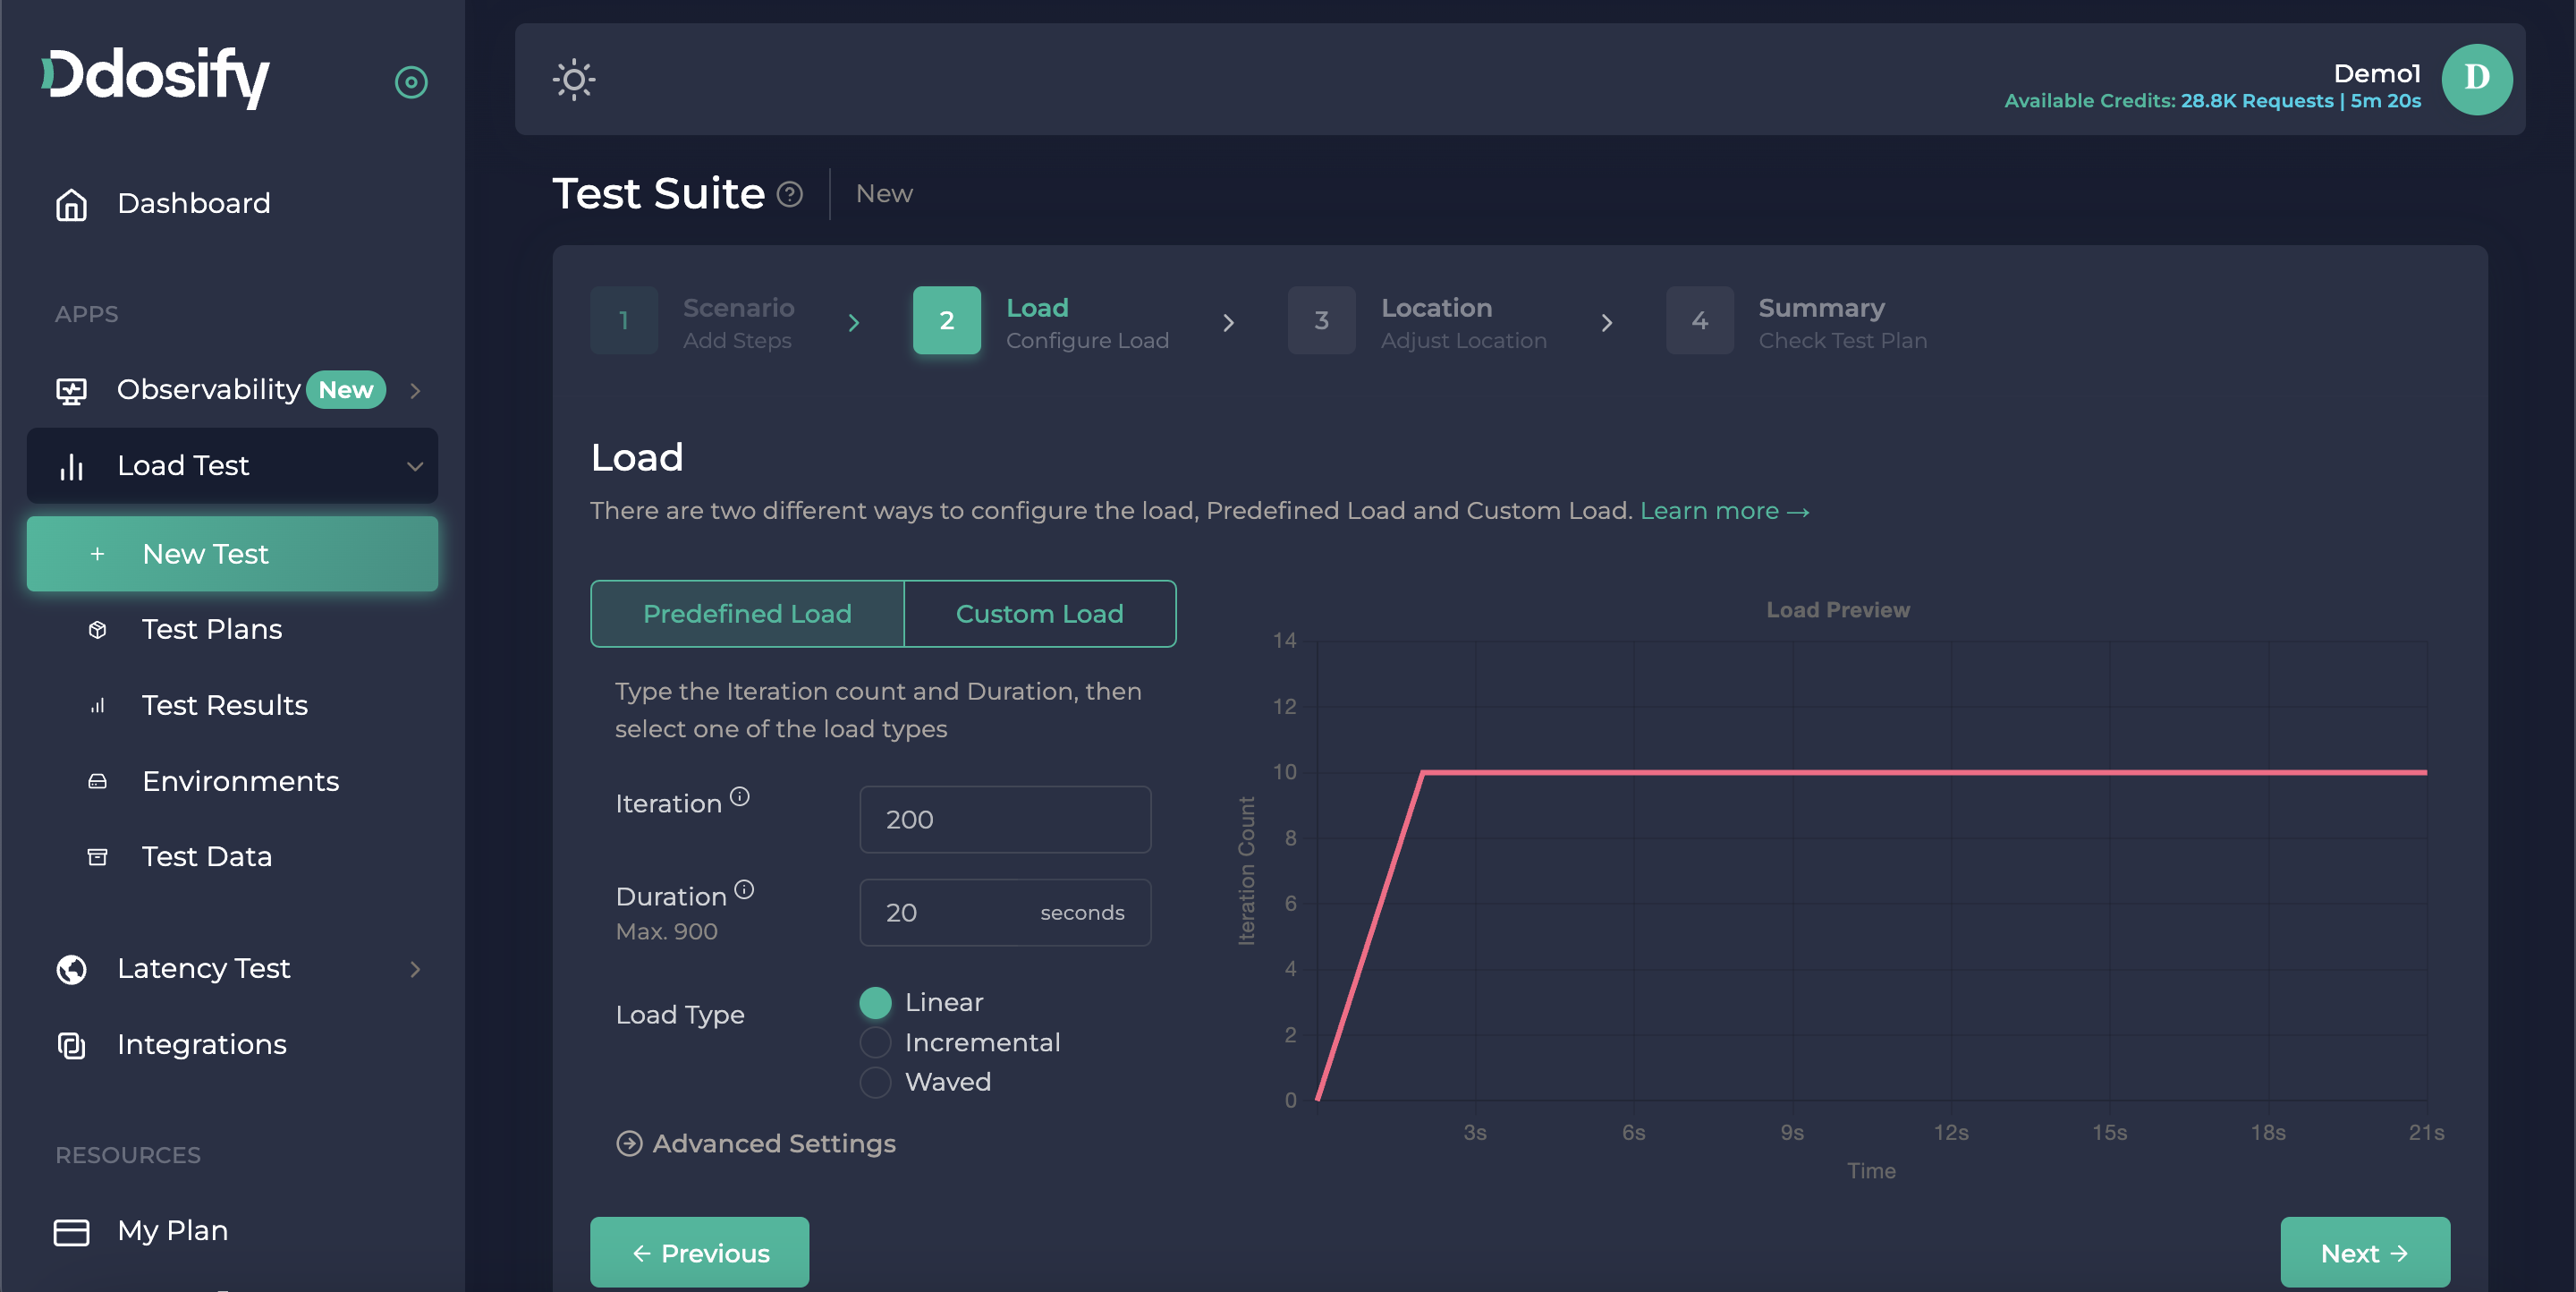
The current configuration says to Ddosify engine run the scenario only 1 time. To start the load test with more load, we have to press the next button to choose the load type.
For our case, this scenario will be iterated 200 times over 20 seconds. Since the load type is "linear" Ddosify will run 10 iterations per second. This means our backend server will receive 10 Register -> Login -> Fetch flows per second. This data is easily obtainable from the line graph.
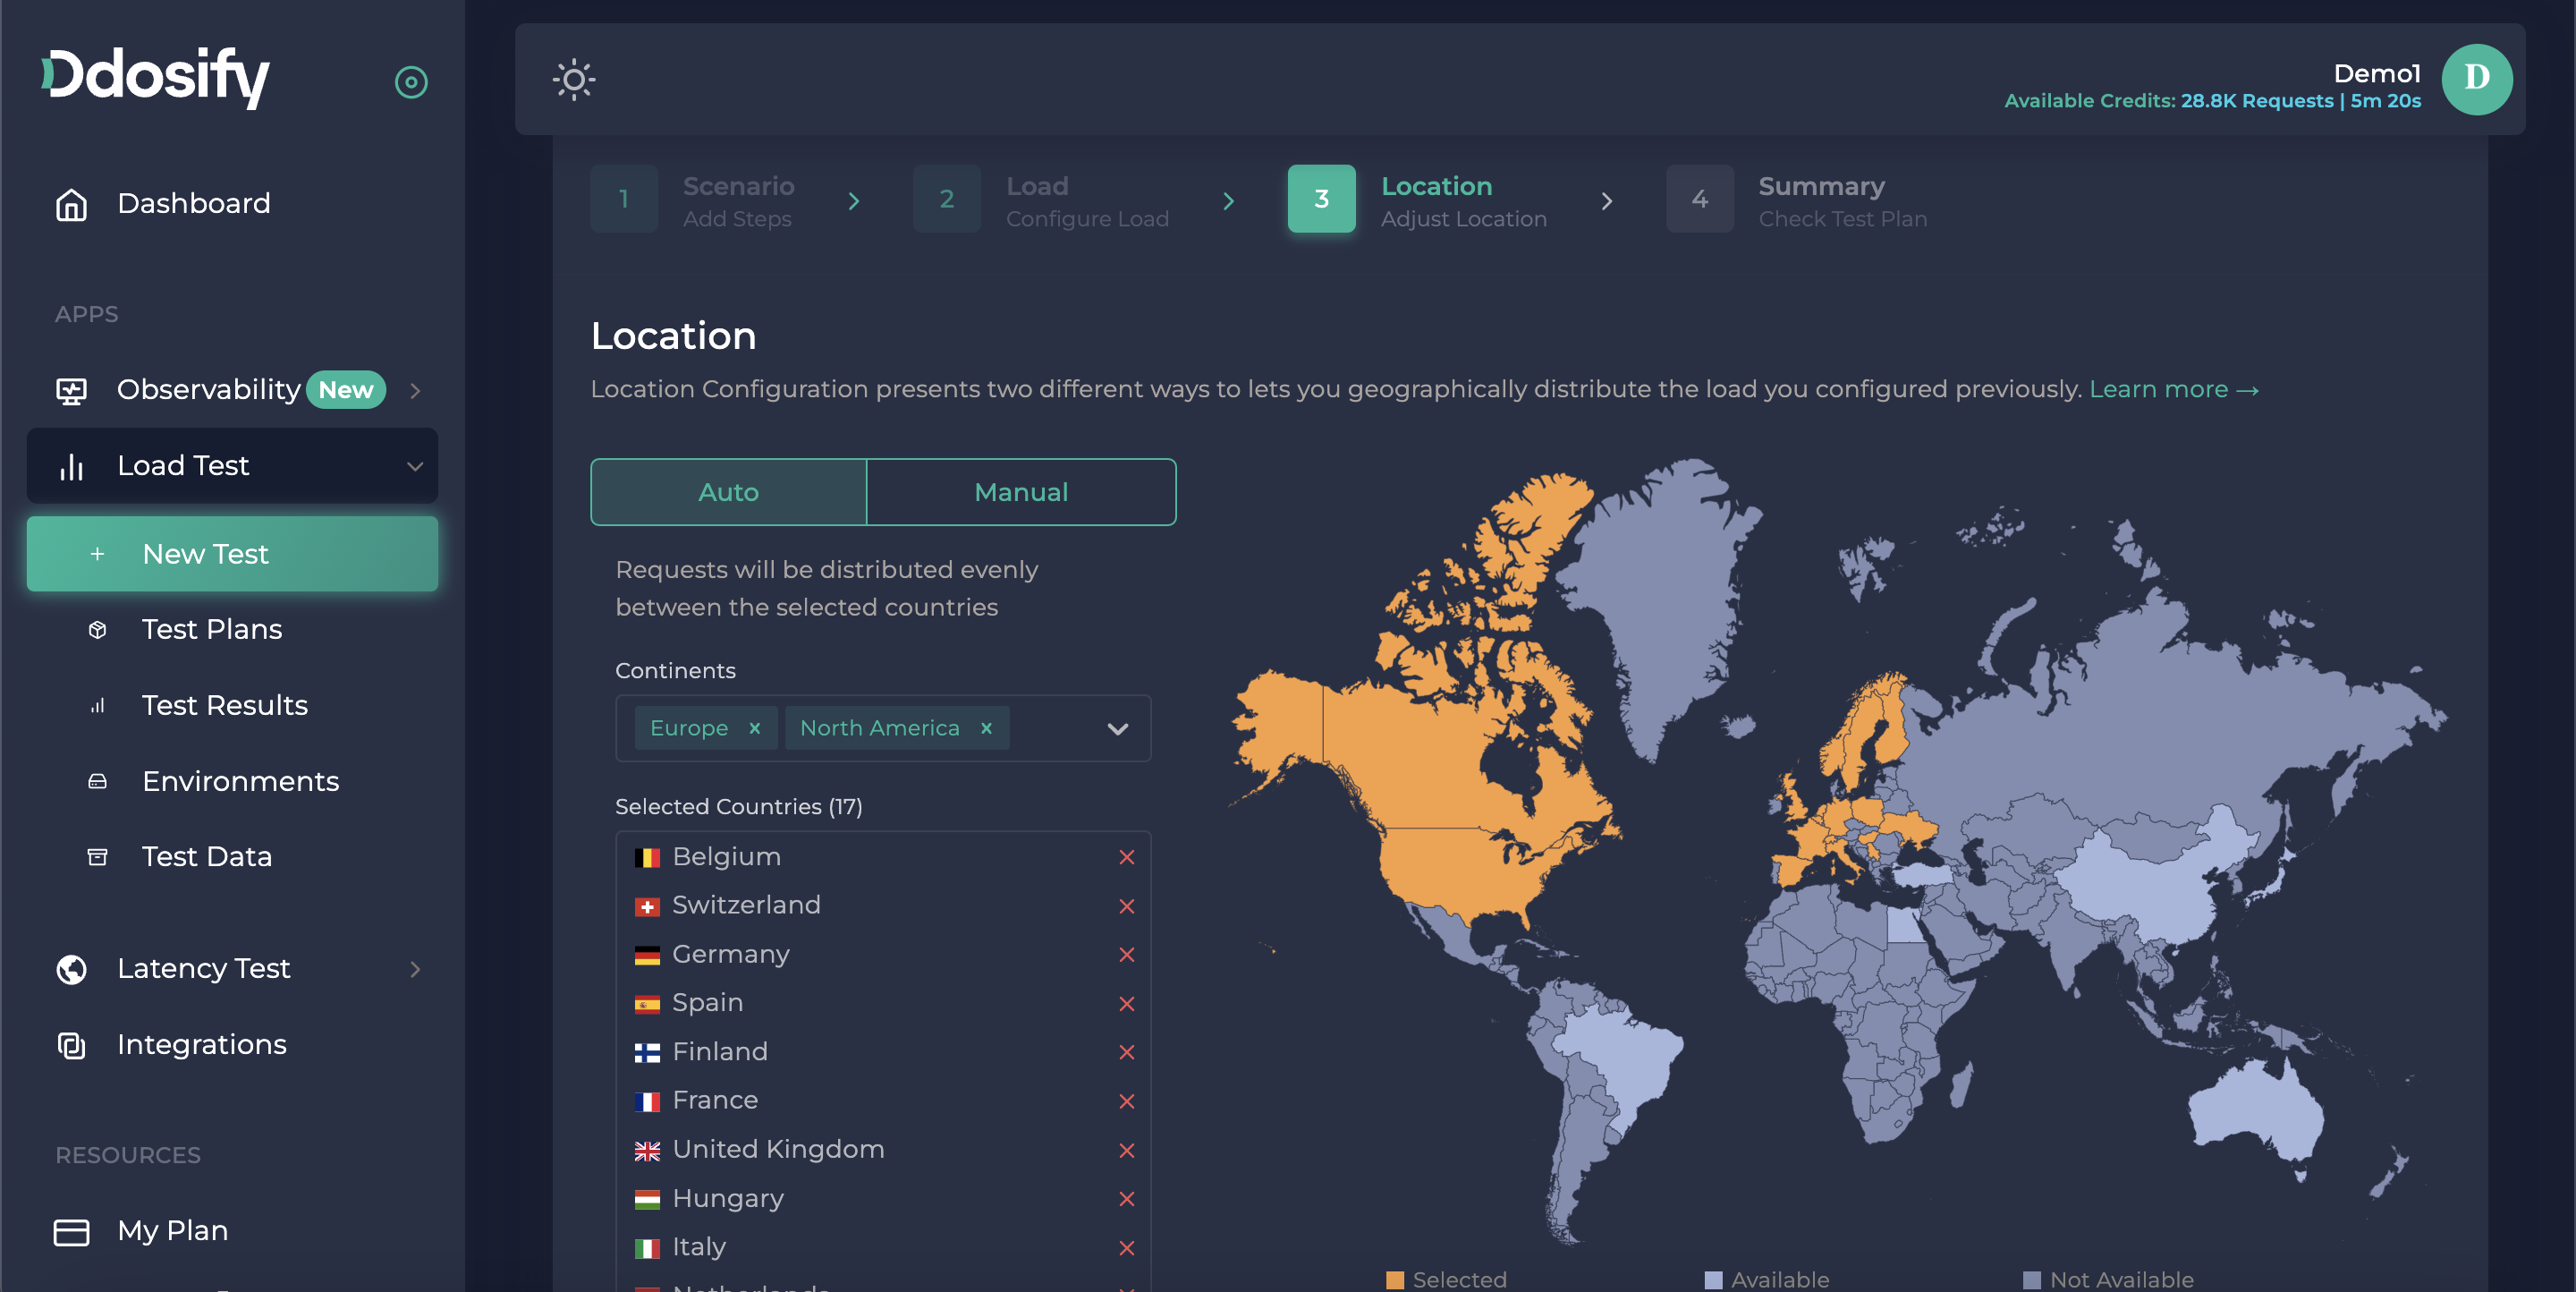
After we press next again, the only thing is to choose a location to send those requests to test auth API. For now, you can distribute the loads equally among your choosings in the auto version. It means every location sends the same amount of requests. If you want to change rates, you can arrange it from the manuel tab.
Lastly, when you press the next button, you can review the summary of your load test. You can give it a name or save it as a test plan for use as a template. After you finish reviewing the summary, you can start the test. You can access the live report, but a detailed report will only appear after the live test finishes.
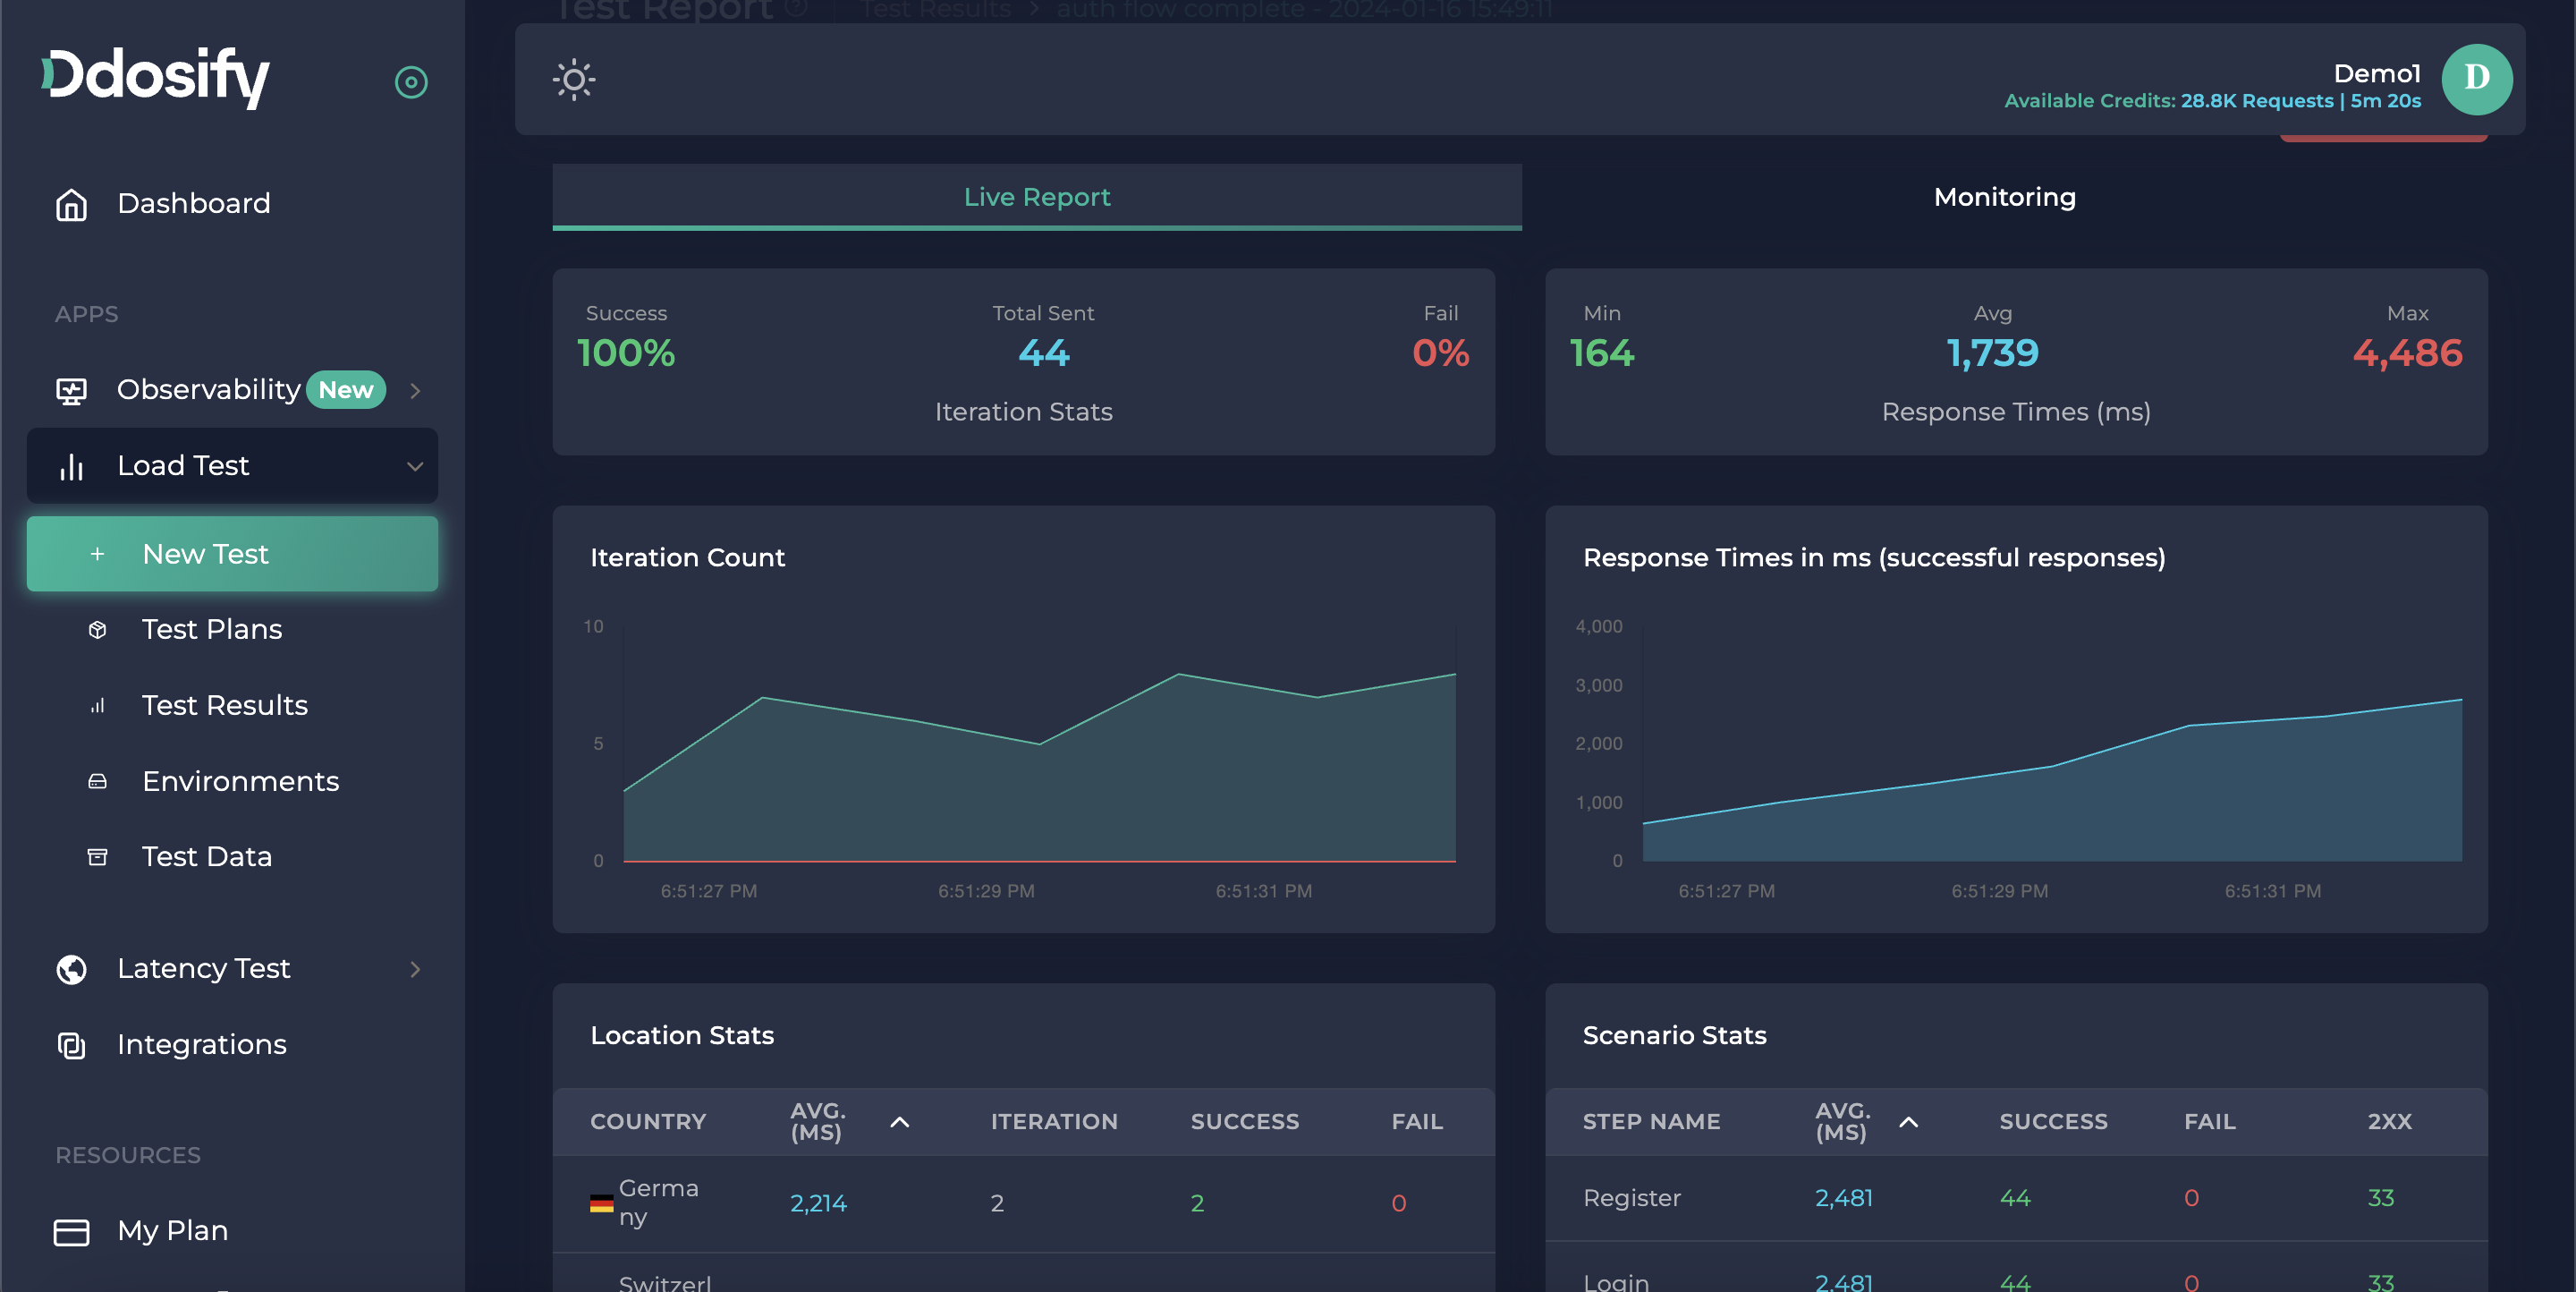
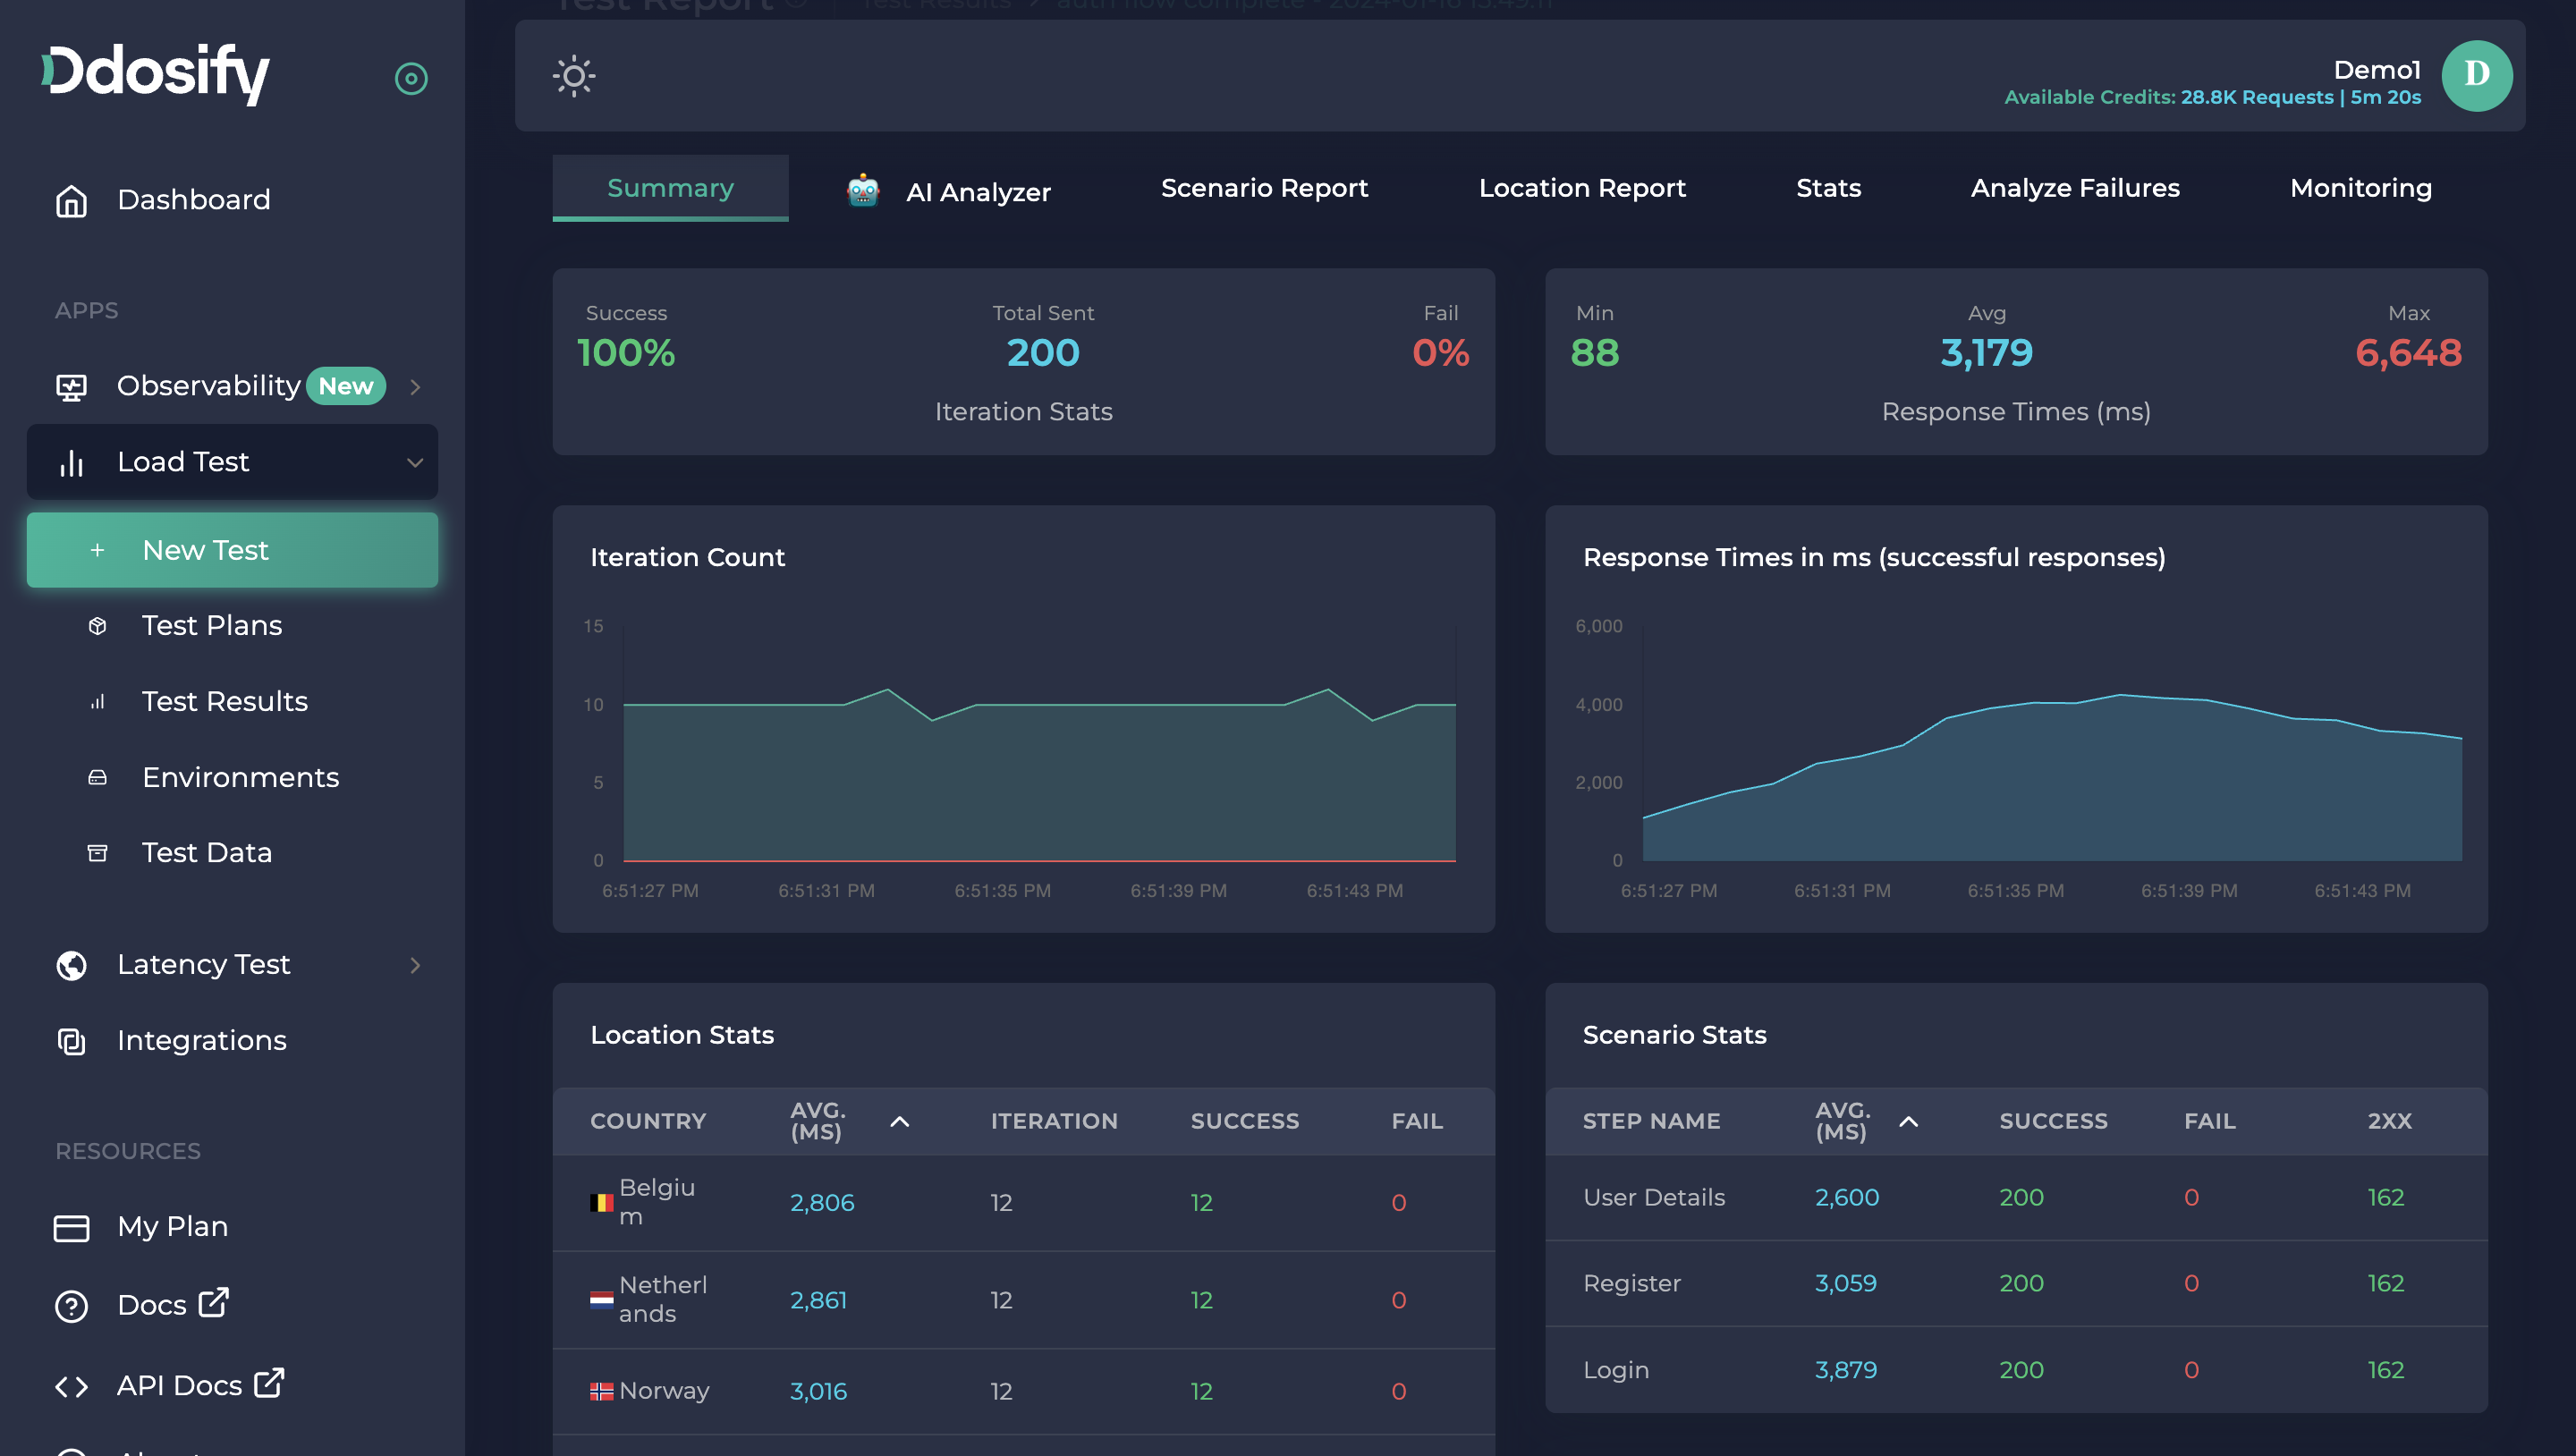
Here is the result of our load test
We can easily analyze the response times, status codes, and success/fail criteria for each step. Ddosify marks the requests as failed if it doesn't receive the response or if it can't send the request. But in that test every request got success.
Ddosify marks the whole Iteration (Run) as failed if any of the steps failed. Otherwise (if all the steps are completed successfully) Ddosify marks the Iteration as Successful. Response Times shows the sum of all the average duration of steps. In our example, the average response time is 3.1 seconds.
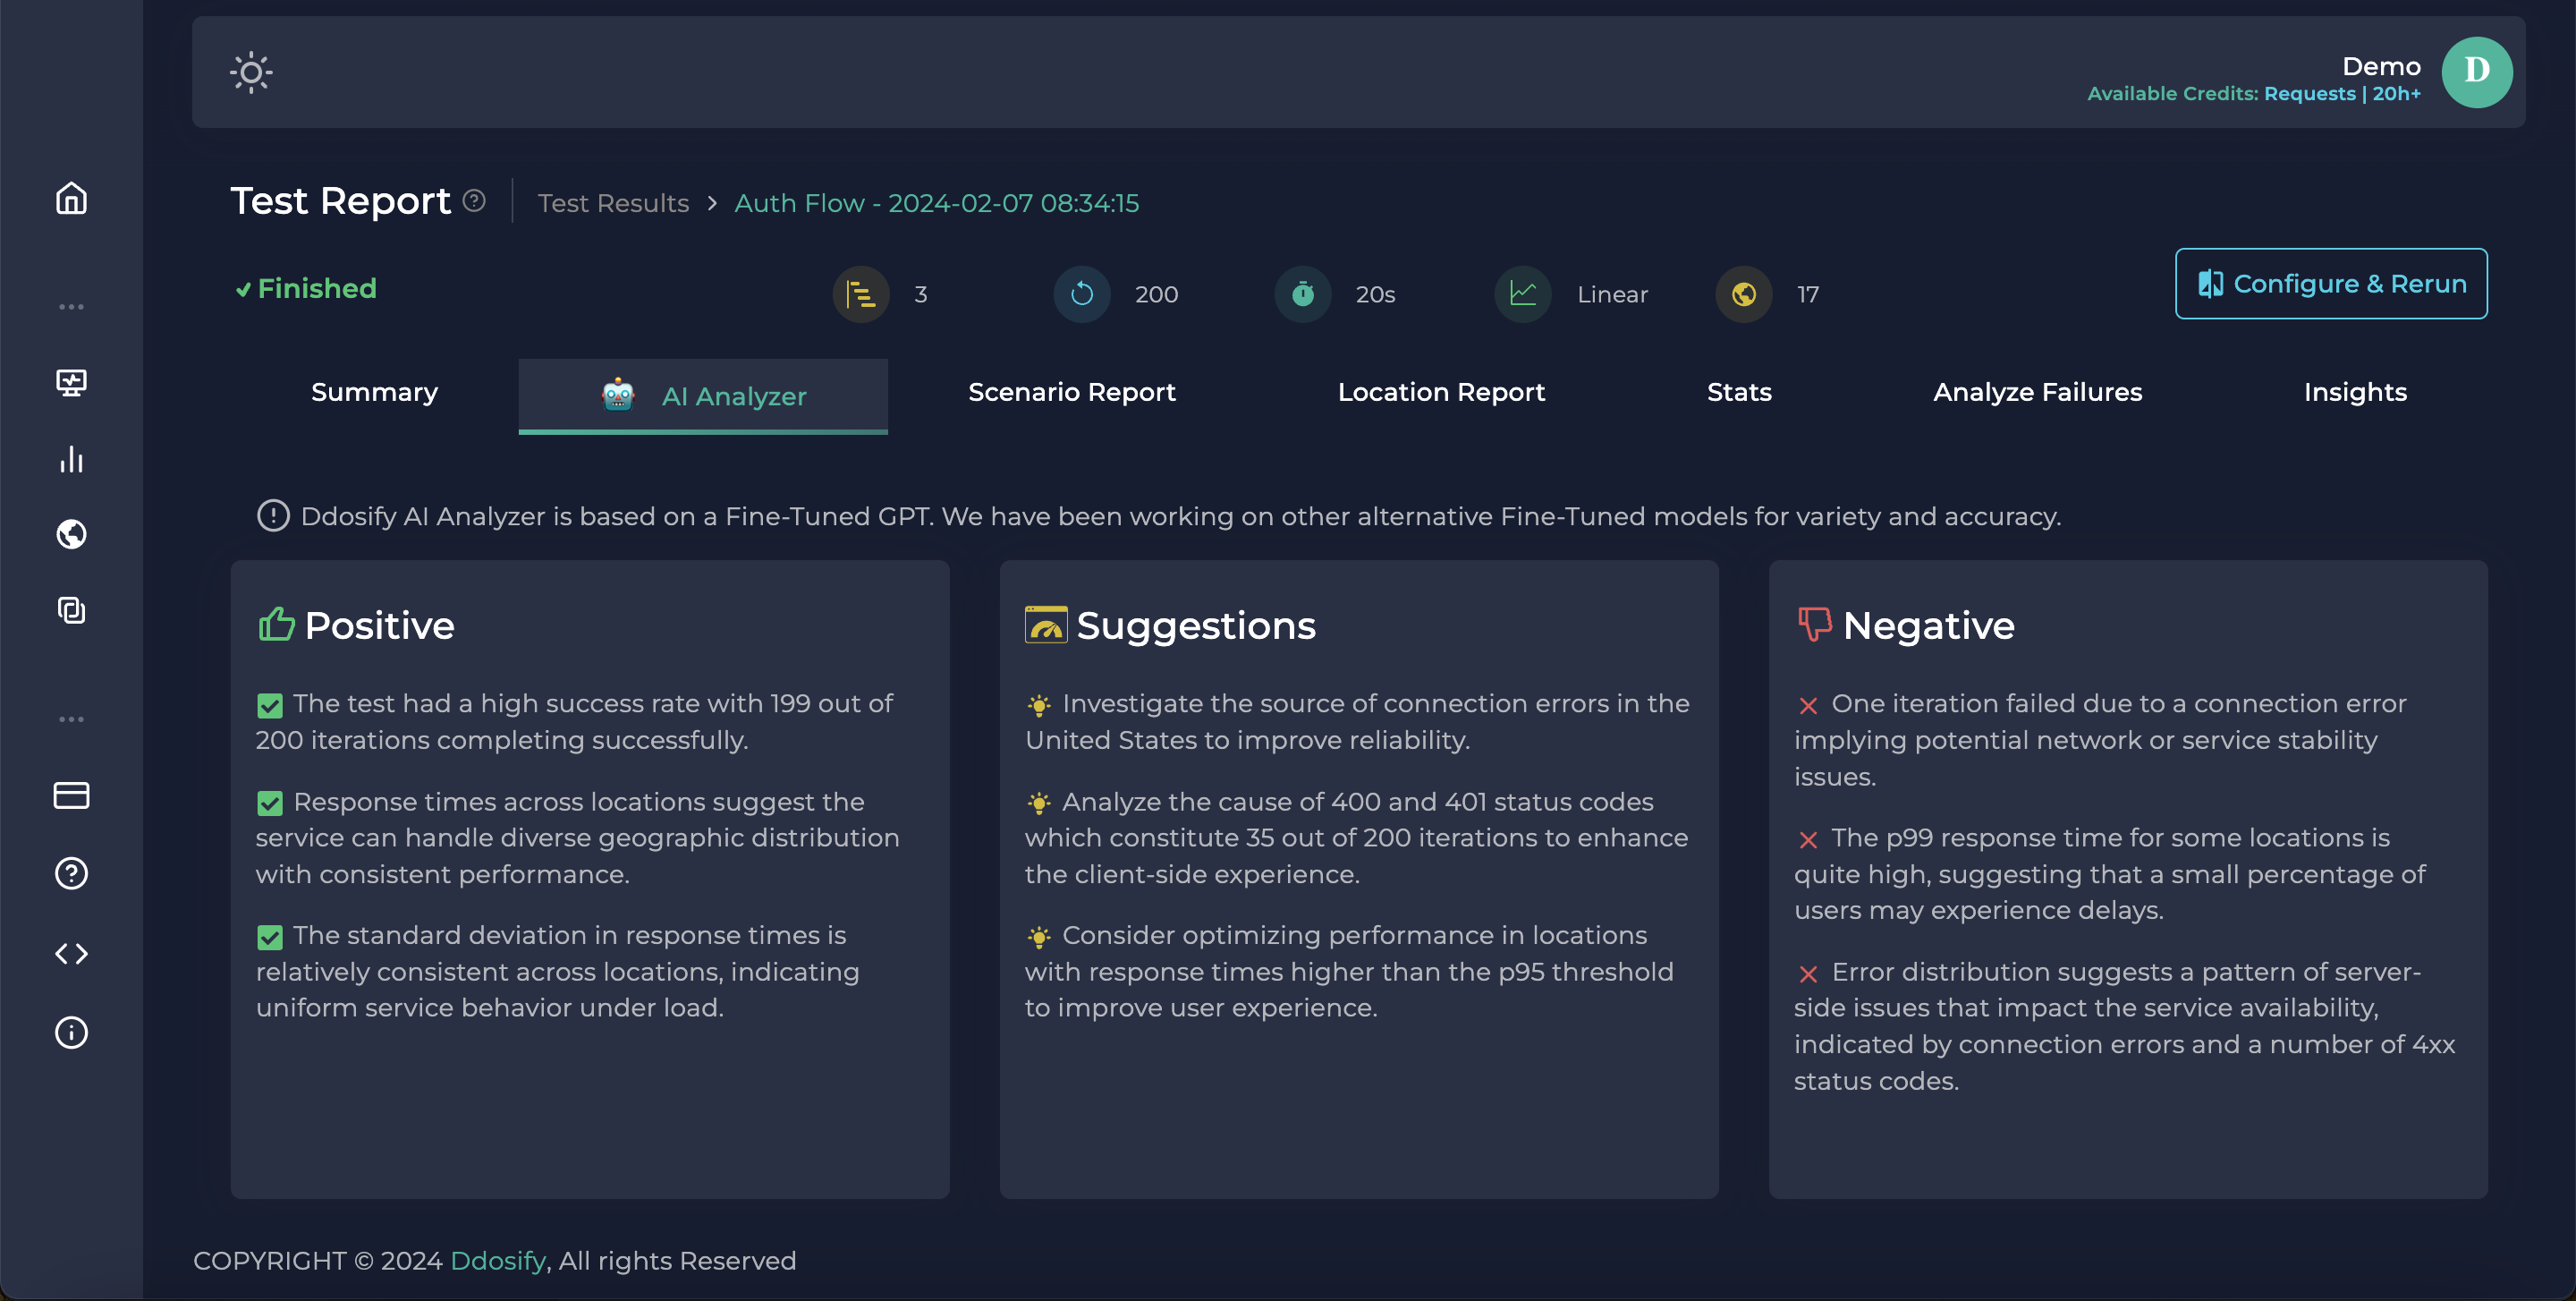
We can use the AI Analyzer module of Ddosify to get insights easily from Fine-Tuned GPT.
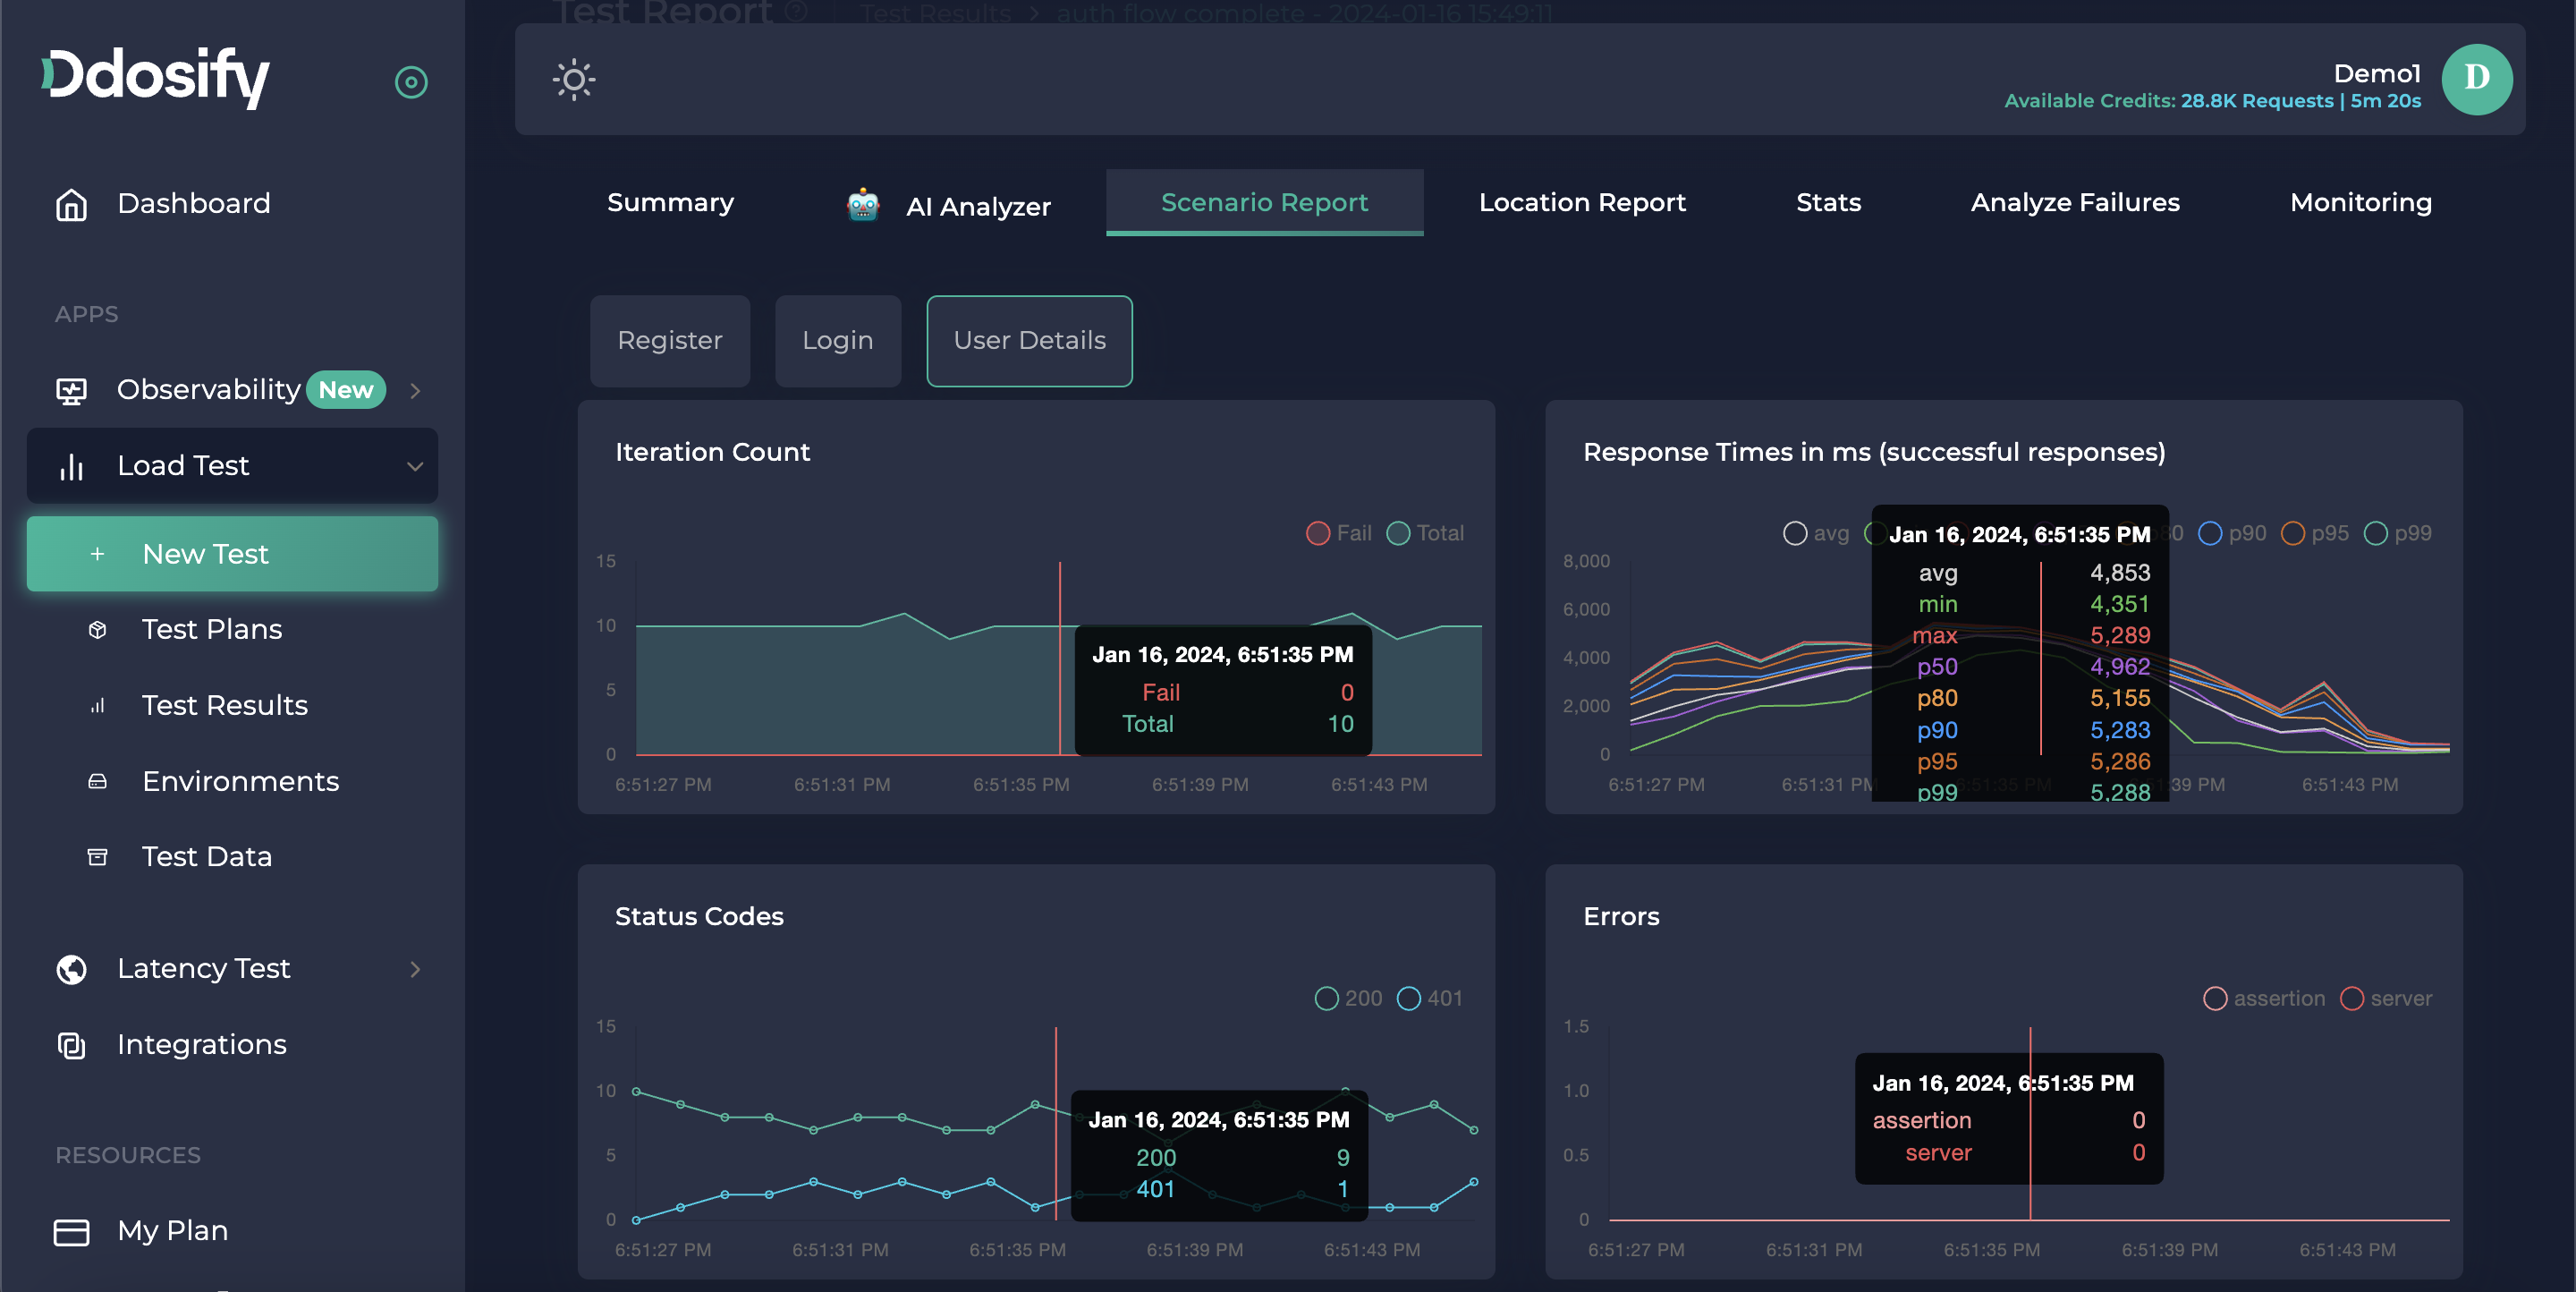
We can see results, and endpoint specified in the scenario report tab. It includes iteration counts, status codes, response times, and errors.
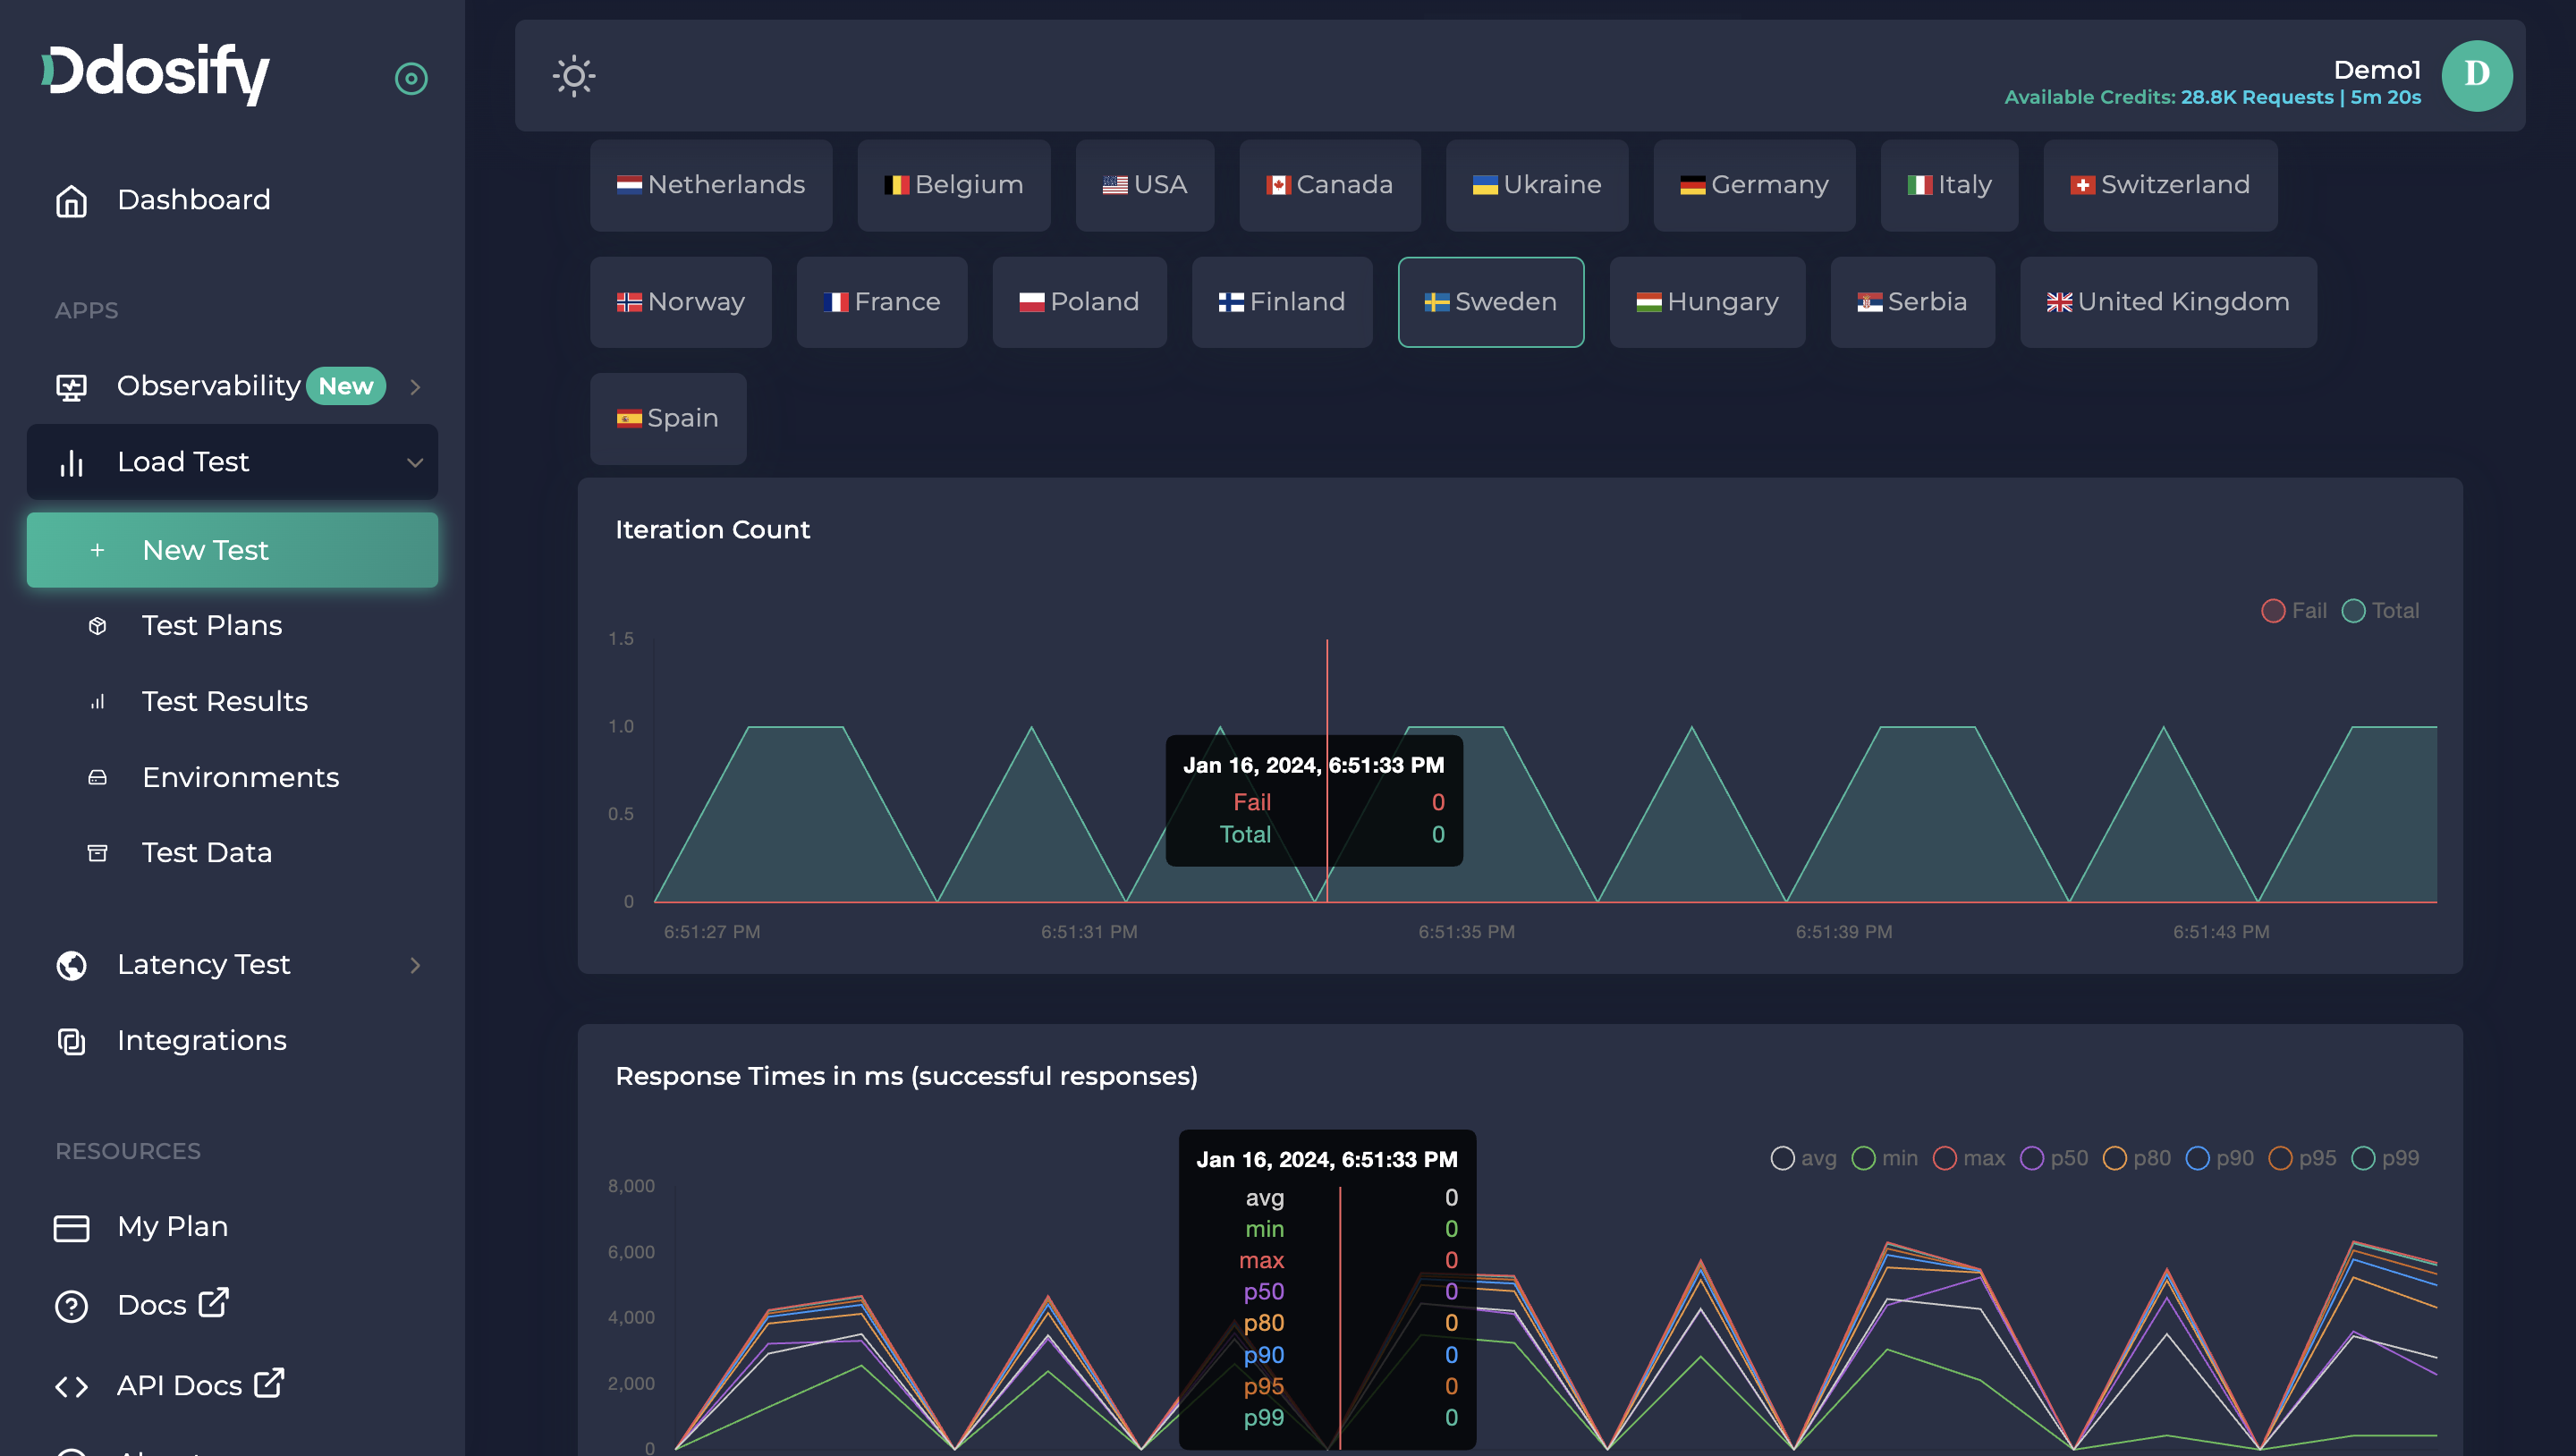
In the Location Report Tab, we can see results specified per location.
In the Analyze Failures tab, we can see all failed iterations.
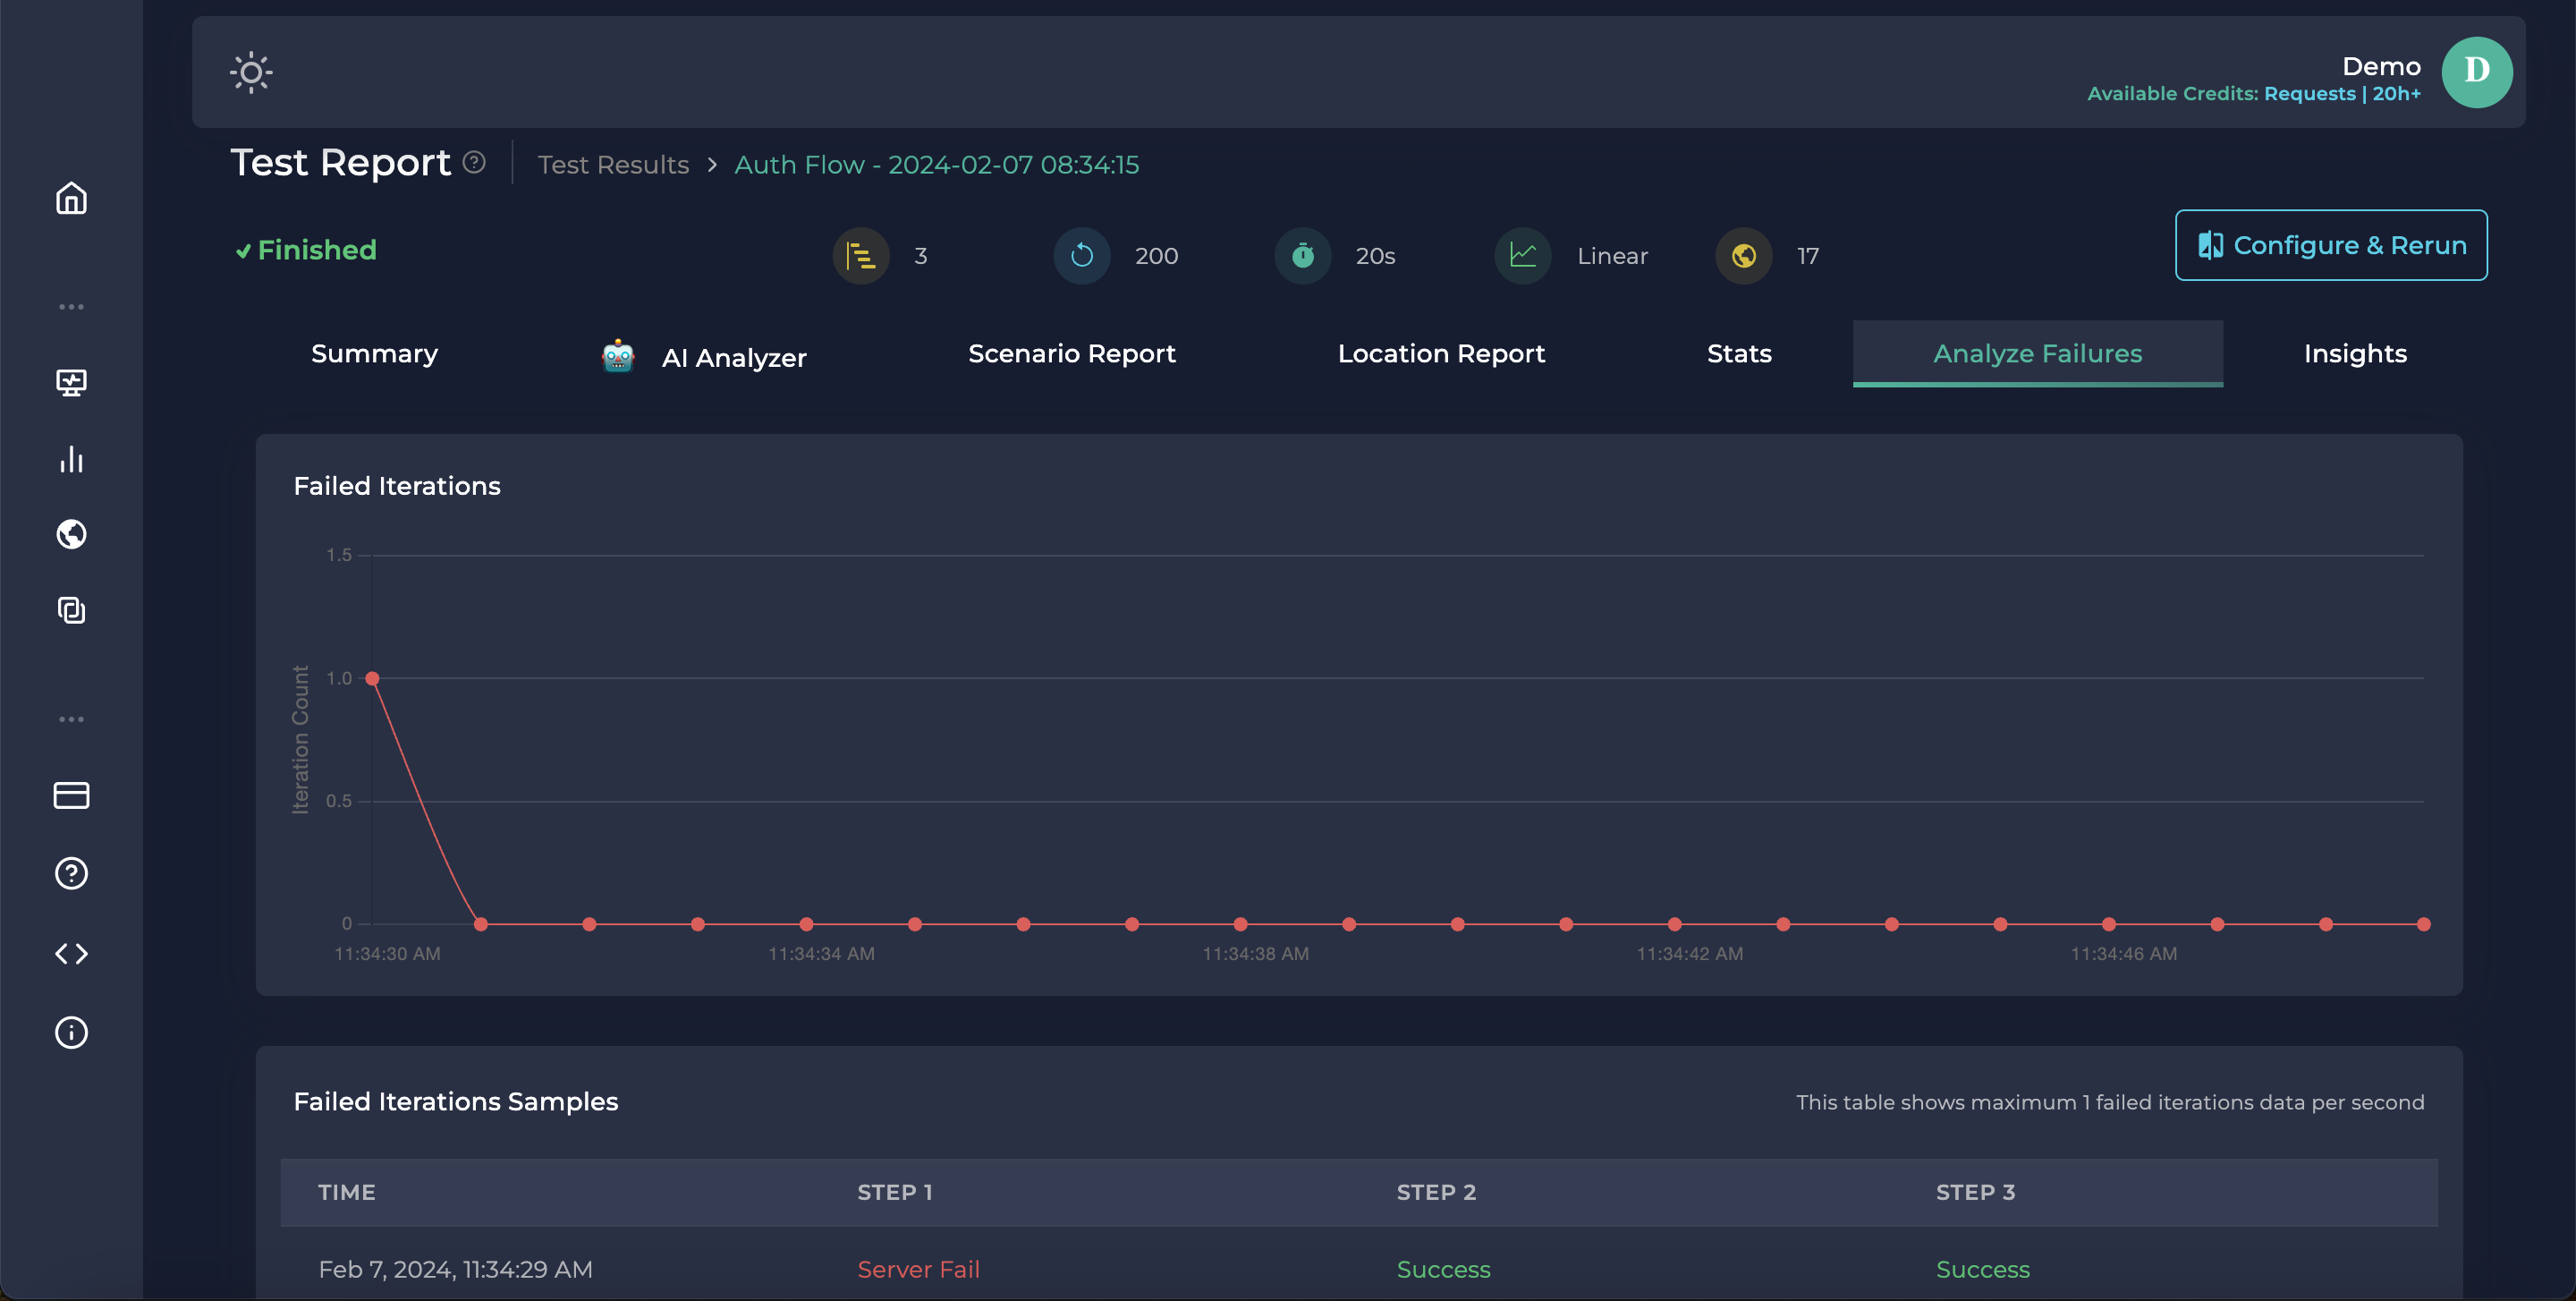
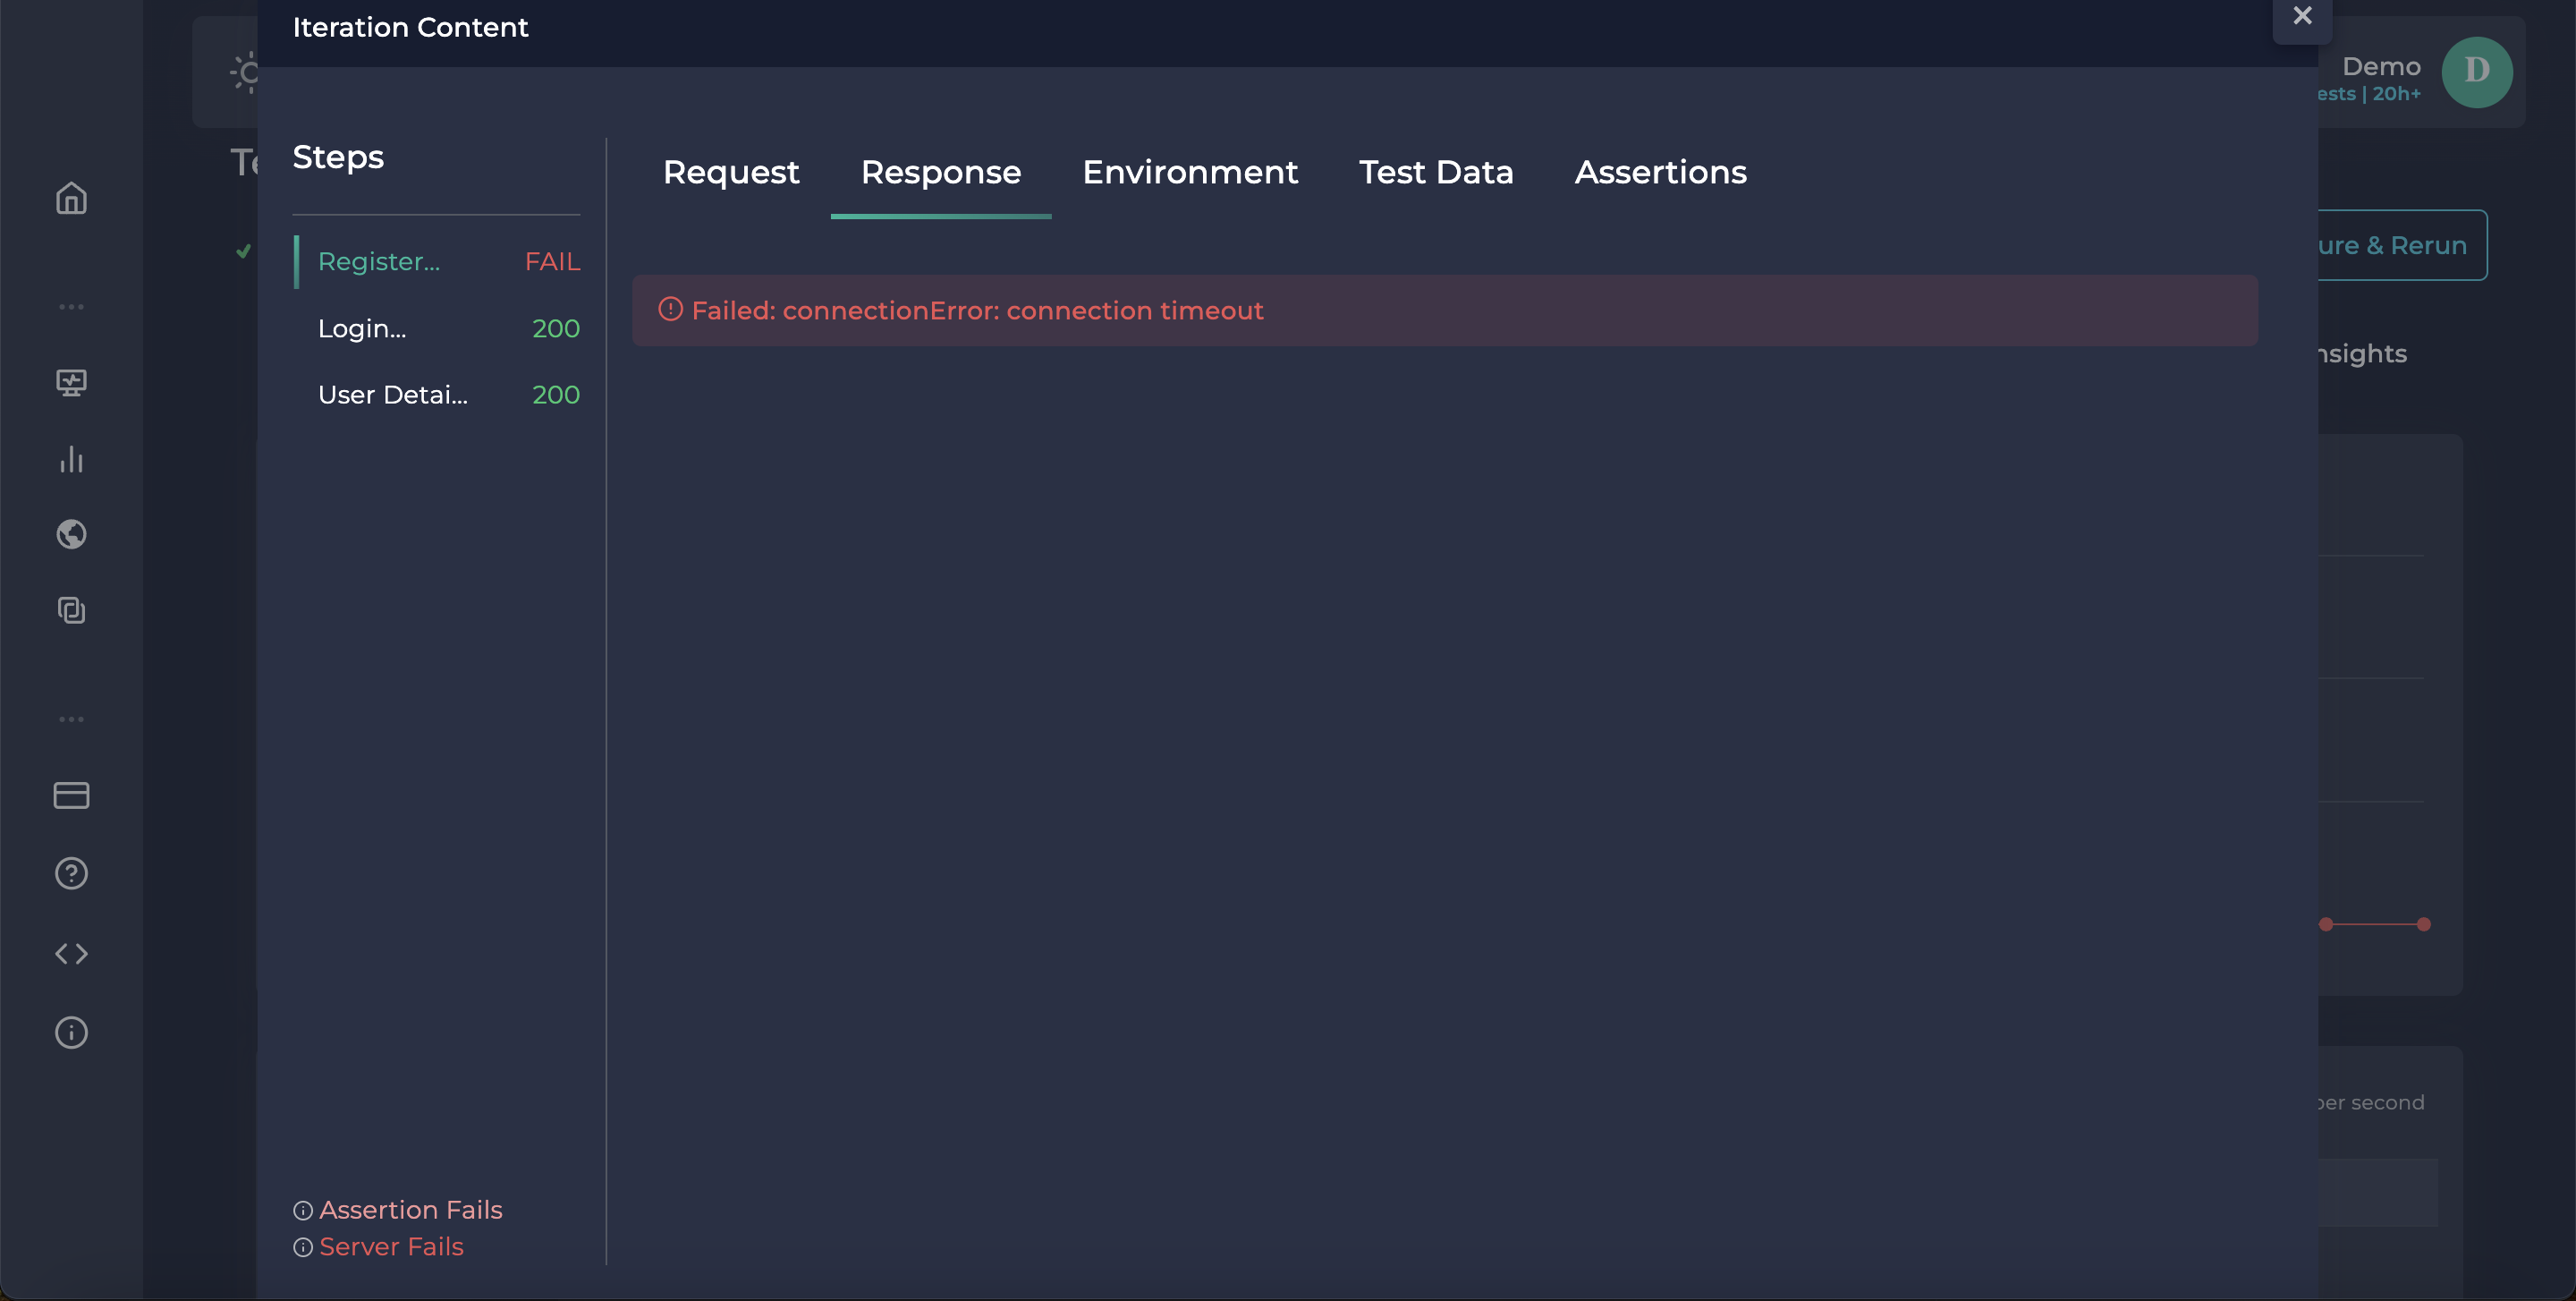
After we click any failed iteration, requests and responses can be visible.
Conclusion
Through this article, we have used different features of the Ddosify Cloud, such as correlation, environment variables, debug mode, dynamic variables, etc. If you need assistance, you can join our Discord channel.
Share on social media: